
  I'm so excited to be releasing my third garment pattern! This is the my first pattern that uses my animal sizing, which I absolutely love. And it's already a staple in my closet! I've made three for myself, and I already have plans to make a fourth one! Robes are one of those garments that I never knew I wanted until I had one. My mother in law surprised me with a super fuzzy and warm robe for Christmas a few years ago, and now I barely take it off during the winter because I'm always freezing. But I decided I loved wearing it so much that I wanted a cute summery version too. 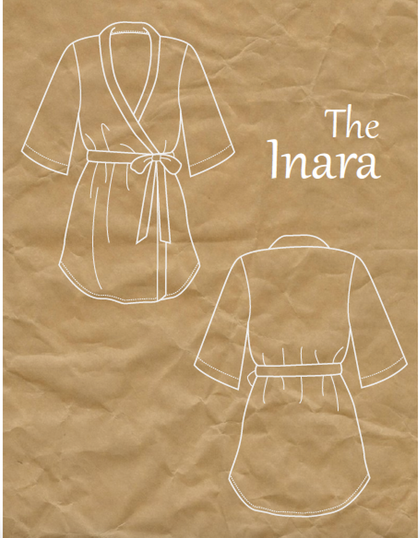 And voila! The Inara was born. The name is a nod to the show Firefly, because Inara is one of my favourite characters and a flirty robe seems right up her alley! The robe is short and sassy with a hem that curves up on the sides, and it works great with all the lightweight drapey fabrics in your stash. It can be a beach coverup, a bridesmaid gift, lacy lingerie, a maternity delivery robe, a house coat, or a light outer layer for summery days. So much possibility!  And it's a great pattern for Capable (advanced beginner) sewers! The curved hem, the thread belt loops, and the homemade binding might be new skills to add to your repertoire, and they each come with step by step instructions, tips, and even a few videos to help you along your way. And of course, I'm always here as a resource! I can't wait to see all the fun you have with this pattern! 
2 Comments
 I can't tell you how this pattern fits on a baby, if it is easy to take on and off a baby, or show you a picture of what the options look like on a baby. Because my baby won't be here for another 4.5 months. But I can tell you how easy the pattern was to use, how quick it was, and how much fun I had! 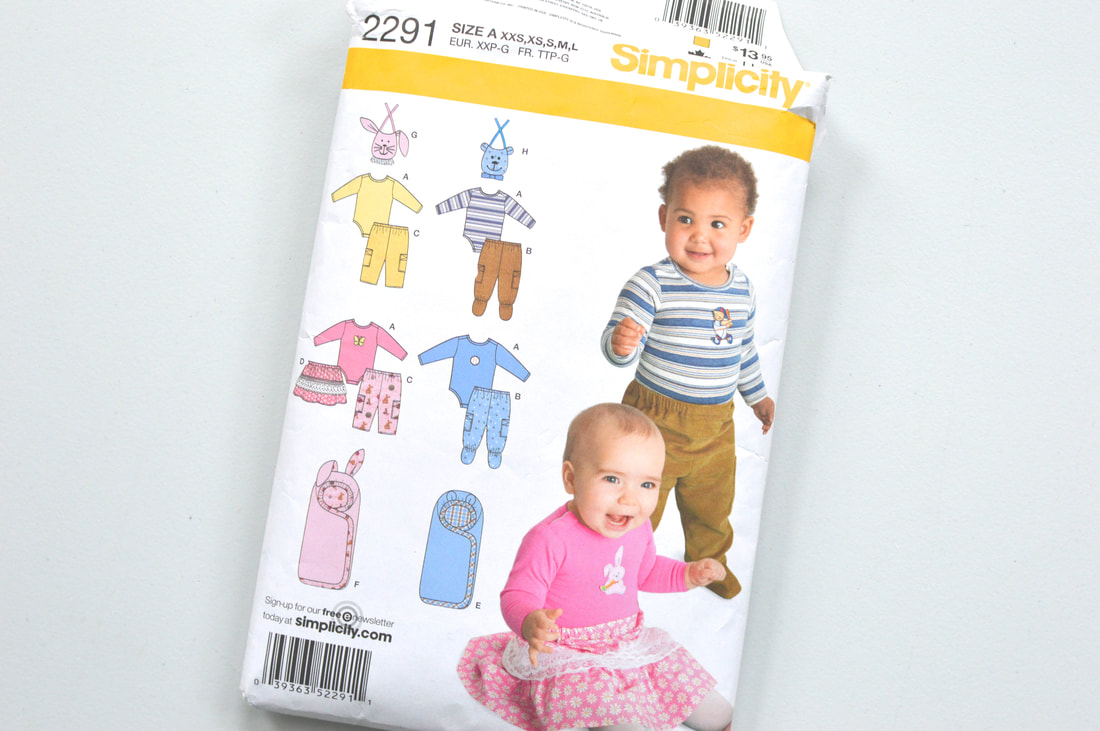 Simplicity 2291 came into my hands because a friend of mine was getting rid of some of her pattern stash. I immediately snatched up all her baby patterns. Ever since I found out I was pregnant, I knew I'd want to make at least one outfit for when little Stage arrives. This pattern was perfect because it offers great unisex options and we aren't going to find out what gender our baby is! I ended up making a unisex onesie, little unisex sweatpants, and a skirt (just in case!). It took so little time to cut and sew them all, and SO little fabric! I think I've discovered the perfect scrap busters! Now it's going to be even harder to part with my scraps...  I made a few adjustments to my little memades. First, I made the onesie short sleeved instead of long sleeved (since baby stage is going to arrive in the summer). Second, I adjusted the sweat pants to accommodate my lack of fabric. I made the legs a bit narrower at the bottom, and left off the pockets. I also cut them shorter than the pattern called for, but used extra scraps to create cuffs on the bottom. An extra little strip of fabric became a fake drawstring bow. I love the result even more than the pictured pants on the envelope. I didn't have any lace for the skirt, so I just left that out as well. 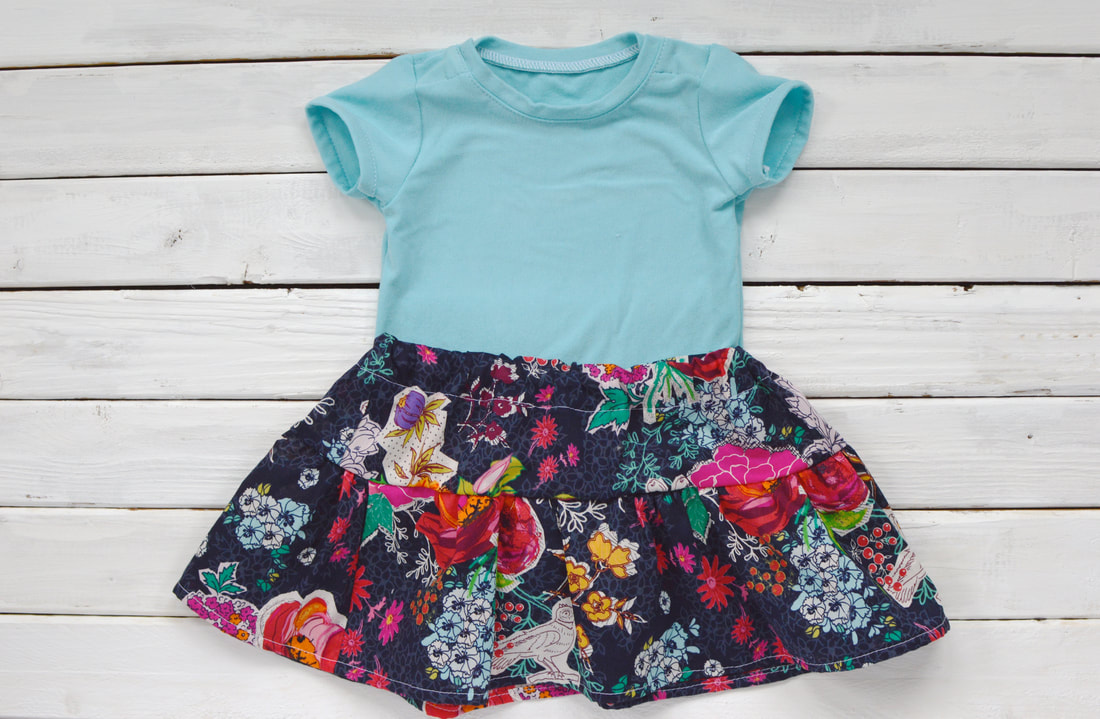 Now I just hope that these adorable little makes will fit well enough to be worn at least once!
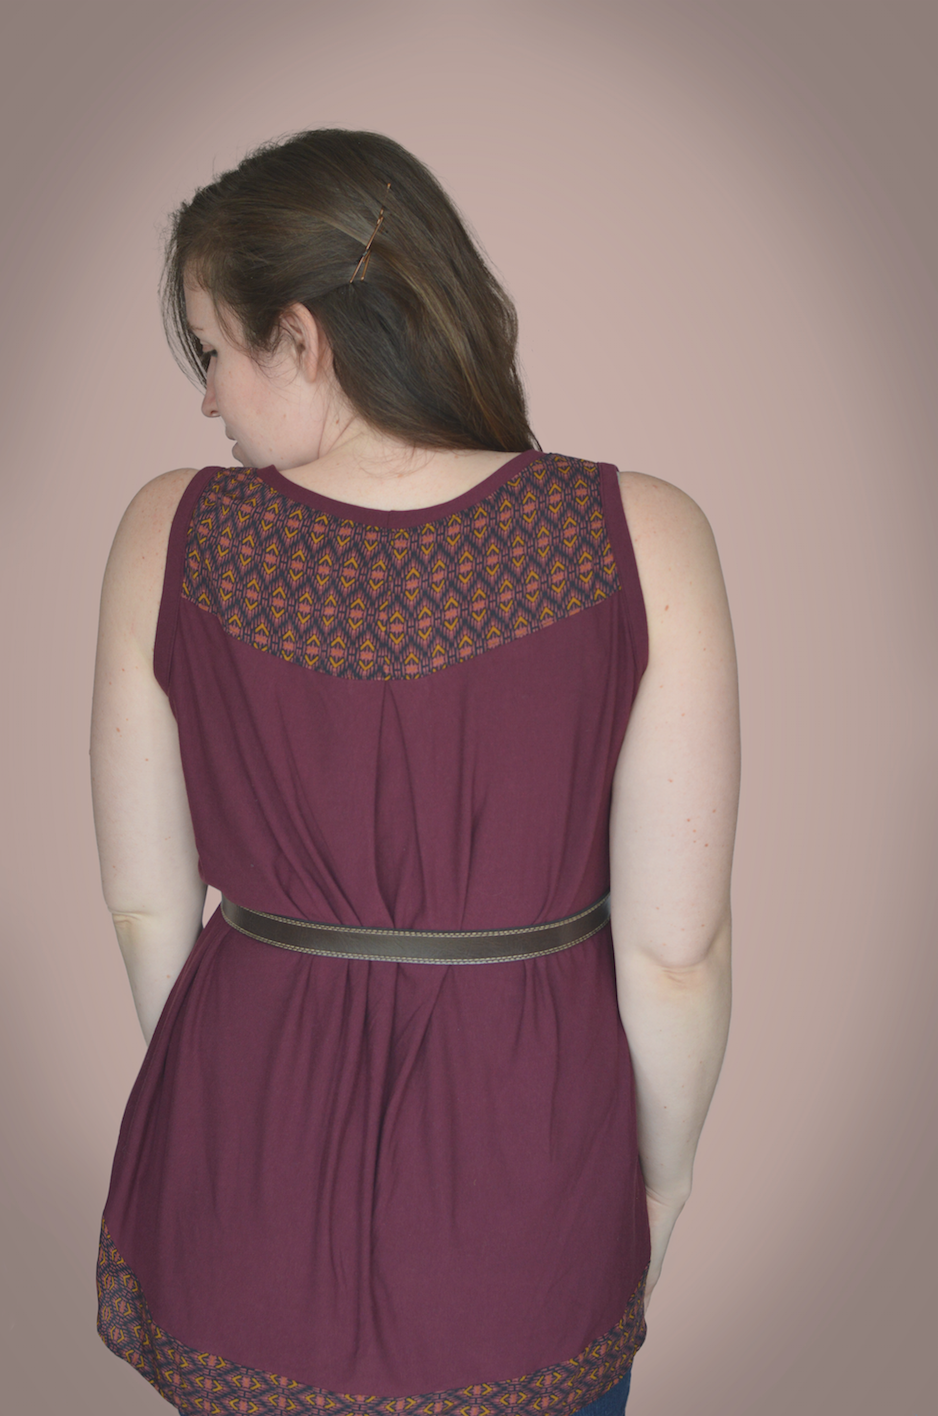
 While at my selfish sewing retreat, I ended up making myself a top from Simplicity pattern 1113. It's a tank top with a high-low hem, and a very flowy silhouette. I figured it could be a good maternity top for me!  Not intending to sew this top, I hadn't brought any fabric for it. Which meant that I ended up using fabric scraps from another retreater. But Whitney's fabric scraps are beautiful and relatively sizable. I found two coordinating fabrics (although one was woven and one was knit) and managed to cut just about all the pattern pieces out. I only ended up missing one of the back hem stripes. So I decided to just go with it, and adjusted the seams at the sides to make sure that at least the bottom stripe lined up correctly. I also had to piece together the banding for the neck and armholes. I really like how the color blocking ended up looking on this top! I also ended up with armhole banding that was significantly wider than the neck banding. I'm not sure if this was a pattern detail or a mistake on my part, but I wasn't digging it. I ended up turning the banding onto the right side of the tank and top stitching in place to make the banding look smaller. 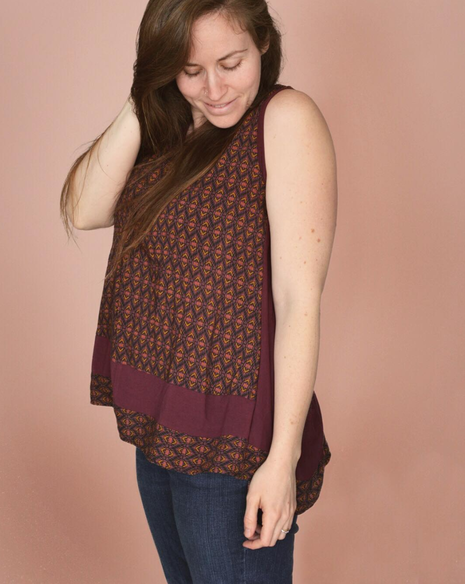 If I made it again, I would make the arm holes a little larger, and make it narrower across the shoulders and upper bust area, and also fix the arm banding issue from the start. I would also skip my length alteration, assuming I had enough fabric this time. I think my alteration caused the top to lose some of the beautiful drape that was meant to be in the top. Or maybe I would lengthen the entire top, seeing as my growing belly will need more fabric in the front. But overall, it was a quick easy make, and a very forgiving pattern because of the cut and fit!  A cabin in the woods, complete with sewing machines, hot tub, and more delicious food than you could ever eat in a week. If that sounds like a hot slice of heaven to you, that's because it is. Once a year, in January, when the rush of the christmas season is over and the rush of prom season hasn't yet begun, my ASDP group (Association of Sewing and Design Professionals) spends 4 days at a selfish sewing retreat. There are around 8-12 of us, and we each bring our machines, and projects, and we each take a meal to be in charge of. That way we only have to cook once in the four days. Just going four days with fantastic home cooking that I don't have to do myself is heaven enough. We set up the ping pong table as a cutting station, and set up our machines in the beautiful sunroom, which got cozy enough that we ended up cracking open the windows even during an Indiana January! I call this the Selfish Sewing Retreat because the one rule is that you cannot sew anything for clients. Which is pretty much the best rule I've ever heard. Because despite what you may think, owning a sewing business does not mean that I make all my own clothes. Ever heard the saying "The cobbler's children go unshod"? that pretty much sums up my wardrobe. I spend so much time sewing for my business that extra sewing is rarely on the list of things that I want to do after my work day. Even when I want to, my back sometimes has other ideas. You can only take so long sitting a sewing machine or leaning over a cutting table!
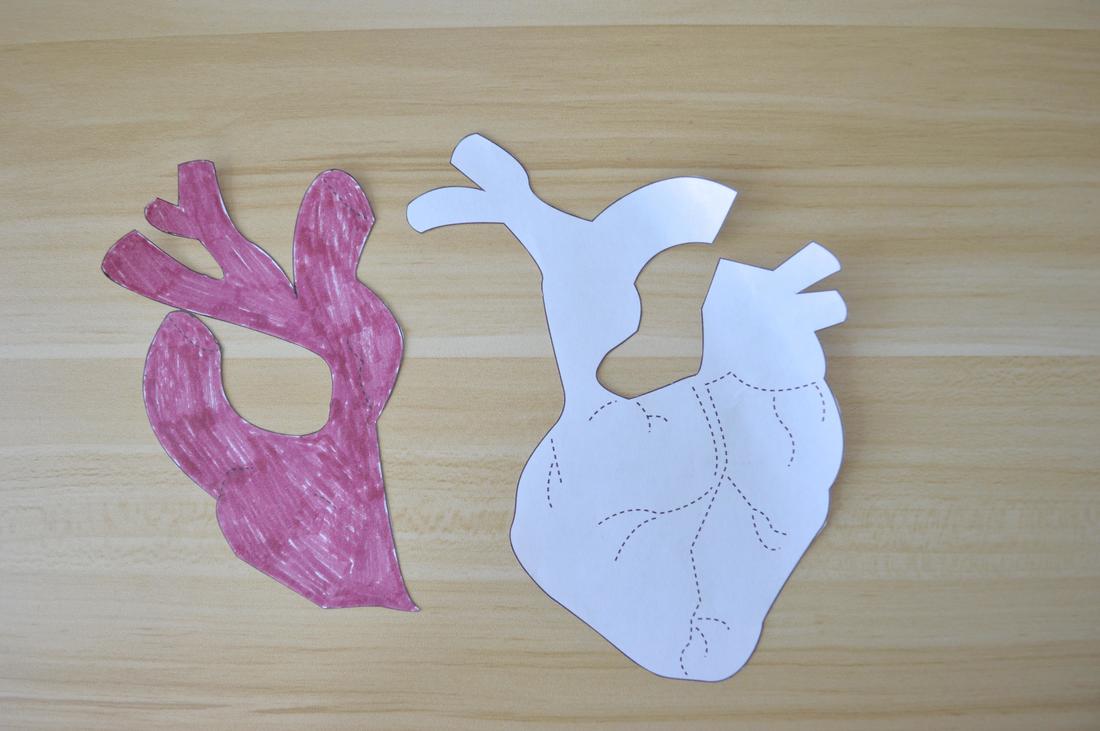
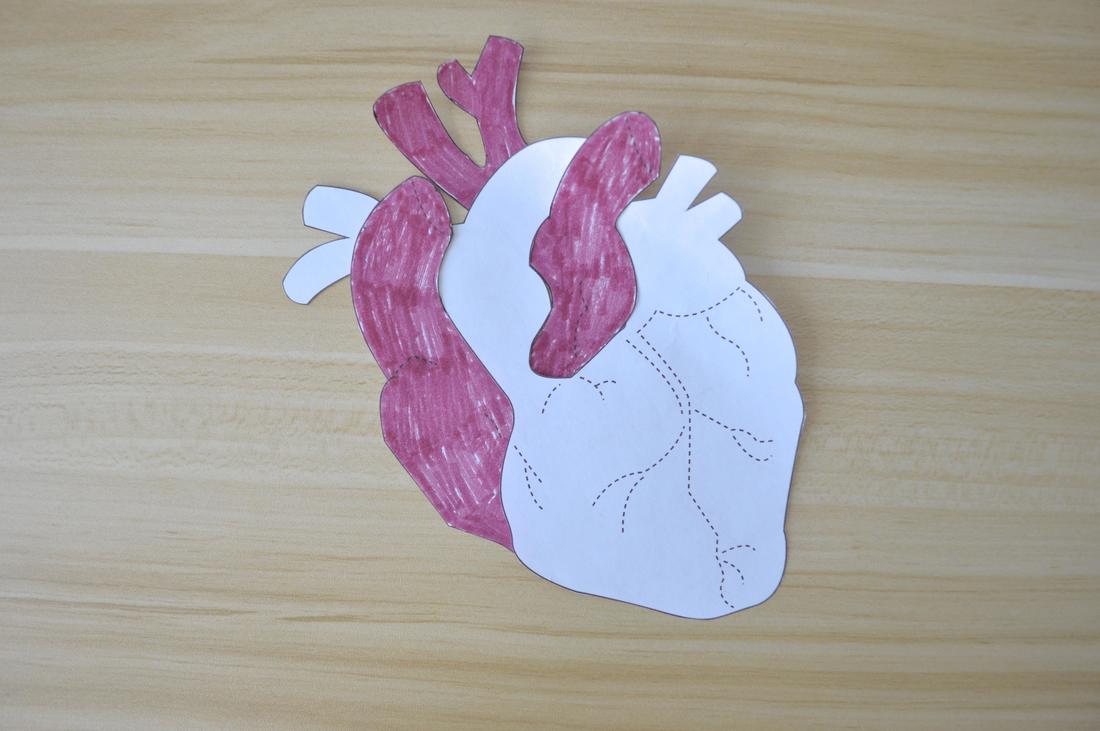
But once a year, I let myself off the work-sewing hook and become a completely selfish sewer. Honestly, I need to just start implementing this into my monthly schedule. Because it feels so good! And that way I won't be bringing the same project back to the retreat year after year because I still haven't found time to finish it (I think most of us ended up bring back a project from the last retreat haha). 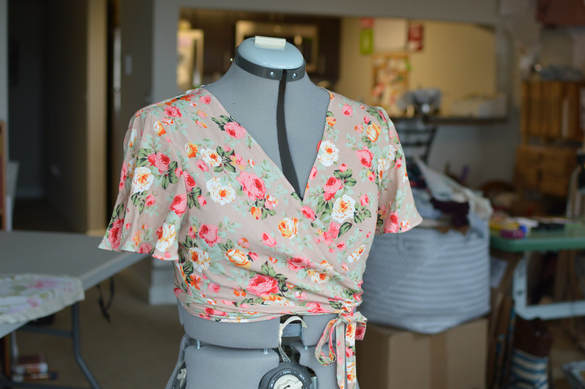 I went this year with every intention of finishing up my wedding quilt (just like last year). Because it has been over 4 years now. Come on! So I only brought supplies for that one project. To keep myself from getting distracted. Fat chance!  Between the fabric scraps that Whitney brought me, and the patterns Diane and Cathy shared with me, I ended up coming home with two new maternity tops and three little baby garments. All out of scraps! The baby clothes are especially satisfying because they take up such a small amount of fabric that it is so easy to use up scraps this way! I have a feeling there are going to be a lot of baby clothes in my future. And there will be some blog posts soon about these makes :) 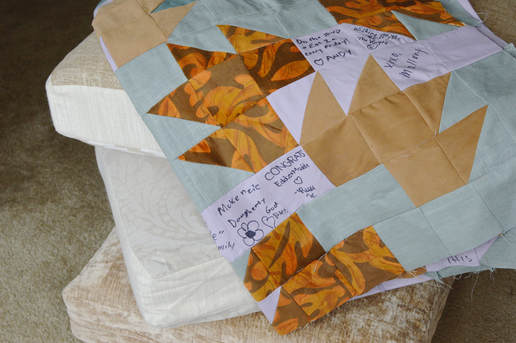 I did actually get some good work done on my wedding quilt... just not as much as I'd hoped. I'll just have to finish my quilt on my own this year. Or bring it back next January....we'll see. 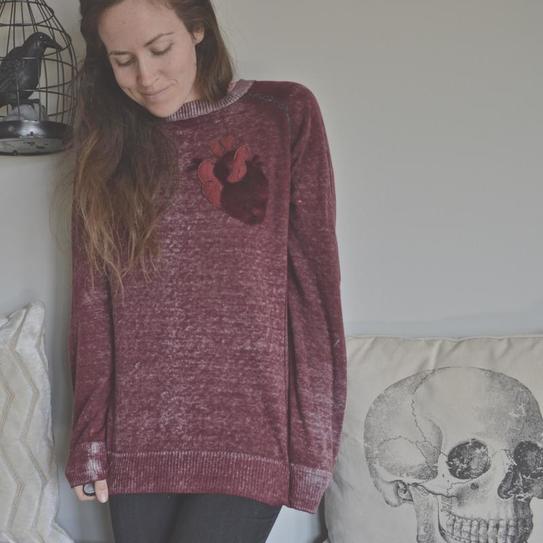 I have a new PDF pattern for you guys!! It is a super quick and easy anatomical heart appliqué! As I'm sure you know by now, I'm obsessed with all things Halloween. I love the big elaborate costumes, but I also love little touches of macabre. Things that I can wear all October long, simply as a part of my outfit, without drawing a ridiculous number of stares. And this simple little heart is absolutely perfect! You can add it to a tshirt, a dress, a coat, or a costume. Make it really stand out with contrasting fabric, or make it a subtle addition as I did here. I appliquéd this thrift store sweater last friday, and then immediately wore it out to Kings Island for their Halloween Haunt night and it was perfection! Now I just need to make about ten more!  If you haven't picked up the pattern yet, you can head on over to the shop to grab it. I have the basic written instructions on the one page pdf as well, but if you want a more detailed tutorial, you are in the right place! Read on!
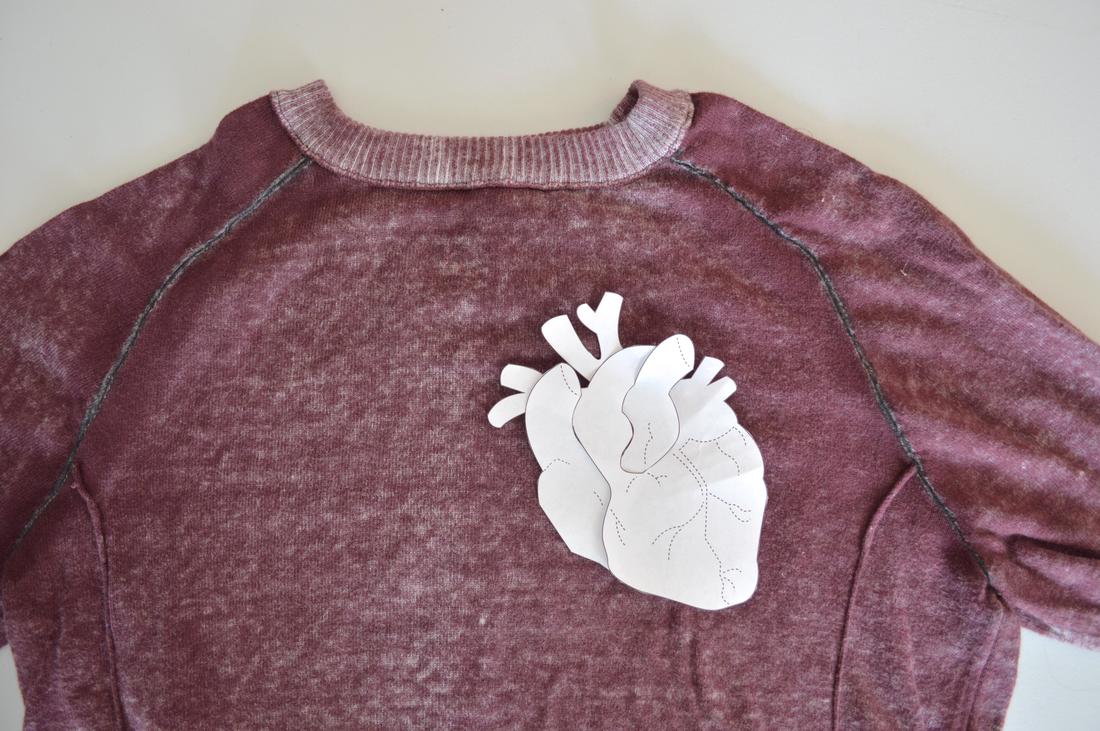 Cut out the 2 (only two!) pattern pieces, and use them to cut your fabric. I really like the look of having two different tones for the two different pieces of the heart. A super easy way to do this is to use the same fabric, just flipped to the back side, which is what I did here! One is right side up, and the other is right side down. 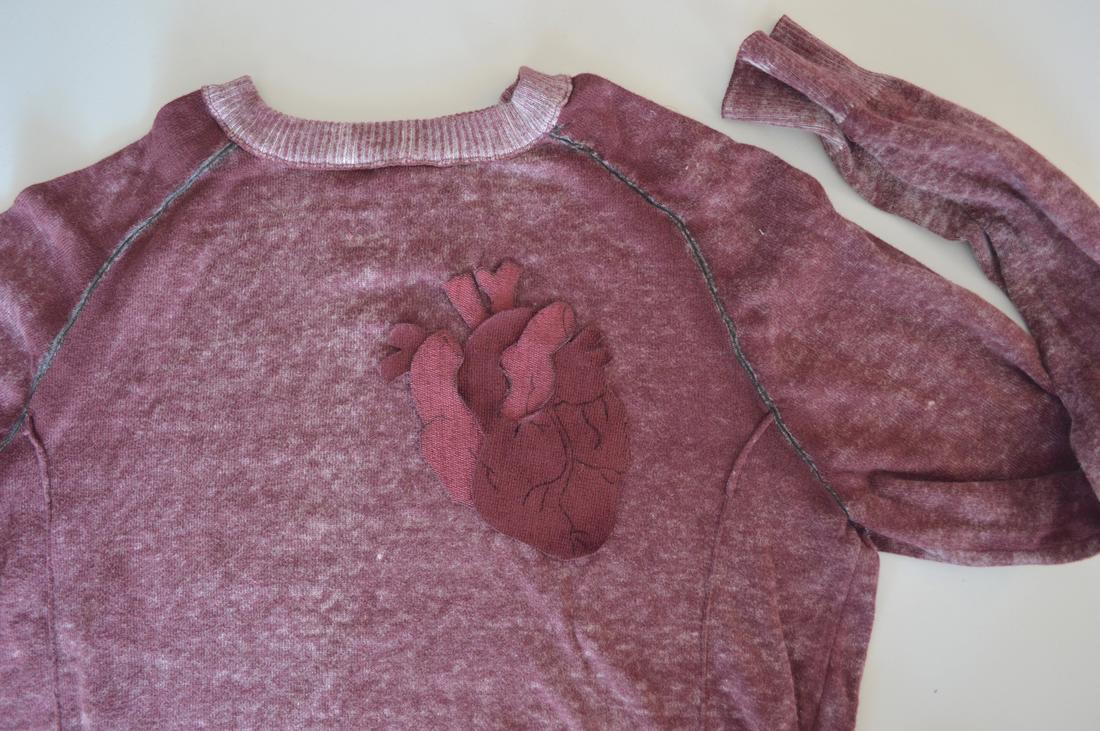 Transfer the dotted line markings from your pattern to your fabric. I honestly just used a black marker since I planned to sew over them in black thread anyway.  If you are using a fabric that may unravel along the edges, you can use fray check or some sort of stabilizer to help keep your fabric intact. 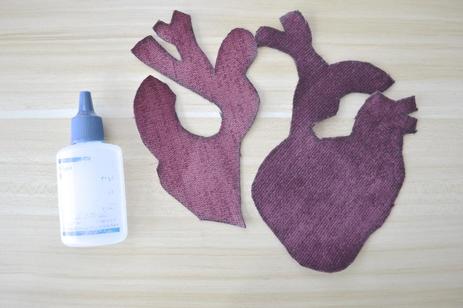 Once the fray check has dried, intertwine your two heart pieces together so that they look like so: 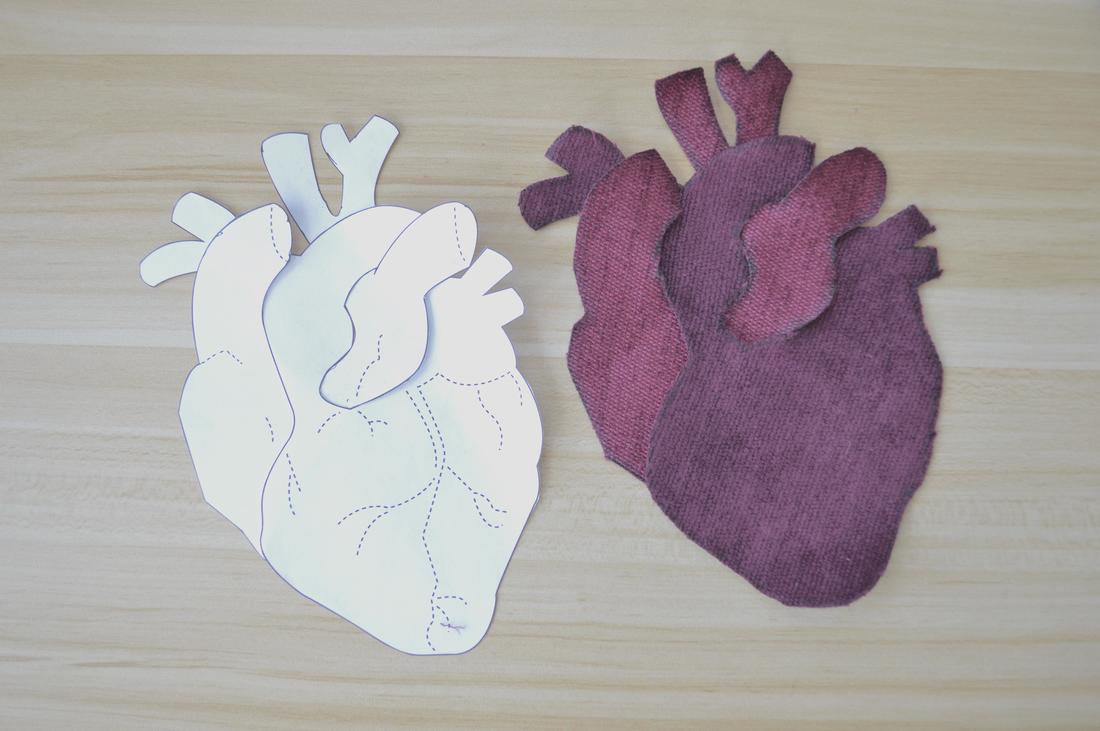
Pin them into place on your main fabric (whatever you are adding this appliqué to) and topstitch them in place! I just followed along the edges of my heart pieces, and then sewed down a few of the dotted lines as well. 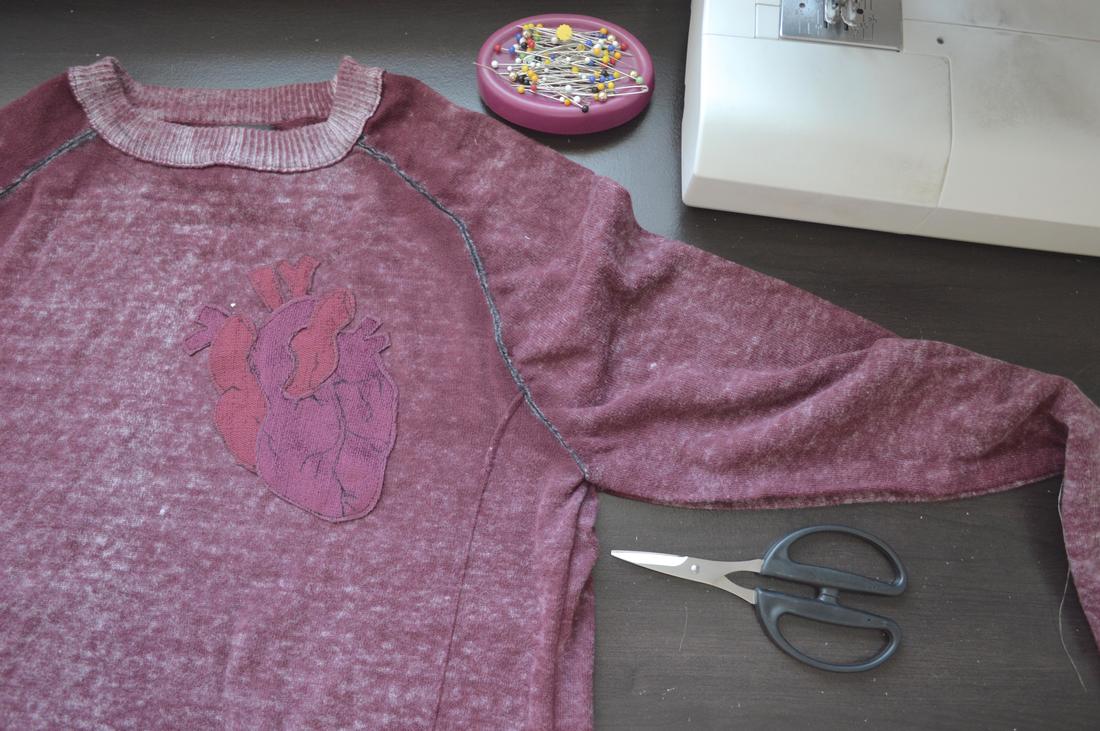 Then, if you like, you can use embroidery thread to really make your heart lines pop! 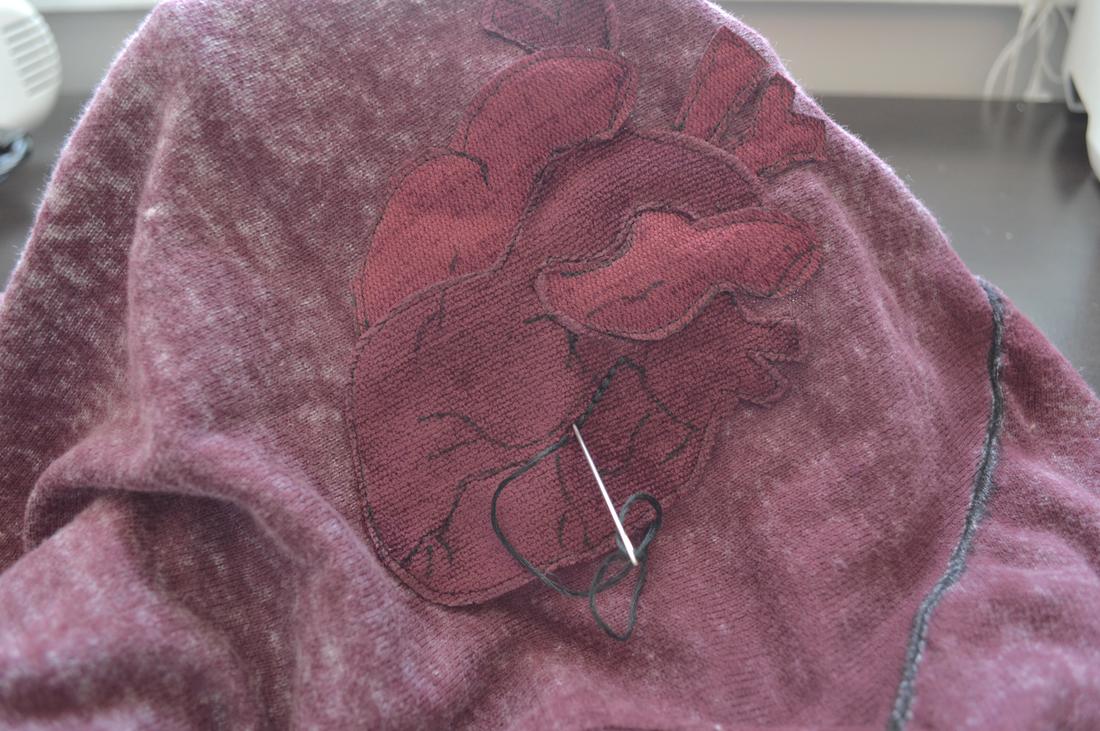 Boom! Done! Enjoy your new anatomical heart! And don't forget to use #anatomicalheartapplique so I can see your creations!!  If you haven't seen Sylvia's Epic Halloween Quilt on FlyingParrotQuilts.com, you need to drop everything and go look! I am absolutely in love with her quilt blocks, and her color choices! One day, I will make this quilt for myself! Mark my words! I'm extra excited to see her Round-up for it this year because she gives my Tombstone Pillow a mention! I would love to see someone make both the quilt and the Tombstone pillows for an epic Halloween bed set. Because you know that's what is going to happen over here at the Stage household one day. 
Guest Post by Annabelle, Chief Crafter and Writer at Wunderlabel
Have you ever noticed that a basketball player does much better when they are wearing the
right shoes, have a perfectly aired up ball, and are at their home gym? Whether you are crafting or playing a sport – or even doing another hobby – the perfect space is the key to your success. The perfect space is what enables you to hone your skills and create that perfect, finished piece. It is like having all the correct components when you are baking a cake: If you are missing the flour or sugar, or even just the food coloring, something in your finished product will be off. So, when you are crafting, it is essential that you find the perfect sewing space to master your skills, ensuring you have all the key components for success. The perfect sewing space consists of proper lighting to match your colors or contrast and goes all the way down to proper storage for your patterns. Not only will the perfect sewing space help improve your skills as a crafter, but it will also make you more comfortable and ensure proper care of your tools. It is hard to do your best if you aren’t feeling your best. But, a perfect sewing space will have a comfortable working space with enough room for you and your tools. And, it is hard to do your best if your tools are not in top notch condition. But, the perfect sewing space will take care of that as well, offering you storage for tools, threads, patterns, and your labels. Keep reading to see the 14 Steps to Creating Your Perfect Sewing Space, an infographic designed by Wunderlabel.com 
 Hello, and welcome back to the Tombstone Sewalong! It's time for Part 5, during which we will be finishing our tombstones! If you are just stumbling upon this series, you can head over to Part 1, and start there! SEWING YOUR PILLOW TOGETHER Now that you have put the cording on your pillow (this was done in Part 4), it is time to close your pillow up! Match up the “Start” notch on the boxing, and the “Start” dot on the front of the pillow with right sides together, and pin it in place. Now do the same for the rest of the corner markings around the edge of your pillow, all the way until it gets back to the start. These will help keep you on track, because the hard part of sewing boxing is making sure that the front and back of the pillow are directly matched up through the boxing, otherwise your pillow will skew and be lopsided. After pinning the important marks, you can pin the rest of the gusset in place. Now you can sew! Sew from the “Start”, across the bottom, and all the way around until you get back to the “Start” dot in the bottom right corner (see picture below). 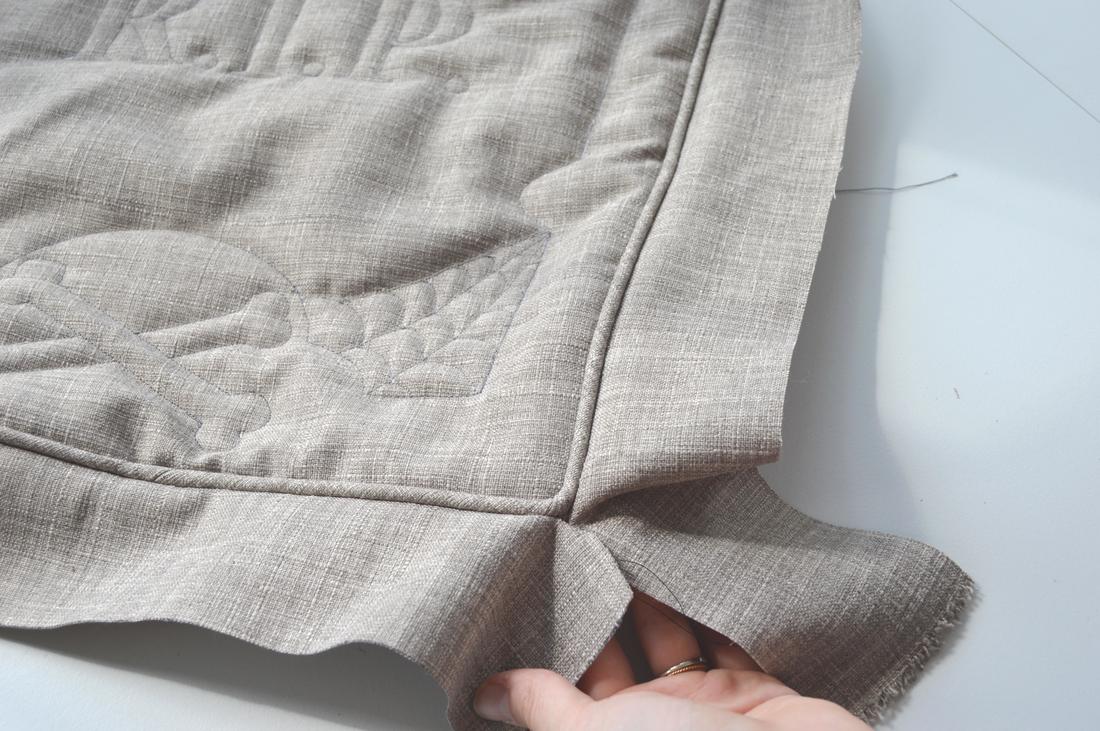 Tips: You should arrive at each of your pinned markings with an equal amount of fabric on the gusset and the front pieces, but this isn’t always the case. Different people and machines mean that it isn’t always perfect. To help, keep checking as you go to make sure that you are on track, and if you find that you are getting off track, you can gently stretch the fabric that is too short to help make it fit. Or add more clips into the shorter fabric to help release more tension. Now we repeat for the back of your pillow. Once again, pin all the markings together, and then the rest of the gusset before you sew. But this time, you will sew from the “Start”, up the side, across the top, then down around and across the bottom to the end (the opposite order of the front) Stop sewing about 4-5 inches before you return to your “Start” mark to leave an opening for stuffing your pillow. 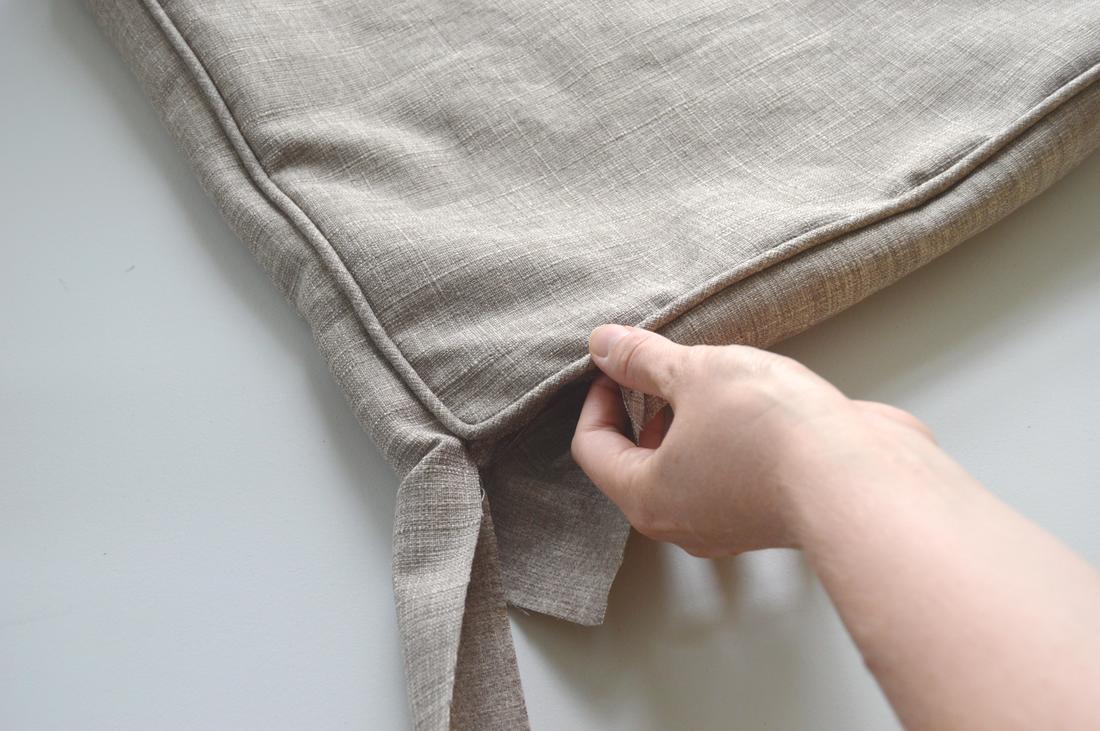 TroubleShooting Got a tricky fabric, and you just can’t get MY gusset markings to line up with the front of YOUR pillow? Don’t sweat it! Here is Option #2: Sew the gusset onto the front, without worrying about lining things up. BUT, when you get done, make new markings on the gusset where it lines up with the markings on the front, and transfer these markings to the opposite side of the gusset (exactly across), to be lined up with the back of your pillow. Now just make sure the back of the pillow lines up with your new markings on the gusset so that the pillow isn’t lopsided! 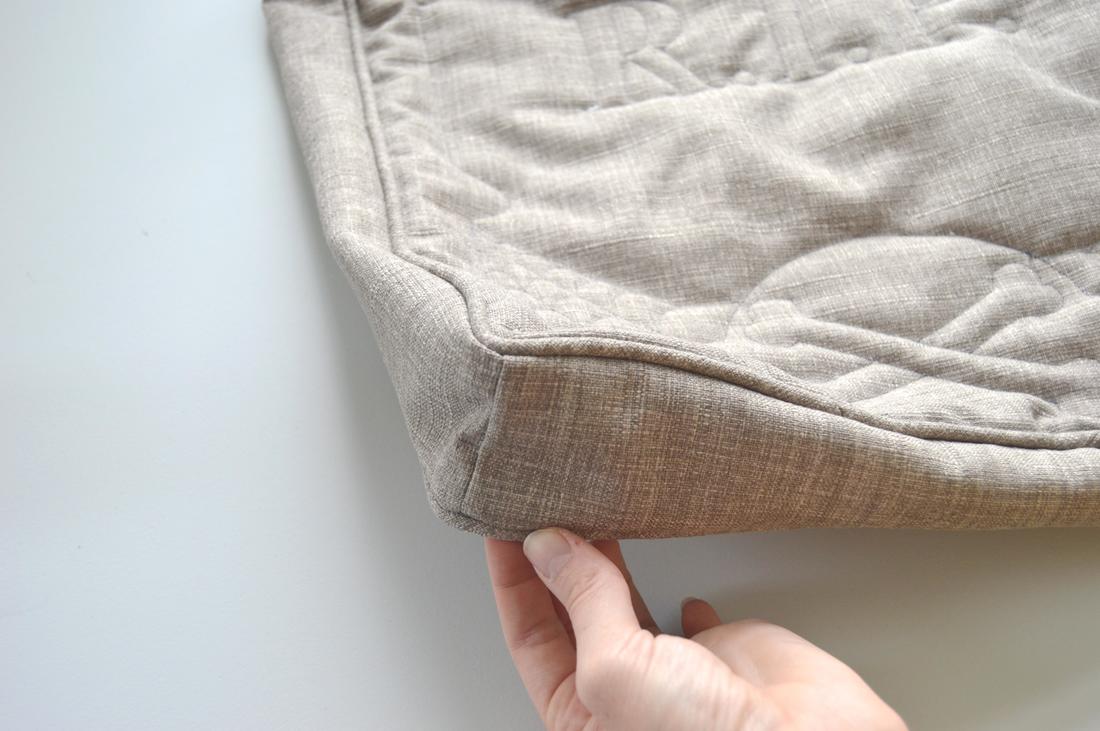 CLOSING YOUR PILLOW Once you are done sewing, turn the pillow inside right, poke out all the corners, and fill it with your polyfil! Tip: A screwdriver is a great too to help you poke out all the corners. 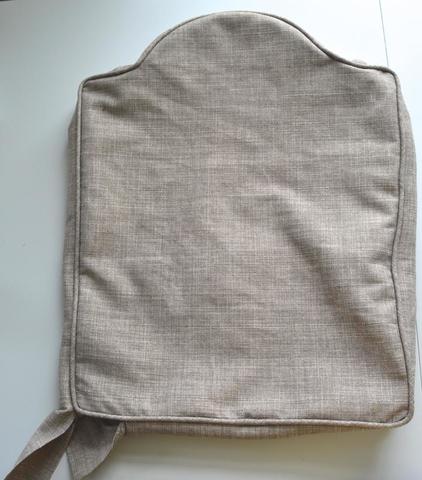 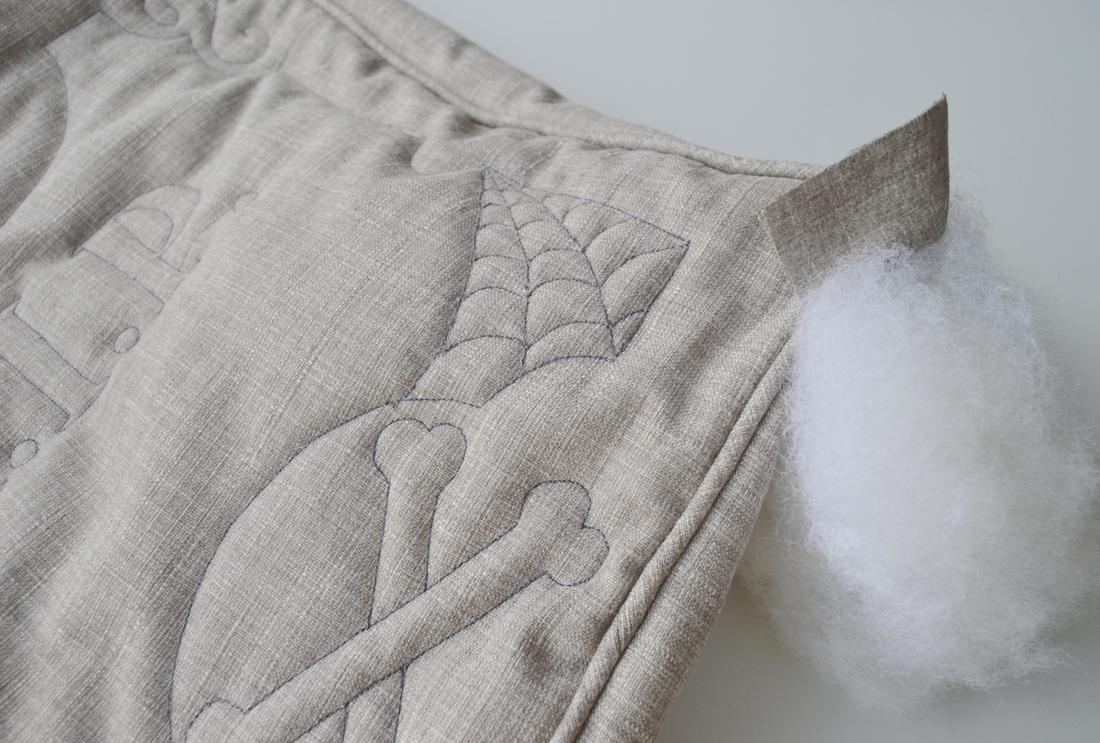 Now turn the edges of the opening in, and pin the pillow shut like in the example below. Then, using a color of thread that blends in, sew the opening shut using a ladder stitch. If you need a refresher for how to do this stitch, check out a tutorial on my blog HERE 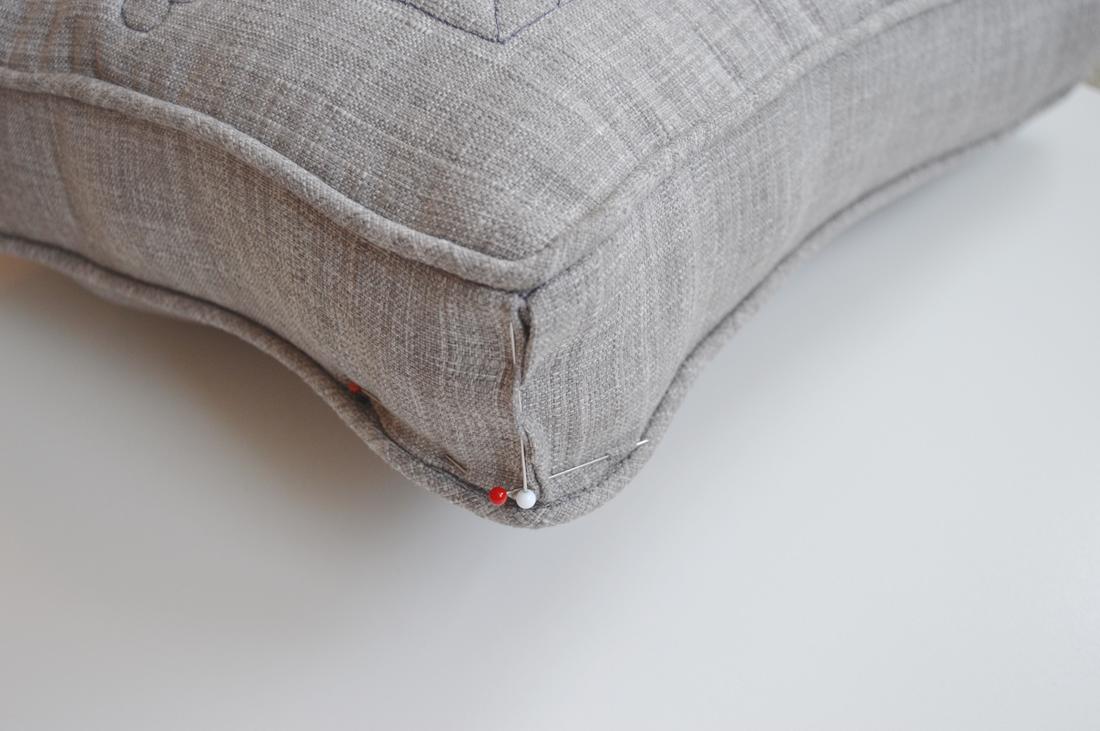 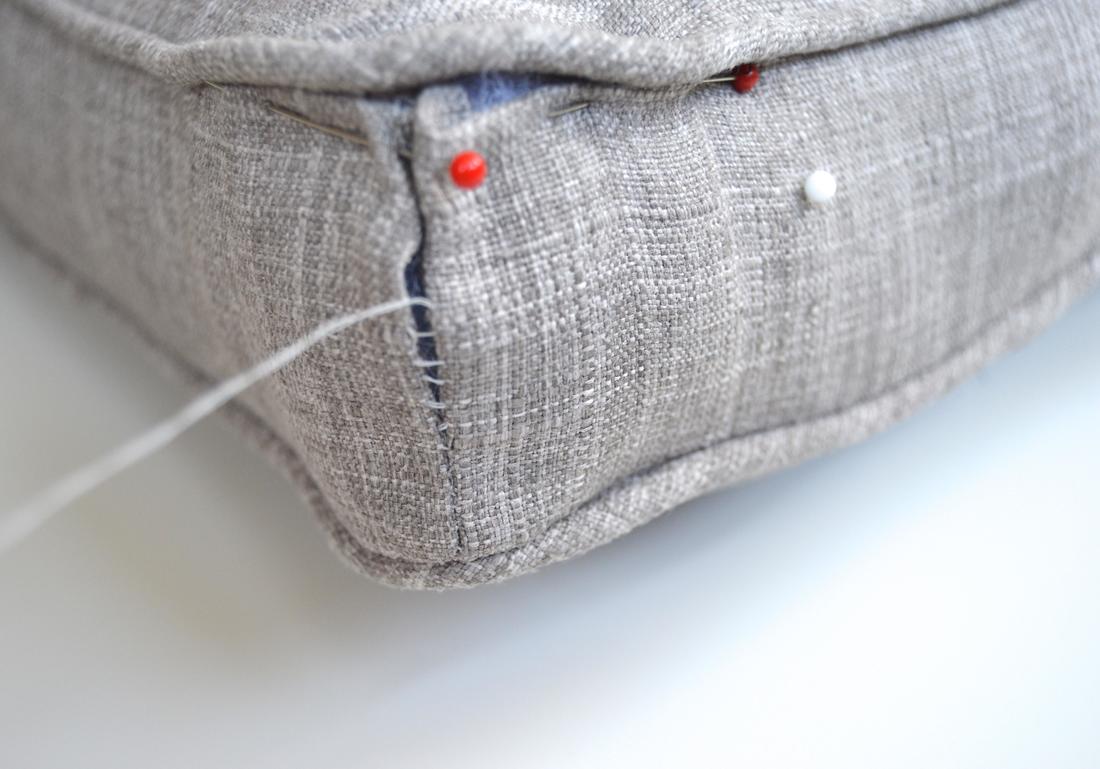 And now you have a finished tombstone!! Yay!! I would love to see photos of your finished cemetery. Just shoot me an email ( madeline.goheen@gmail.com ) or use #tombstonesewalong on instagram.
Let me know if you have any questions!  Today on the sewalong, we are going to be cutting and sewing If you missed Part 1, Part 2, or Part 3 you might want to go back to see what we've done so far! Or, if you are here just to learn some tips and tricks about cording, read on! Also, if you don't actually want cording on your tombstone, you can just completely skip it! But I do love the look of the cording on the pillow, so I definitely go for it. You can also buy pre-made cording if you prefer. But the instructions below will help you to make your own cording, which is sure to match your face fabric! TIP: If you can’t find the cording you want at a craft store, take a look at clothesline. My local grocery store sells a clothesline that is perfect for cording! I recommend buying 5/32” cording, but if you buy another size, you can just adjust the width of the bias strips to work for you. Aim to have about 1/2" of seam allowance on the edge of your cording when it is sewn. CUTTING BIAS STRIPS First, you will need to cut bias strips to cover the cord. Fold the fabric on the diagonal and cut along that line. 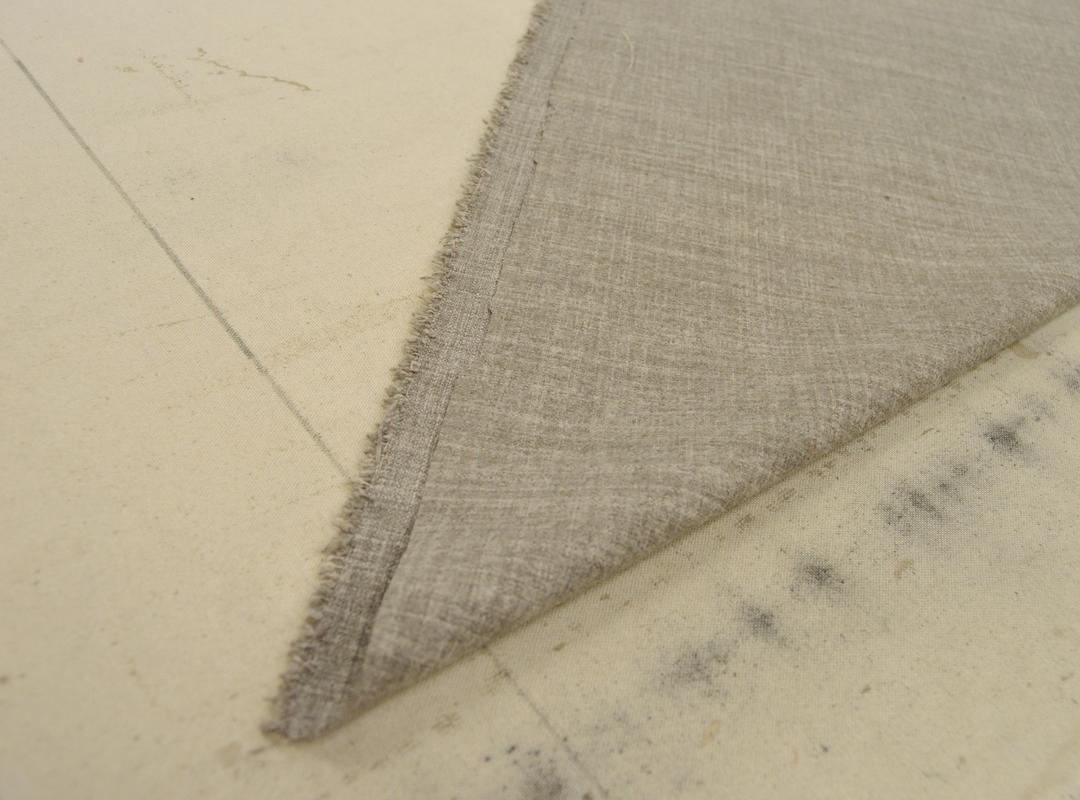 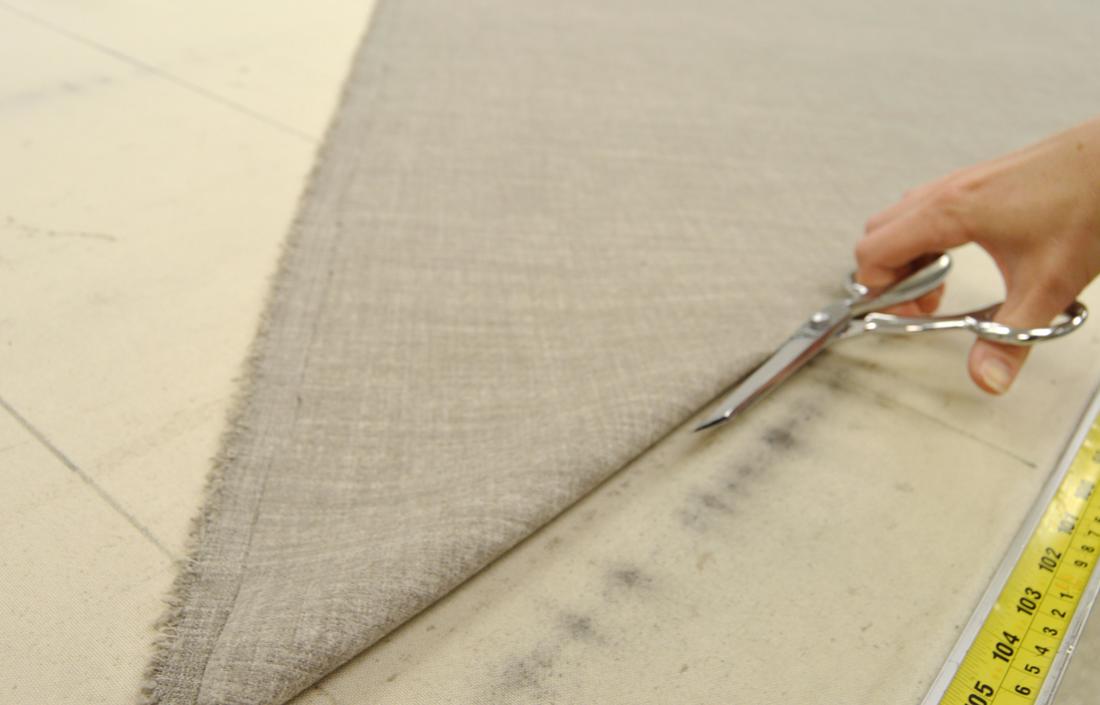 Then, using a fabric marker, draw your cut lines 1 ¾ “ apart using your new diagonal cut edge as a guide. Cut enough strips to cover 140” of cording. 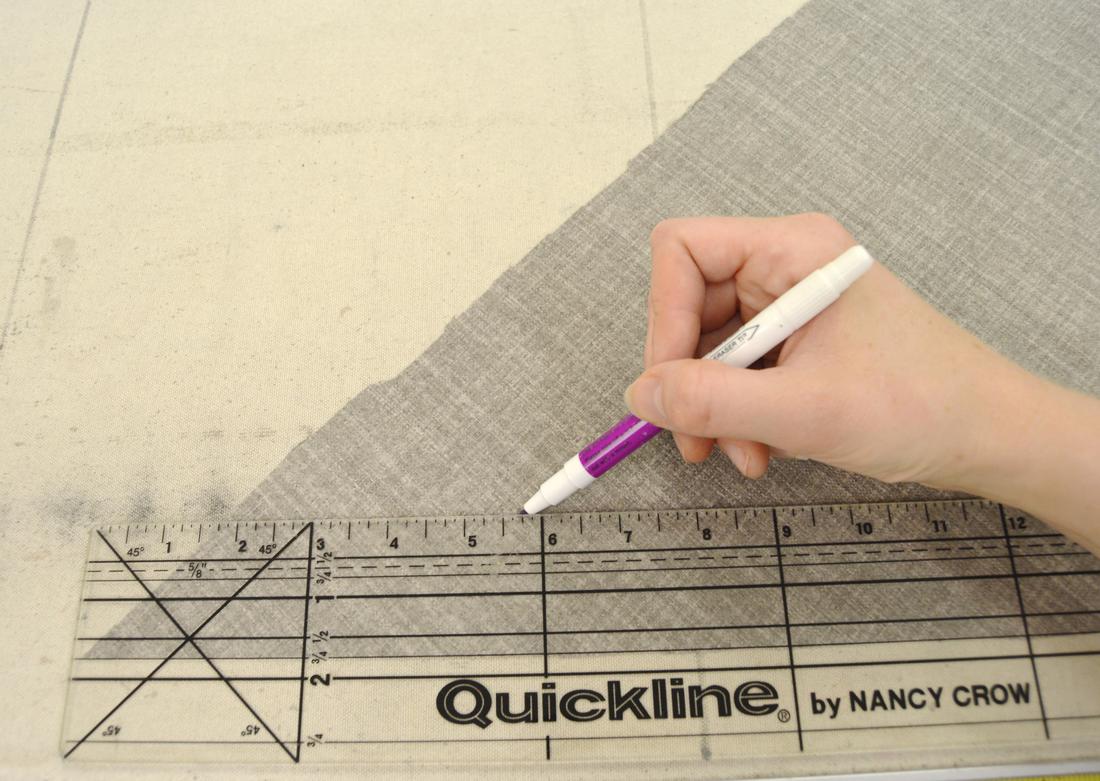 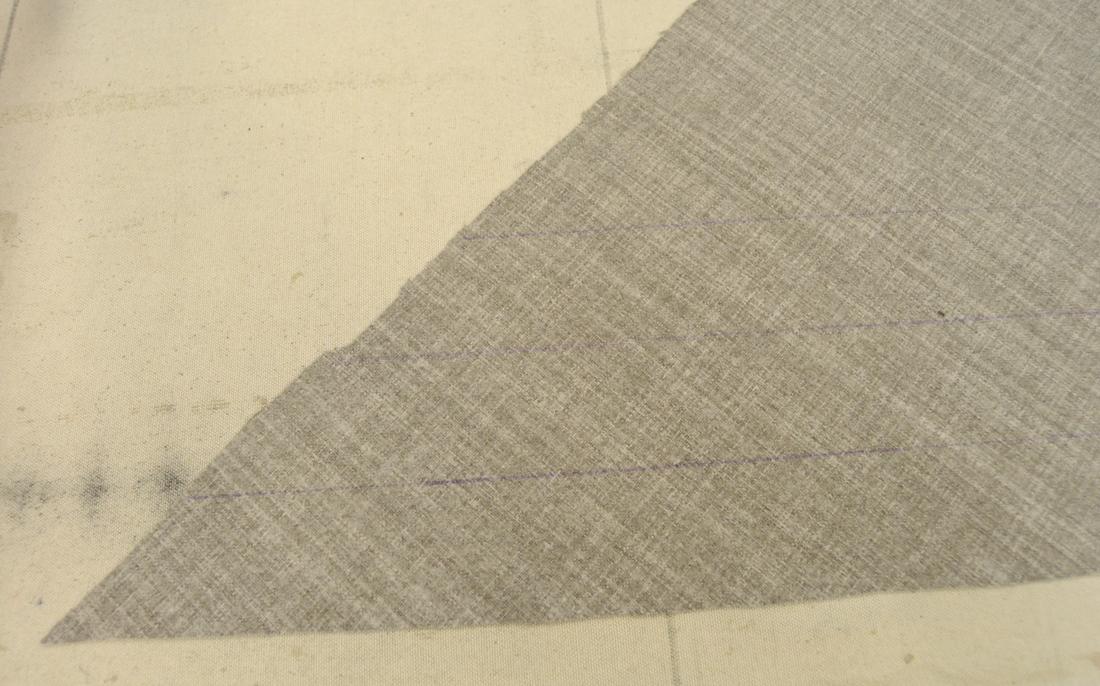 JOINING THE STRIPS After you have cut enough strips, you will need to join the ends. Pick two ends that, when put together, match up like the picture below. 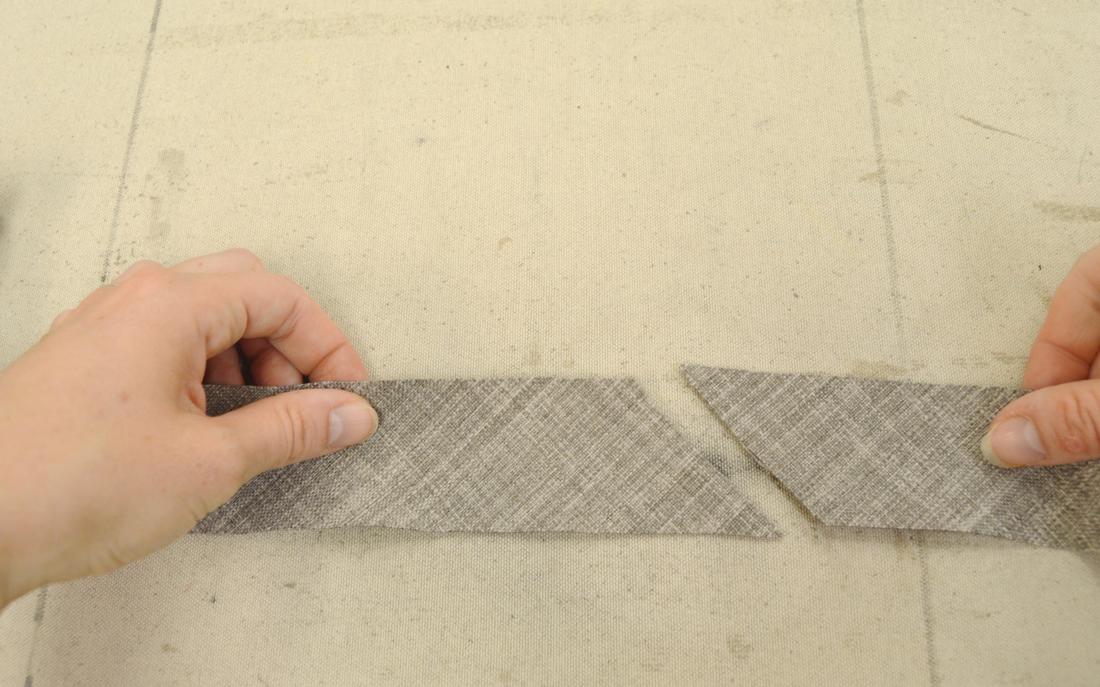 Then turn one strip 90 degrees, and lay it on top with the diagonal edges lined up. Offset them just a bit, so that ¼ “ in is where the edges of your fabric match up. Then sew that ¼ “ seam, and press it open. Join all of your bias strips this way. 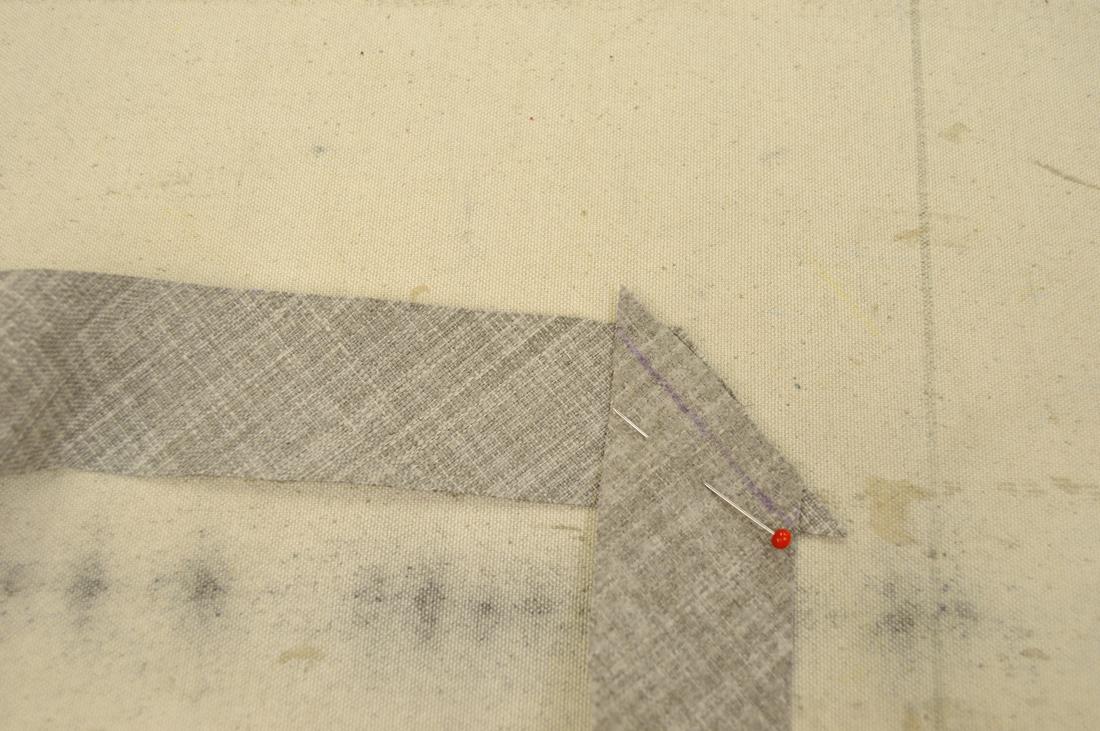 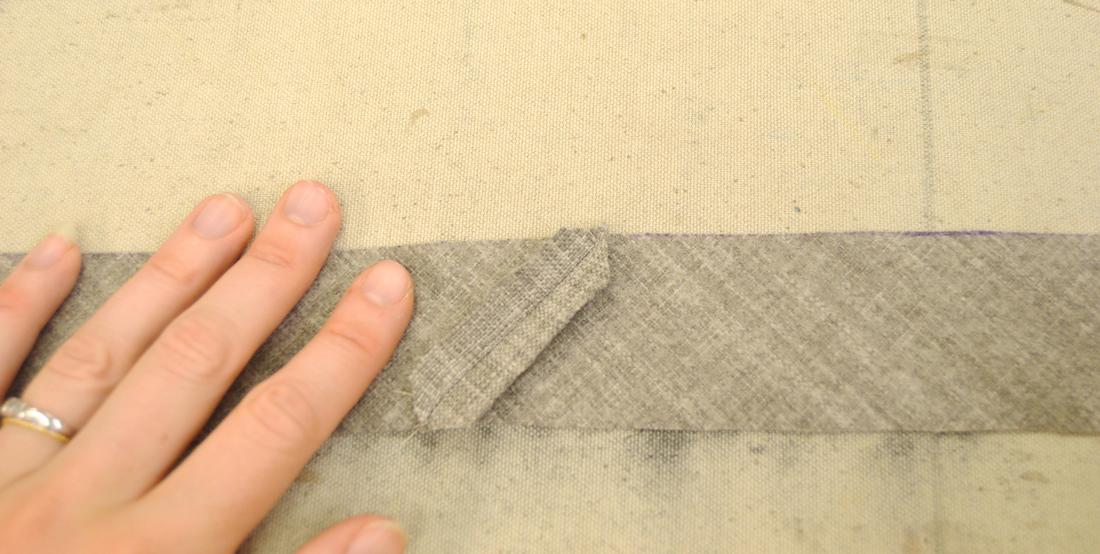 MAKING THE CORDING Once they are all joined, you will make the cording using either a cording foot or a zipper foot on your machine. If you use a cording foot, make sure you are using the correct size (3/16" foot or a 1/4" foot). 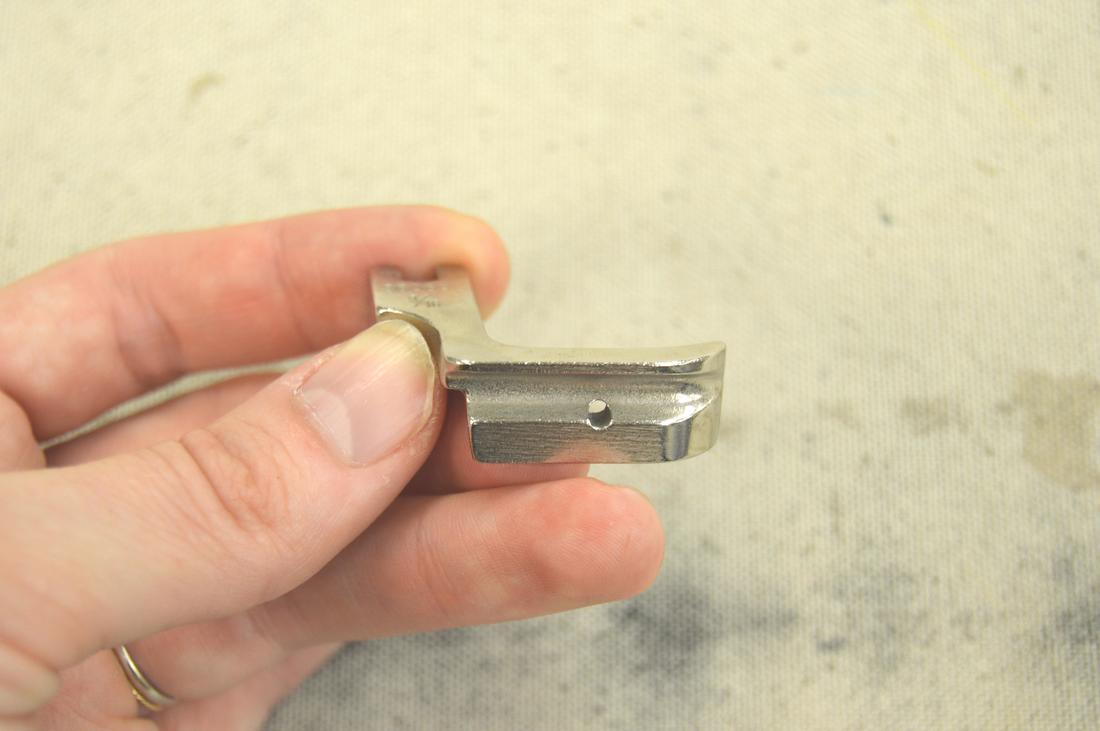 If you are using a zipper foot, try to get up as close as possible next to the cording as you sew (shown below). The strips get wrapped in half around the cord as you go, like the photo below. Make sure you have the right side facing out. 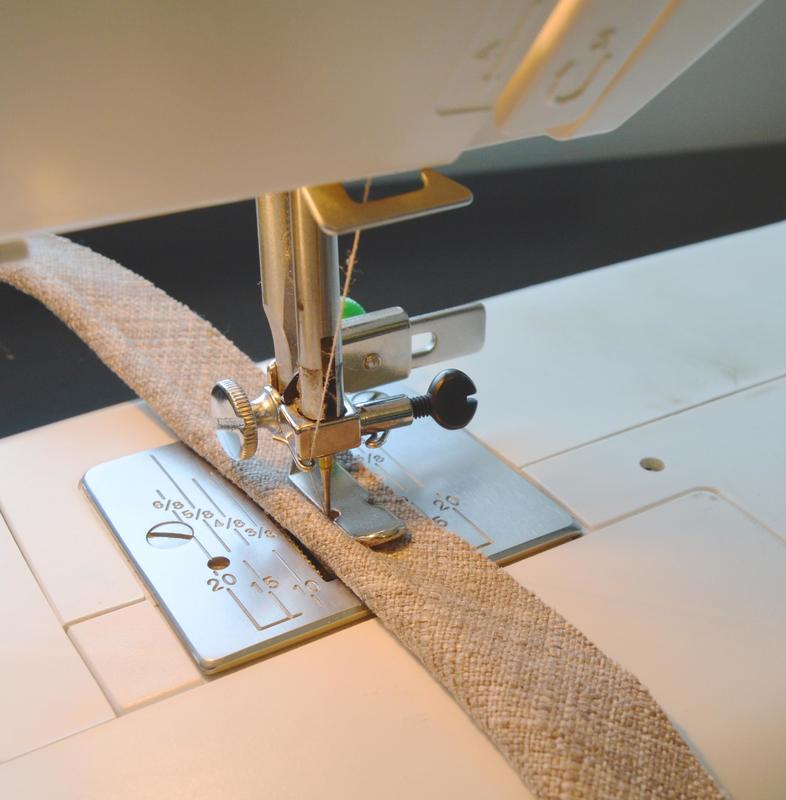 If you are using 5/32” cording, and 1 ¾ “ fabric strips, the leftover fabric that makes up the seam allowance for the cording should measure about ½”, which is perfect. If you have used your own measurements, be sure to cut down your seam allowance to ½” before moving on to the next step. SEWING ON THE CORDING Next, sew the cording onto the front and back of your pillow. Start on the bottom edge of the tombstone, leaving a few inches of cording free before you start stitching. Simply line up the edge of the cording with the edge of your pillow, and sew as close to the cording as you can.
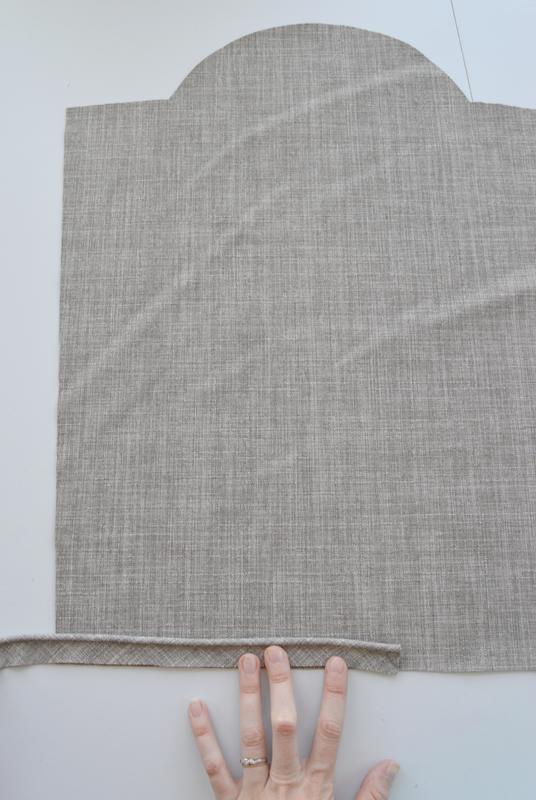
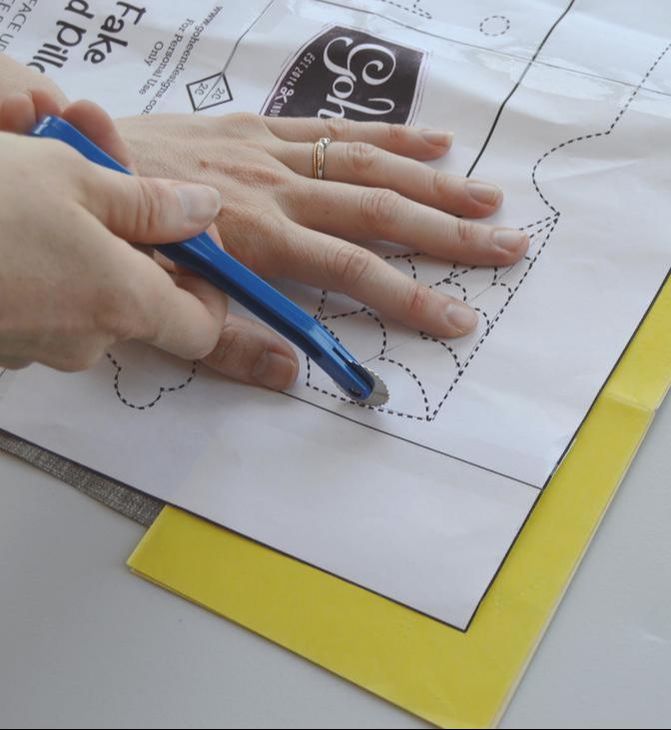
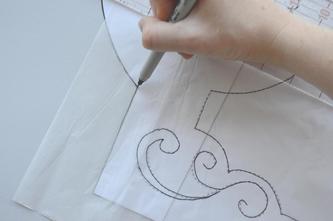
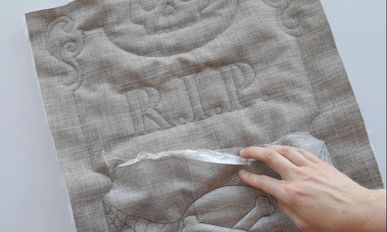
When you get to a corner, or to the curved edge of the tombstone, you will need to clip the cording seam allowance to make it easier. 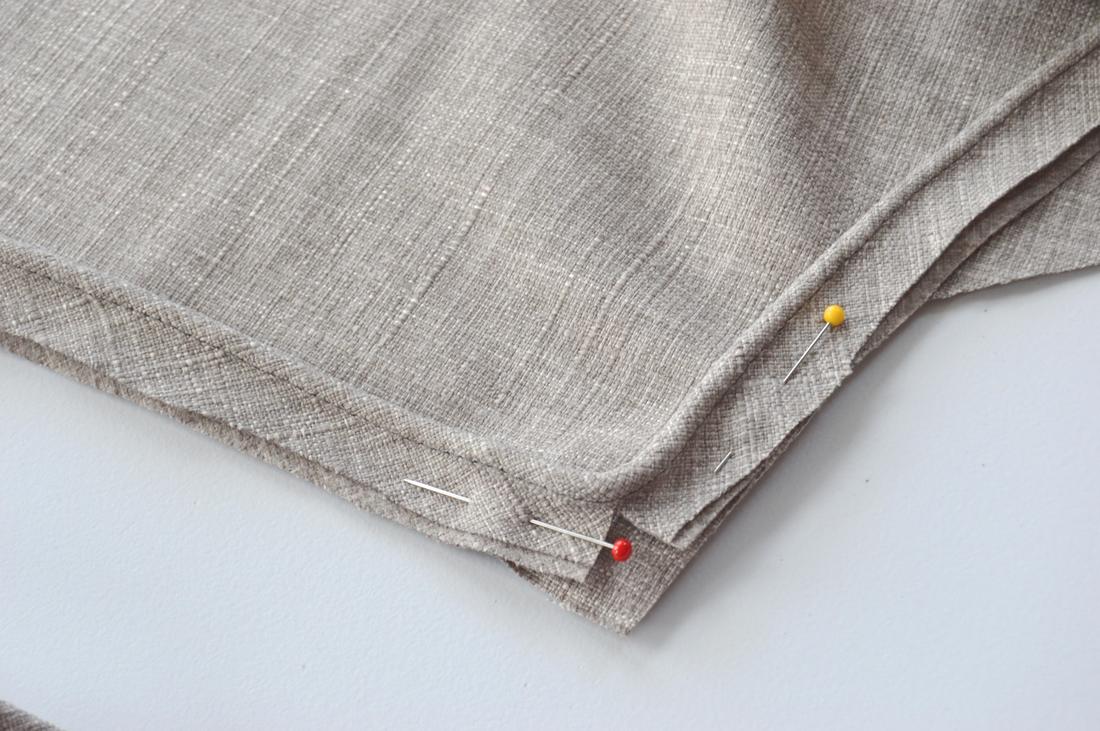 When you get to the bottom of the pillow again, leave a few inches free before you get to where you started. Lay the two ends of the cording overlapping, and cut the ends so that they overlap exactly 1 and ¾“ (it is no coincidence that this is the same size as the width of our bias strips. These measurements should always match.) TIP: If your cording likes to fray, you can use a small piece of tape to keep it from unraveling! 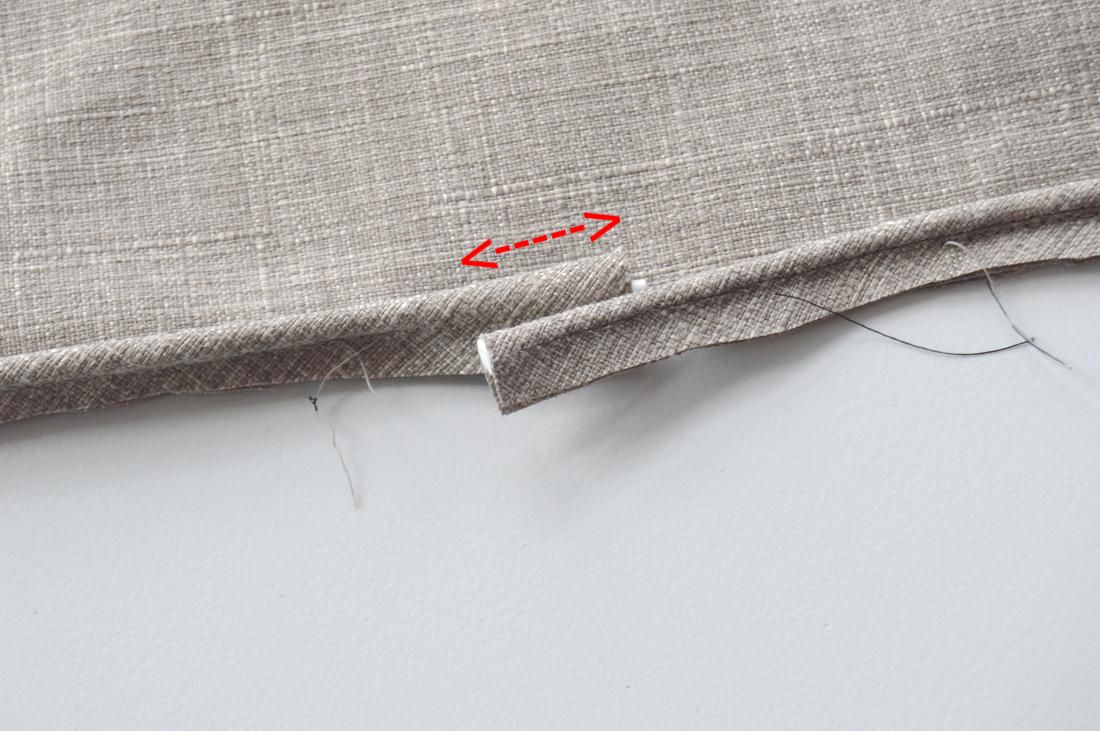 Now take out the stitching of your cording a few inches in each direction, so that you have room to sew the ends together. Match the ends like the picture below at a 90 degree angle, and sew the diagonal. It should look just like the other joins you made for the strips. 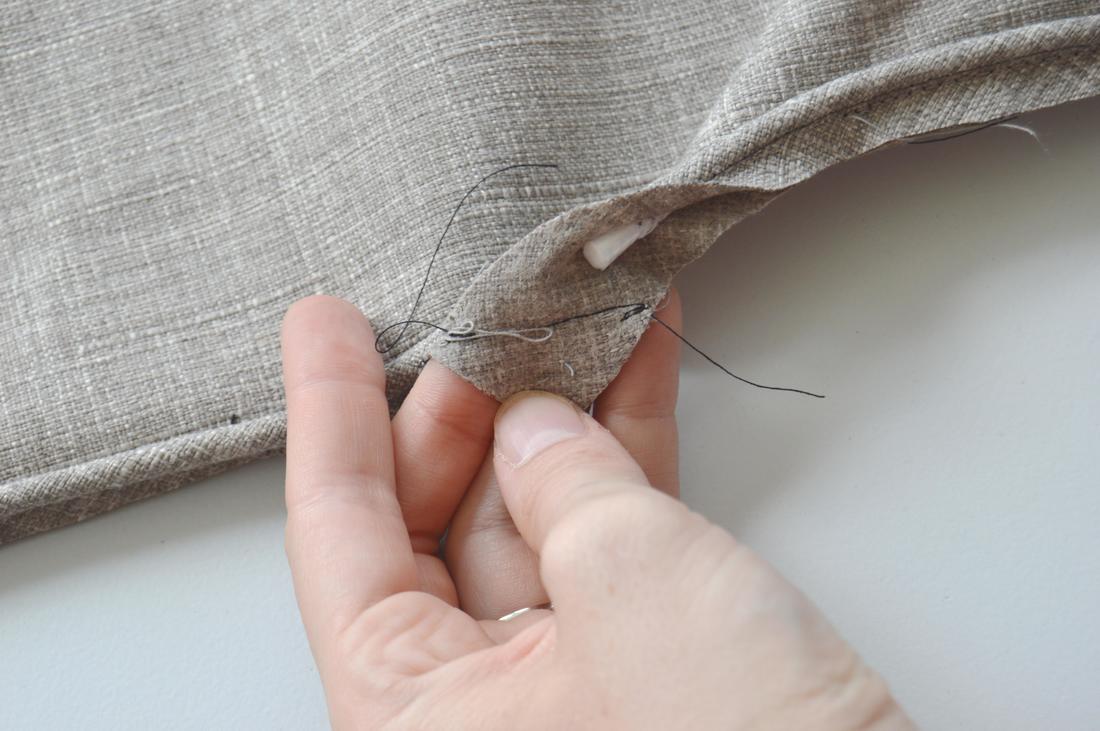 Finally, cut your inside cord so that the ends just meet in the middle, tape them together, and finish sewing the cording to the bottom edge of the pillow like normal. Bam! Perfect continuous cording every time! 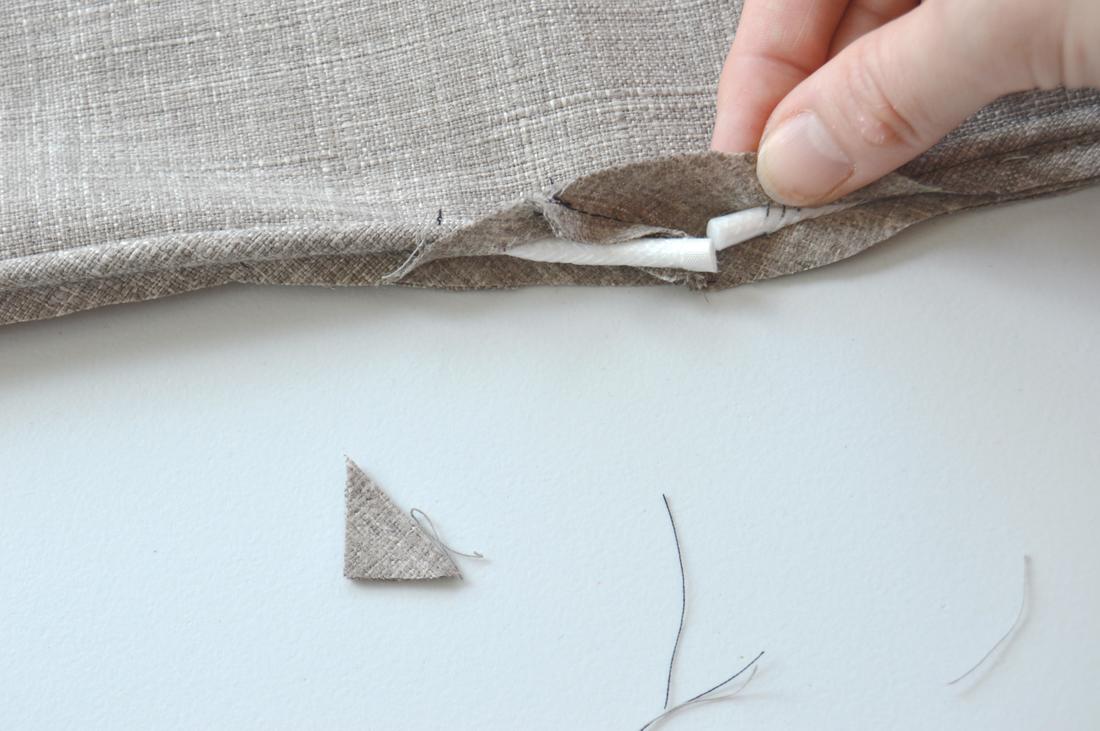 Make sure you do both the front and back of your pillow. 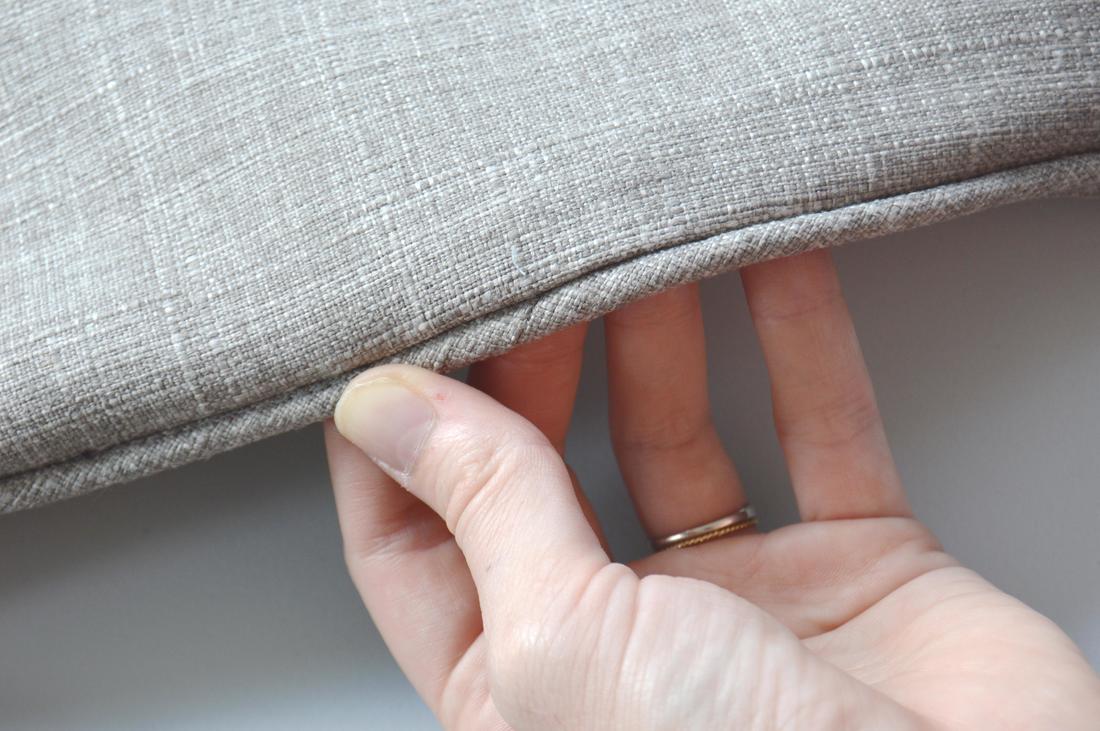 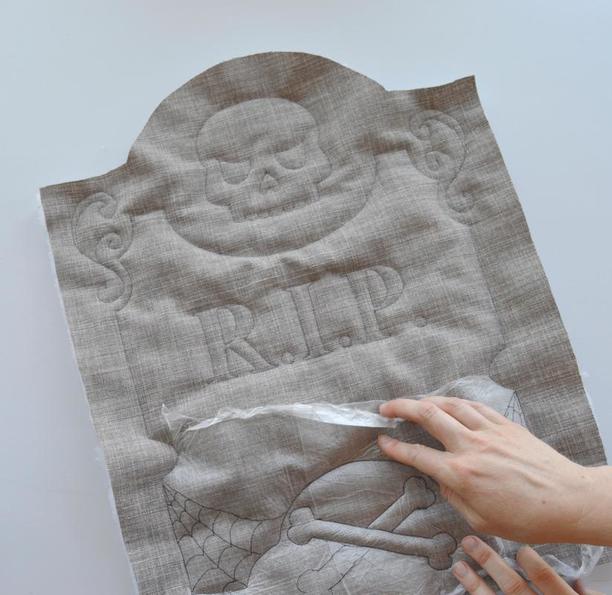 Today on the sewalong, we are getting down to the real business of tombstone sewing. We will be cutting out our fabric pattern pieces, and quilting the front of our "stone". If you missed Part 1 and Part 2, you might want to go back to see what materials you need, and how to put together the PDF pattern. CUT IT OUT! Here is the breakdown of what you need to cut: 2 of Piece A in your main fabric 1 of Piece A in your scrap fabric (this can be the same as your main fabric too if that's easiest) 1 or 2 of Piece A in your batting. Your choice, depending on how much loft you want for your quilted area. I prefer a double layer! 1 of Piece B in your main fabric 1 of Piece C in your main fabric 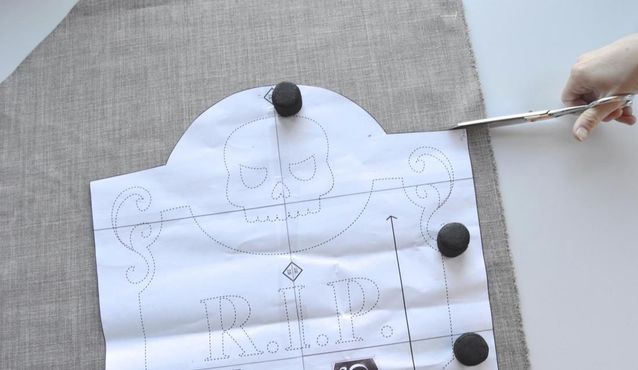 My favorite way to cut out my pieces is to lay the pattern on top of my fabric, weight it down with whatever is handy (this often ends up being a jar of pens, my phone, a stapler, etc) and then carefully cut around it. You could also trace around your pattern pieces with a fabric marker if you prefer, and then move the pattern paper away and cut it out. Sewers choice! Join your B and C pieces at the "corner join" marks. Note: Your boxing (the really really long piece that makes up the edges of your 3D pillow) can be cut out as patterned, or out of one long piece, or if you don’t have pieces of fabric long enough for the pattern, you can join a few together. Simply cut out multiple pieces of the correct width (3.5“) and sew them together (right sides together, ½” seam). There is already one built in seam in the pattern to allow for less fabric waste in the pattern layout. Go ahead and join those now. 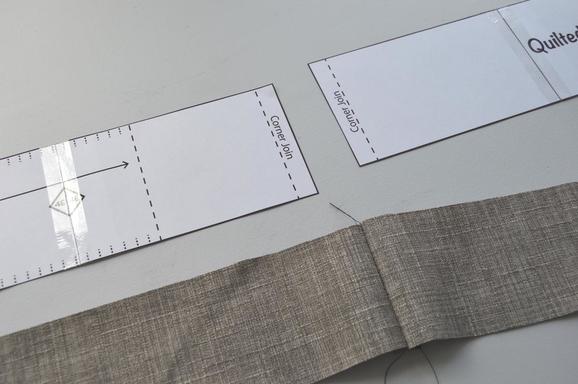 MARK IT! Don't forget to transfer the important marks from your pattern to your fabric. Don't worry about the quilt pattern yet. Just transfer the start/end point onto the RIGHT sides of your two main pieces for A (these will be on opposite corners if both of your pieces are right side up). 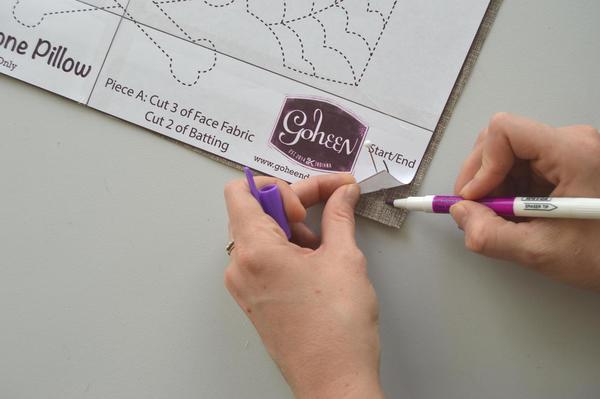 Then for B/C transfer the start, end, and corner lines onto the WRONG side of your boxing strip. The corner marks will help keep your on track while you sew, so that your pillow doesn't get too skewed. Make sure to mark both edges of your strip at these dashed lines. 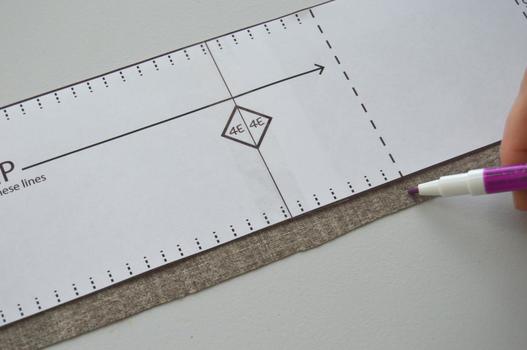 And you will need to clip the boxing in the indicated areas as well. Clipping makes it easier to sew around the curved top of the tombstone. The pattern shows you where, and approximately how far apart to clip. Look for the little dashed lines and the sections that say “CLIP”. Just make sure that your clips are only ½” deep. If it is easier, you can draw a line ½” on the edge of your piece to help you not clip too deep. Note: the pre-clipping is totally optional. You can also clip as you sew around the pillow if you prefer. 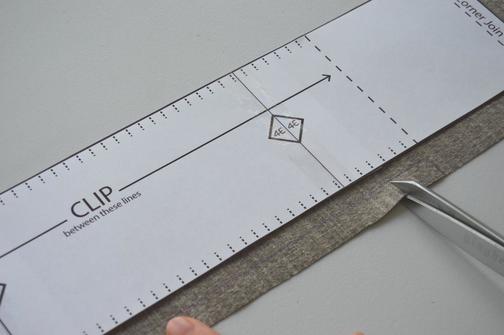 QUILTING YOUR TOMBSTONE Ok now for the fun part: transferring the quilting pattern. There are several methods for doing this, and I've selected three here to demonstrate.
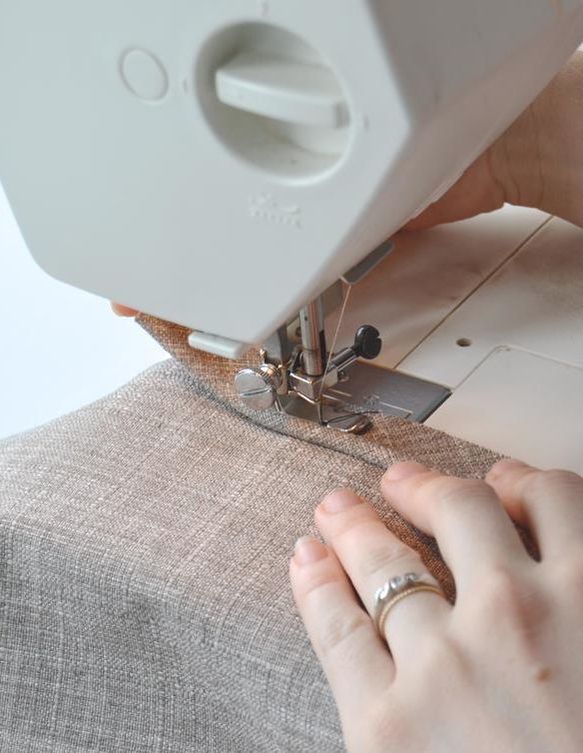
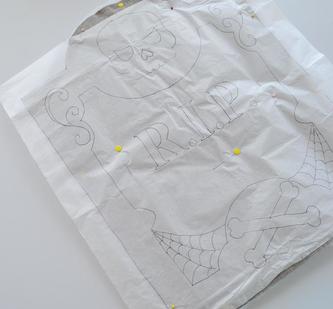
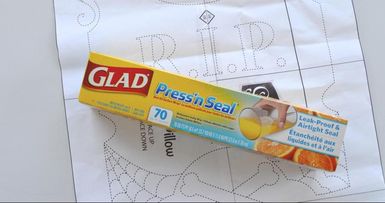
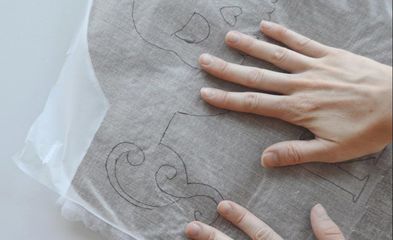
Once you have your pattern traced, and ready to sew, you now create a sandwich: bottom layer is your scrap piece A, then two layers of batting, and top it off with a face fabric piece A, RIGHT side up. Then of course if you are using the press'n seal or tissue paper, that gets aligned on top of that! pin everything carefully in place and get to quilting. Some people use a free motion quilting foot for this part. I'm terrible at this. So I just topstitch it all with a normal foot! I usually set the stitch length a little smaller, and go slow, even hand cranking when necessary to be more precise. Take your time!! This quilting can be time consuming. You can take it in little chunks if you prefer. The next section of the Sewalong isn't for another week, so you can spread this out if you want :) Also, you can always pick and choose which lines you want to quilt. You could always just do an R.I.P. and be done! 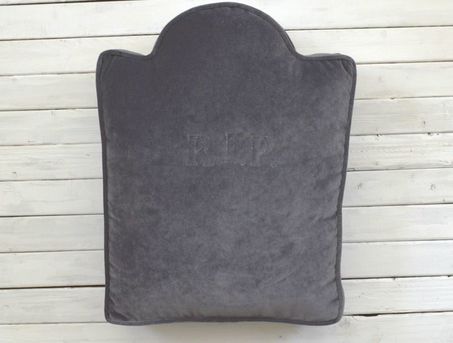 Either way, I'll see you back here in a week! Happy sewing!
|
madeline stage
creative business owner. designer. hoosier. crafter. runner. sewer. swing dancer. outdoor enthusiast. entrepreneur. wife. mom. material hoarder. Categories
All
Archives
June 2023
My Instagram Feed:
@GoheenDesigns |

 RSS Feed