Goheen
  • Home
  • Pattern Shop
    • Shop Patterns
    • Shop Kits
    • Sizing Chart
    • Skill Levels Chart
    • Pattern Kit Instructions
    • Corrections
  • Green Graves
  • The Community
  • Blog
    • Blog
    • Blog Archives
  • About
  • My Makes
  • Stockists
  • Search

Tombstone Sewalong: Part 3

9/23/2017

0 Comments

 
Tombstone sewalong for a diy halloween graveyard decoration

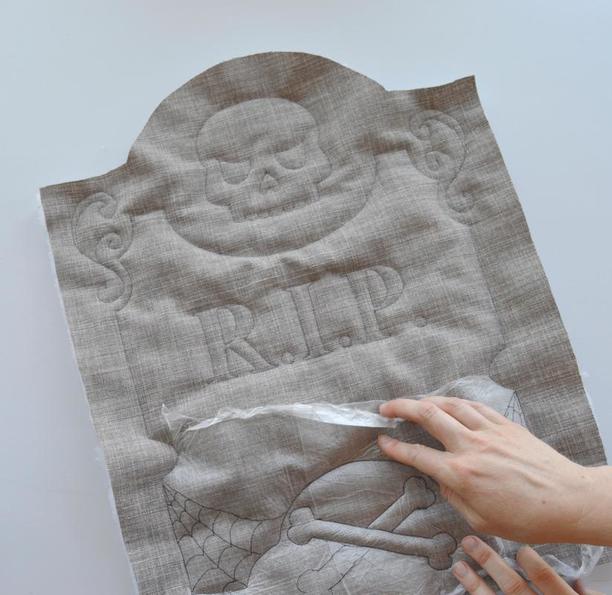
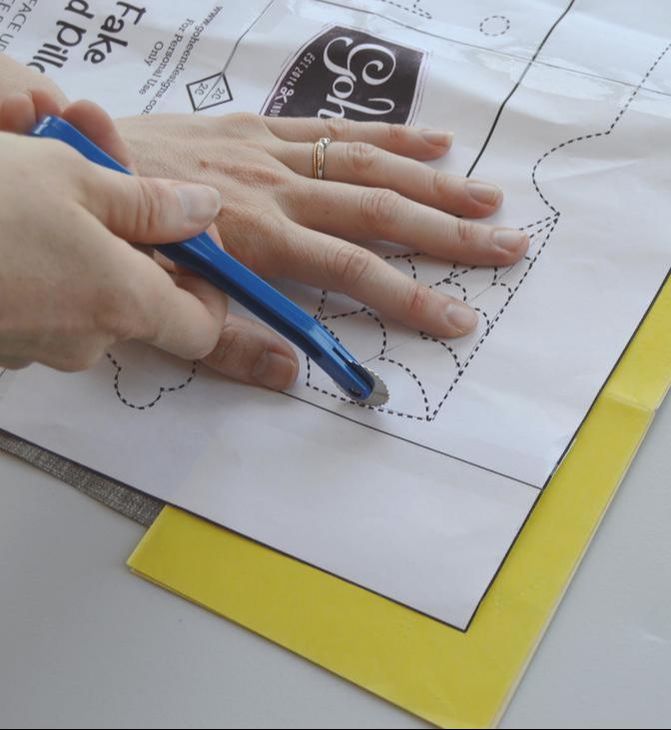
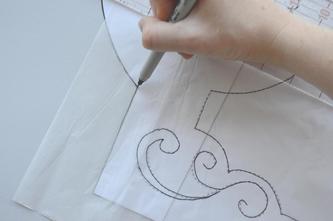
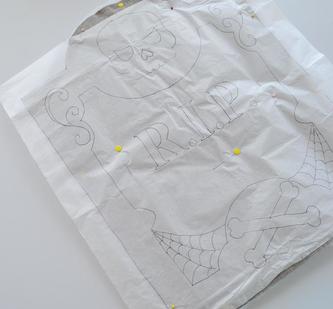
​Today on the sewalong, we are getting down to the real business of tombstone sewing. We will be cutting out our fabric pattern pieces, and quilting the front of our "stone".

If you missed Part 1 and Part 2, you might want to go back to see what materials you need, and how to put together the PDF pattern. 
CUT IT OUT!

Here is the breakdown of what you need to cut:
2 of Piece A in your main fabric
1 of Piece A in your scrap fabric (this can be the same as your main fabric too if that's easiest)
1 or 2 of Piece A in your batting. Your choice, depending on how much loft you want for your quilted area. I prefer a double layer!
1 of Piece B in your main fabric
​1 of Piece C in your main fabric
pattern weights to cut out fabric
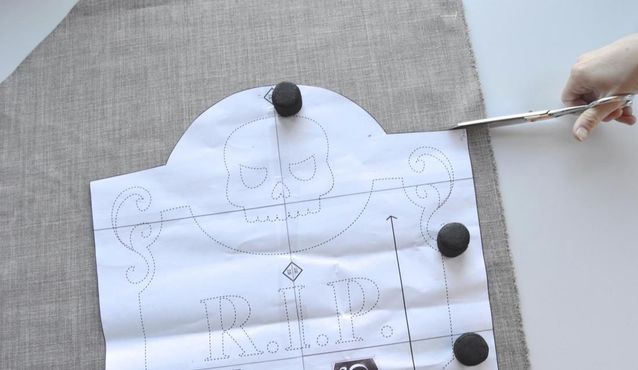
My favorite way to cut out my pieces is to lay the pattern on top of my fabric, weight it down with whatever is handy (this often ends up being a jar of pens, my phone, a stapler, etc) and then carefully cut around it. You could also trace around your pattern pieces with a fabric marker if you prefer, and then move the pattern paper away and cut it out. Sewers choice!

Join your B and C pieces at the "corner join" marks.

Note: ​Your boxing (the really really long piece that makes up the edges of your 3D pillow) can be cut out as patterned, or out of one long piece, or if you don’t have pieces of fabric long enough for the pattern, you can join a few together. Simply cut out multiple pieces of the correct width (3.5“) and sew them together (right sides together, ½” seam). There is already one built in seam in the pattern to allow for less fabric waste in the pattern layout. Go ahead and join those now. 
sewing boxing for your tombstone
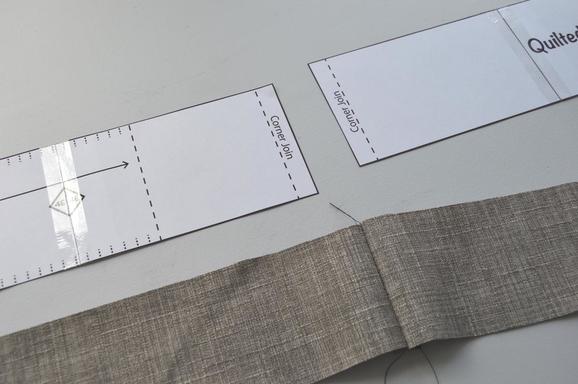
MARK IT!

 Don't forget to transfer the important marks from your pattern to your fabric. Don't worry about the quilt pattern yet. Just transfer the start/end point onto the RIGHT sides of your two main pieces for A (these will be on opposite corners if both of your pieces are right side up).

transferring marks to fabric
​
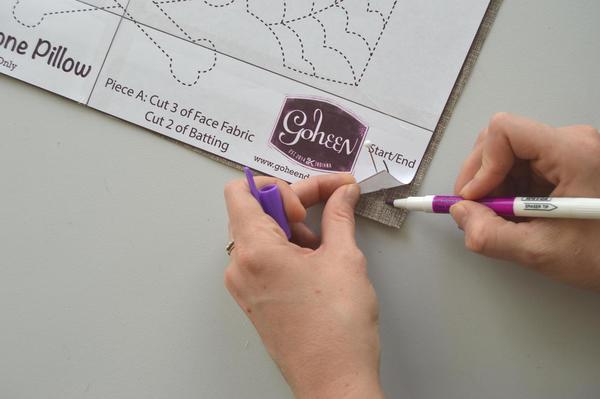
Then for B/C transfer the start, end, and corner lines onto the WRONG side of your boxing strip. The corner marks will help keep your on track while you sew, so that your pillow doesn't get too skewed. Make sure to mark both edges of your strip at these dashed lines. 

marking the corners for your boxing

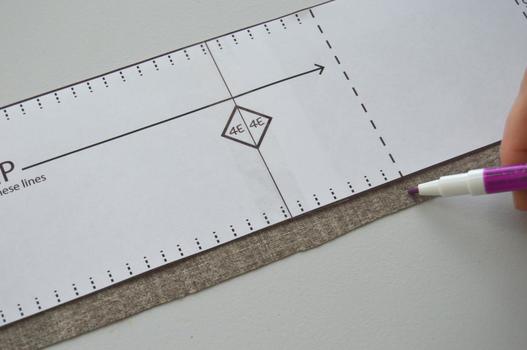
And you will need to clip the boxing in the indicated areas as well. Clipping makes it easier to sew around the curved top of the tombstone. The pattern shows you where, and approximately how far apart to clip. Look for the little dashed lines and the sections that say “CLIP”. Just make sure that your clips are only ½” deep. If it is easier, you can draw a line ½” on the edge of your piece to help you not clip too deep. 

Note: the pre-clipping is totally optional. You can also clip as you sew around the pillow if you prefer.
pre clipping your boxing for a rounded edge
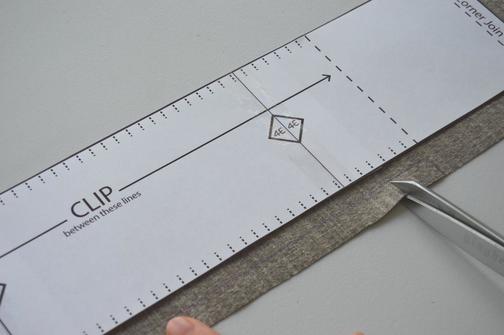
QUILTING YOUR TOMBSTONE

Ok now for the fun part: transferring the quilting pattern. There are several methods for doing this, and I've selected three here to demonstrate.

1. Tracing Paper
One way to transfer lines onto fabric is to use tracing paper, which can be found easily at a craft store. It will come with several different colored sheets of paper, with a chalk-like substance on one side. Pick the color that will show up best. Place your tombstone face up, with the tracing paper chalk side down on top, with the paper pattern on top of that. Use a tracing wheel to transfer the lines.
Downsides:
Tracing paper is usually small, and you will need to shift it around the pattern to reach the entire design. You also have to make sure you wash it off afterwards so that you don’t see the lines when you are done.
using transfer paper to transfer quilt lines


​2. Tissue Paper

Tissue paper is another option! You can lay out a sheet of tissue paper on top of your paper pattern, and trace the quilt design onto the paper with a thin marker. I usually trace a bit of the outside as well so that I know exactly where to position it on the fabric. Then, place on top of the fabric and carefully pin in place. When you quilt, you can sew right through the tissue paper, which you then tear away when you are done!

Downsides:
The tissue paper rips easily, so be careful when you are maneuvering while quilting!

using tissue paper to transfer quilt lines
tissue paper quilting


3. Press'n Seal (or whatever off brand there is)

This is a kitchen product, for covering food containers full of leftovers. But it can also really come in handy for quilting! You can lay out a sheet or two of this plastic (sticky side down) on top of your paper pattern, and trace the quilt design onto the paper with a thin marker. I usually trace a bit of the outside as well so that I know exactly where to position it on the fabric. Then, place on top of the fabric and press lightly in place. It will stay right where you want it. When you quilt, you can sew right through the plastic, which you then tear away when you are done!

Downsides:
This stuff really likes to stick in the small spaces. It takes some work to get it all out of the little spider web area! Be sure you are ready to commit!
​
using press'n seal to quilt
press'n Seal sticks to your fabric
press n seal sucks to peel off

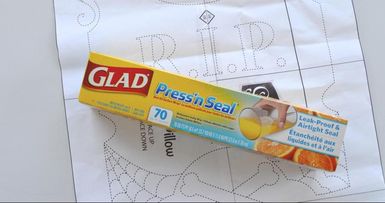
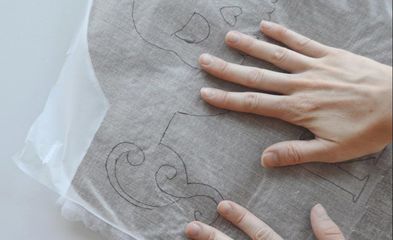
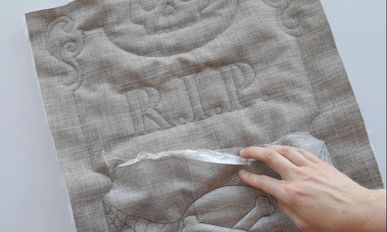
Once you have your pattern traced, and ready to sew, you now create a sandwich: bottom layer is your scrap piece A, then two layers of batting, and top it off with a face fabric piece A, RIGHT side up. Then of course if you are using the press'n seal or tissue paper, that gets aligned on top of that! pin everything carefully in place and get to quilting. 

Some people use a free motion quilting foot for this part. I'm terrible at this. So I just topstitch it all with a normal foot! I usually set the stitch length a little smaller, and go slow, even hand cranking when necessary to be more precise.
​
Take your time!! This quilting can be time consuming. You can take it in little chunks if you prefer. The next section of the Sewalong isn't for another week, so you can spread this out if you want :)

Also, you can always pick and choose which lines you want to quilt. You could always just do an R.I.P. and be done!

R.I.P. velvet tombstone pillow
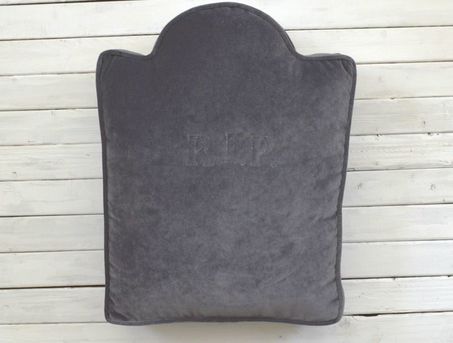
Either way, I'll see you back here in a week! Happy sewing!
0 Comments


Leave a Reply.

    madeline stage

    creative business owner. designer. hoosier. crafter. runner. sewer. swing dancer. outdoor enthusiast. entrepreneur. wife.  material hoarder.


    Categories

    All
    Eddie Pattern
    Goals
    Inara
    Inspiration
    Madi Pattern
    My Makes
    News
    Products
    Sewalong
    Sewing Patterns
    Sewing Tips
    Sponsored


    Archives

    December 2021
    October 2021
    May 2021
    April 2021
    February 2021
    January 2021
    December 2020
    October 2020
    July 2020
    April 2020
    March 2020
    February 2020
    January 2020
    December 2019
    November 2019
    October 2019
    September 2019
    June 2019
    May 2019
    April 2019
    March 2019
    February 2019
    December 2018
    October 2018
    September 2018
    August 2018
    June 2018
    May 2018
    April 2018
    March 2018
    February 2018
    October 2017
    September 2017
    August 2017
    July 2017
    May 2017
    March 2017
    February 2017
    January 2017
    December 2016
    November 2016
    October 2016
    September 2016
    August 2016
    July 2016
    June 2016
    May 2016
    April 2016
    March 2016
    February 2016
    January 2016
    December 2015
    November 2015


    RSS Feed

    follow us in feedly
    My Instagram Feed:
    @GoheenDesigns

    Subscribe to our mailing list

    * indicates required

Contact Me

Madeline Stage madeline.goheen@gmail.com
1-260-403-9348
Libertyville, IL

Weekly Mantra:

Right here. Right now.

Click here for the Privacy Policy

Quick Links

Blog
​About
Patterns
Sizing Chart
Kit Instructions
Sewing Level Chart
Handmade Products
© COPYRIGHT 2021. ALL RIGHTS RESERVED.
  • Home
  • Pattern Shop
    • Shop Patterns
    • Shop Kits
    • Sizing Chart
    • Skill Levels Chart
    • Pattern Kit Instructions
    • Corrections
  • Green Graves
  • The Community
  • Blog
    • Blog
    • Blog Archives
  • About
  • My Makes
  • Stockists
  • Search