
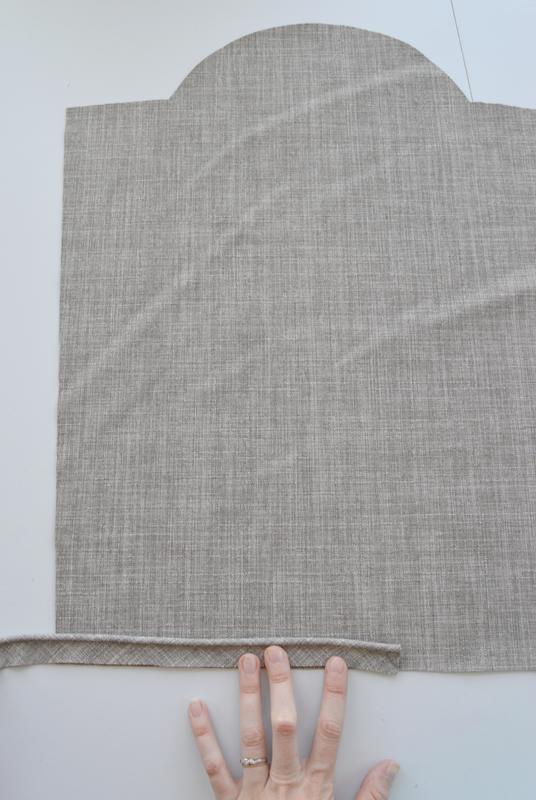
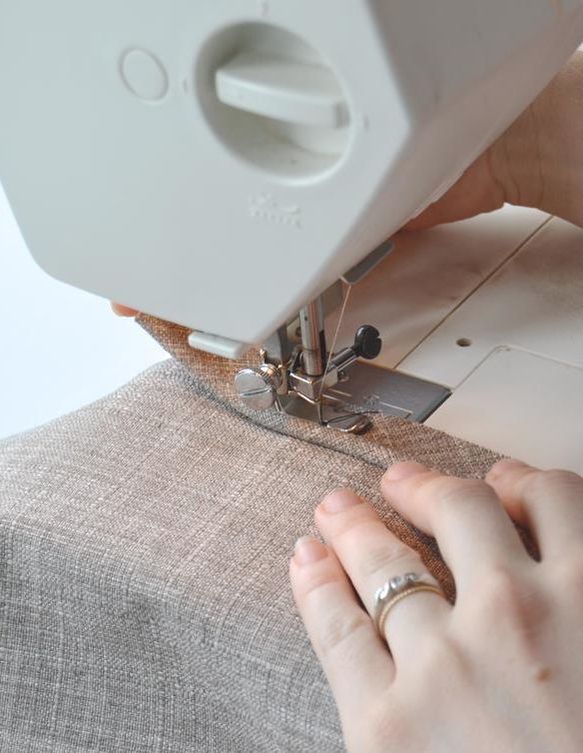
 Today on the sewalong, we are going to be cutting and sewing If you missed Part 1, Part 2, or Part 3 you might want to go back to see what we've done so far! Or, if you are here just to learn some tips and tricks about cording, read on! Also, if you don't actually want cording on your tombstone, you can just completely skip it! But I do love the look of the cording on the pillow, so I definitely go for it. You can also buy pre-made cording if you prefer. But the instructions below will help you to make your own cording, which is sure to match your face fabric! TIP: If you can’t find the cording you want at a craft store, take a look at clothesline. My local grocery store sells a clothesline that is perfect for cording! I recommend buying 5/32” cording, but if you buy another size, you can just adjust the width of the bias strips to work for you. Aim to have about 1/2" of seam allowance on the edge of your cording when it is sewn. CUTTING BIAS STRIPS First, you will need to cut bias strips to cover the cord. Fold the fabric on the diagonal and cut along that line. 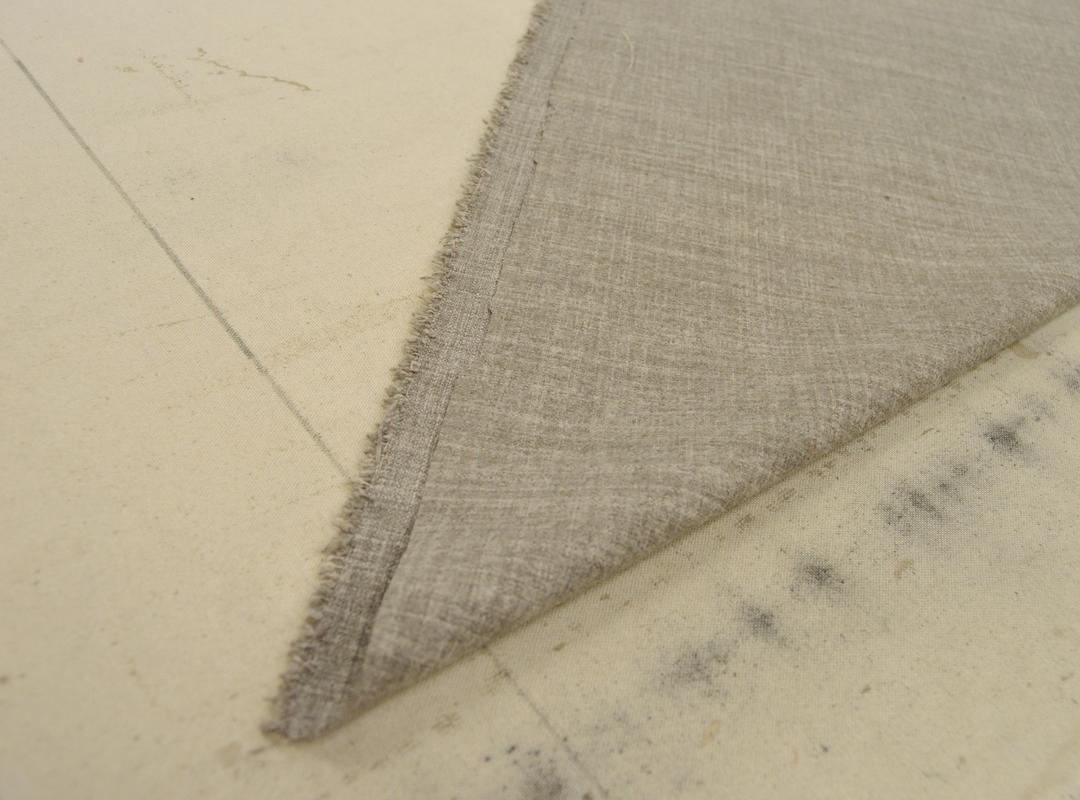 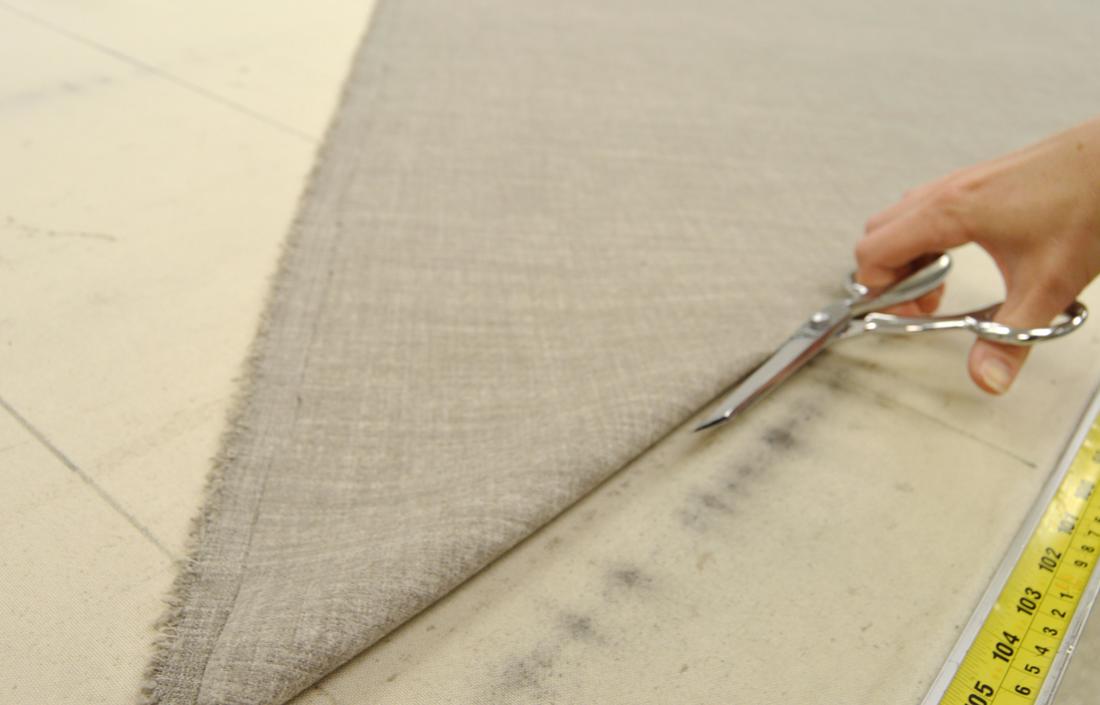 Then, using a fabric marker, draw your cut lines 1 ¾ “ apart using your new diagonal cut edge as a guide. Cut enough strips to cover 140” of cording. 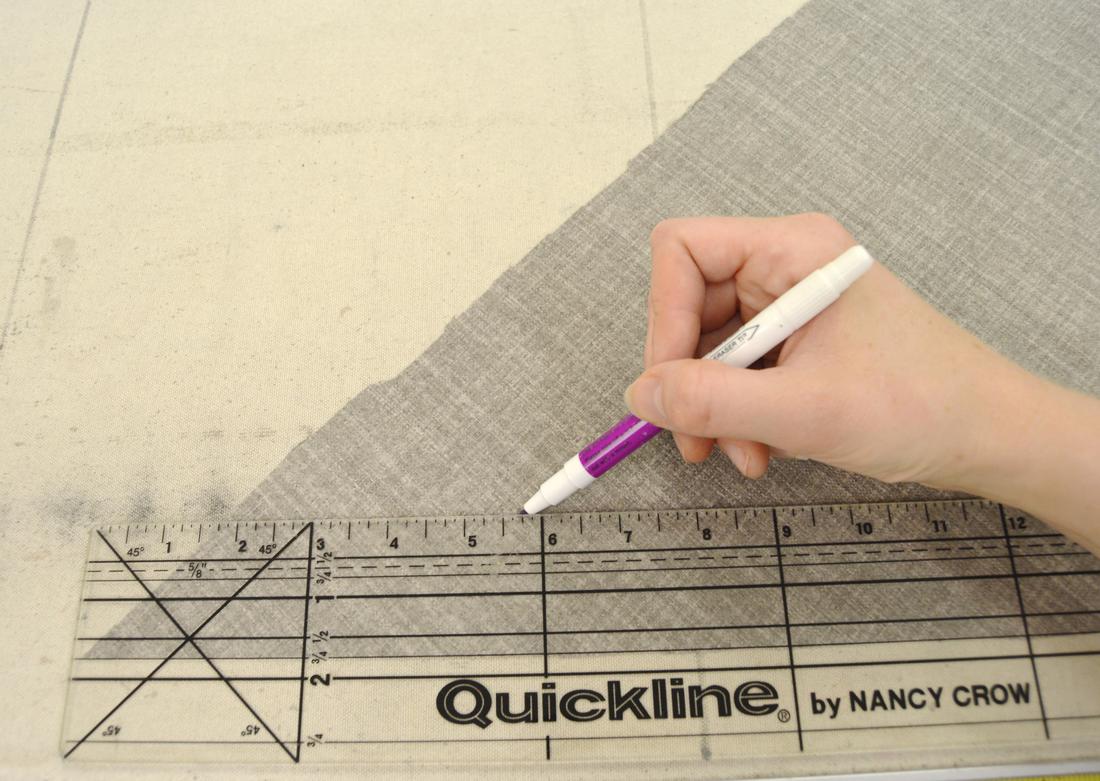 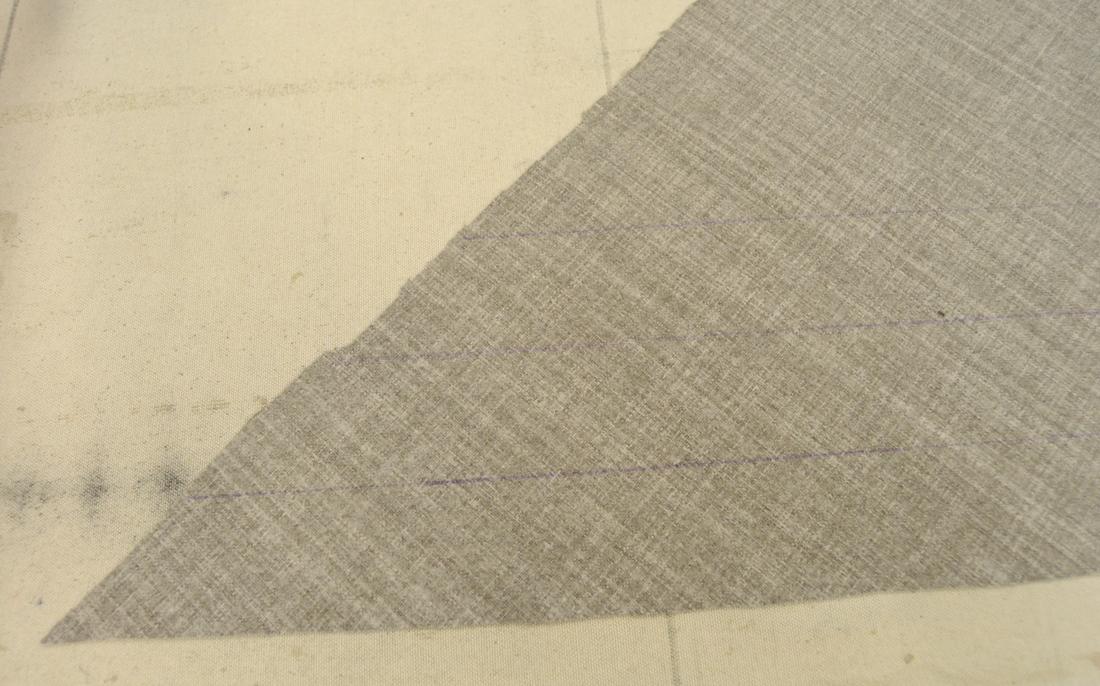 JOINING THE STRIPS After you have cut enough strips, you will need to join the ends. Pick two ends that, when put together, match up like the picture below. 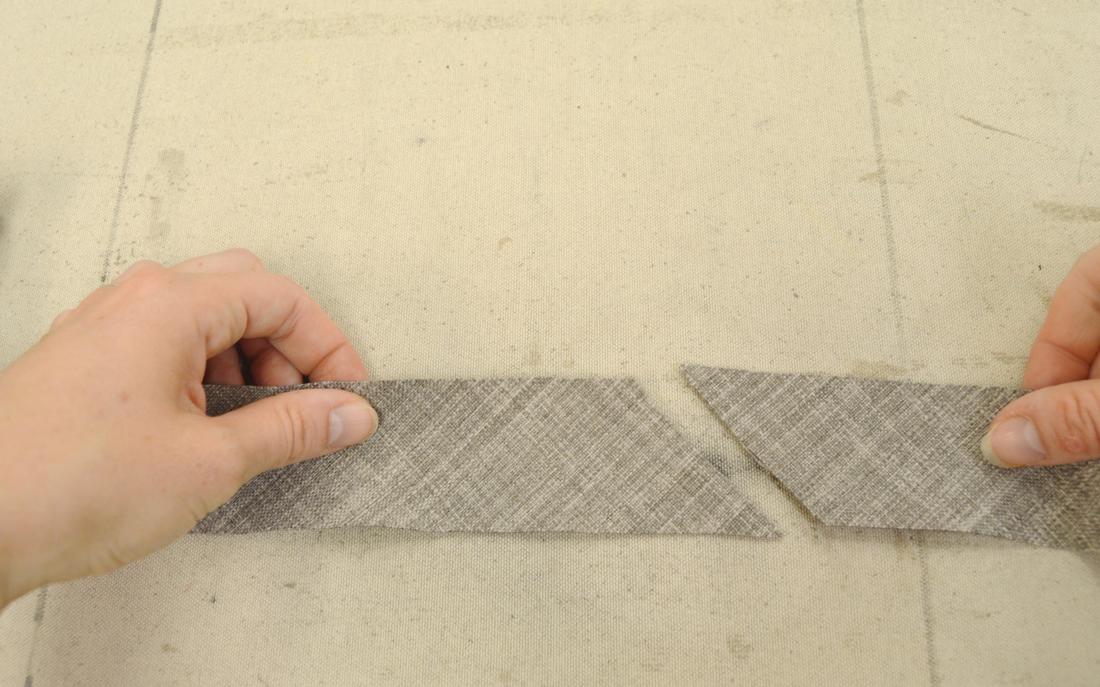 Then turn one strip 90 degrees, and lay it on top with the diagonal edges lined up. Offset them just a bit, so that ¼ “ in is where the edges of your fabric match up. Then sew that ¼ “ seam, and press it open. Join all of your bias strips this way. 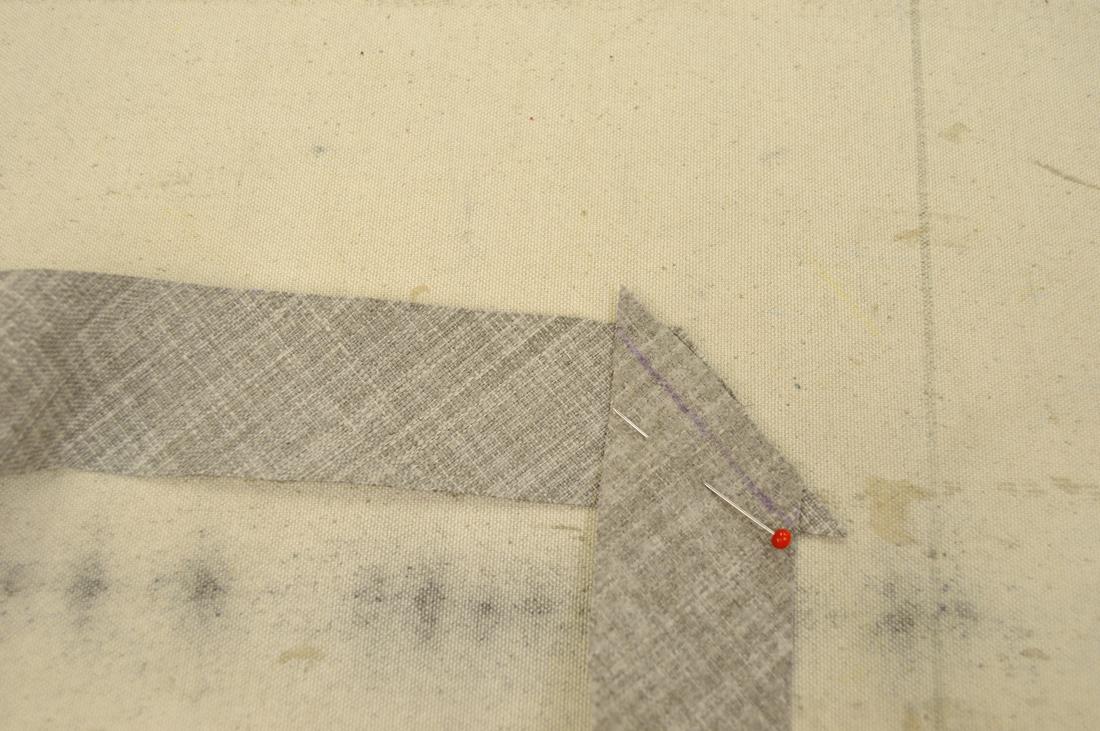 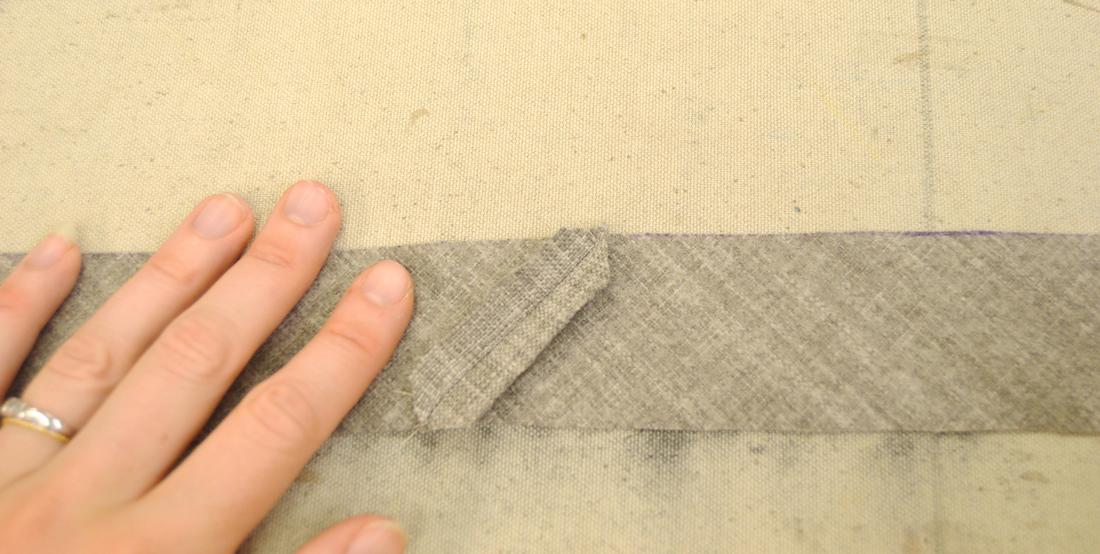 MAKING THE CORDING Once they are all joined, you will make the cording using either a cording foot or a zipper foot on your machine. If you use a cording foot, make sure you are using the correct size (3/16" foot or a 1/4" foot). 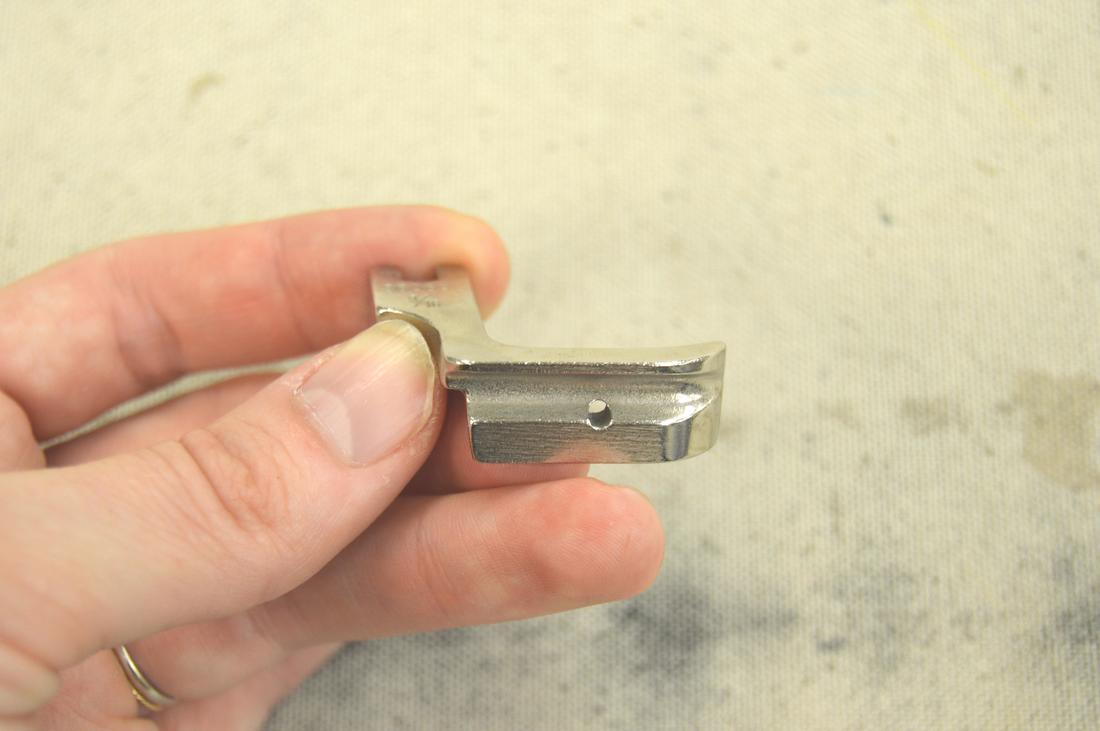 If you are using a zipper foot, try to get up as close as possible next to the cording as you sew (shown below). The strips get wrapped in half around the cord as you go, like the photo below. Make sure you have the right side facing out. 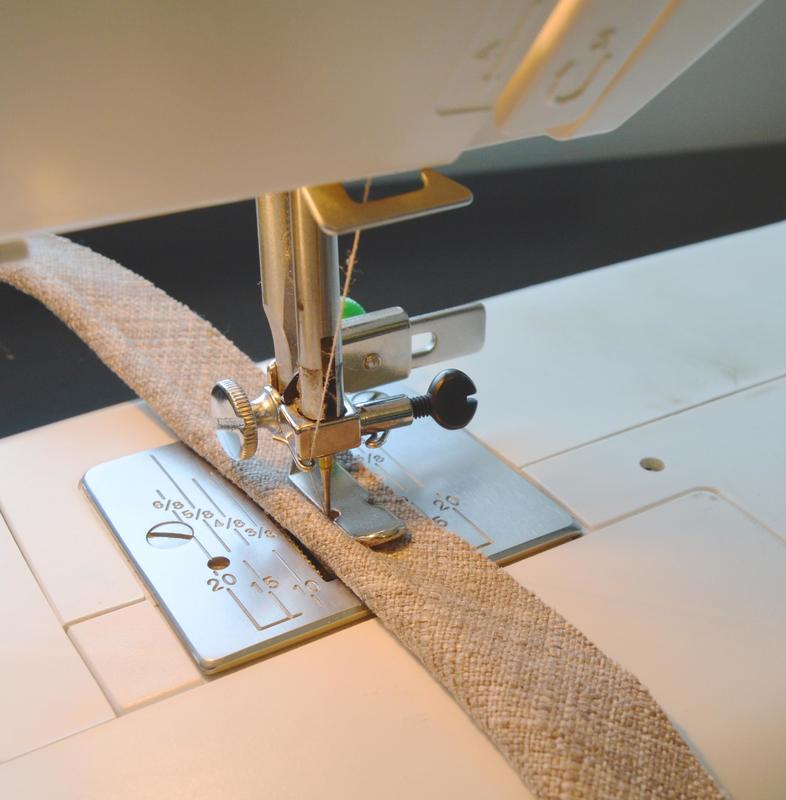 If you are using 5/32” cording, and 1 ¾ “ fabric strips, the leftover fabric that makes up the seam allowance for the cording should measure about ½”, which is perfect. If you have used your own measurements, be sure to cut down your seam allowance to ½” before moving on to the next step. SEWING ON THE CORDING Next, sew the cording onto the front and back of your pillow. Start on the bottom edge of the tombstone, leaving a few inches of cording free before you start stitching. Simply line up the edge of the cording with the edge of your pillow, and sew as close to the cording as you can.
When you get to a corner, or to the curved edge of the tombstone, you will need to clip the cording seam allowance to make it easier. 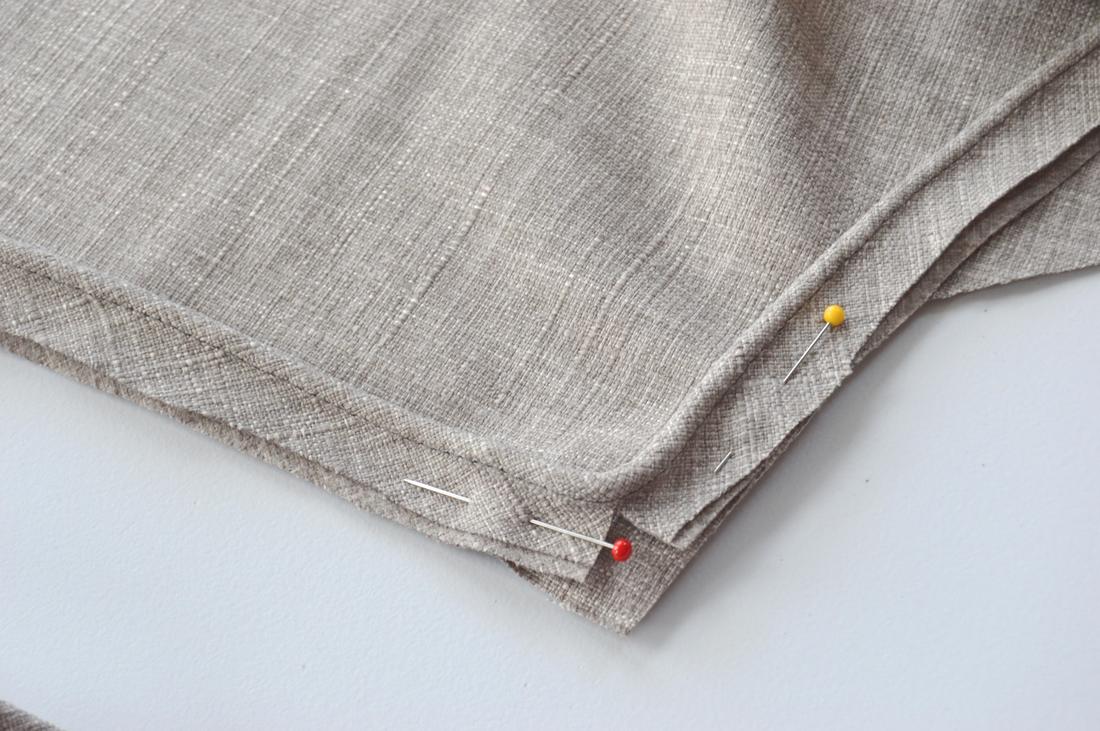 When you get to the bottom of the pillow again, leave a few inches free before you get to where you started. Lay the two ends of the cording overlapping, and cut the ends so that they overlap exactly 1 and ¾“ (it is no coincidence that this is the same size as the width of our bias strips. These measurements should always match.) TIP: If your cording likes to fray, you can use a small piece of tape to keep it from unraveling! 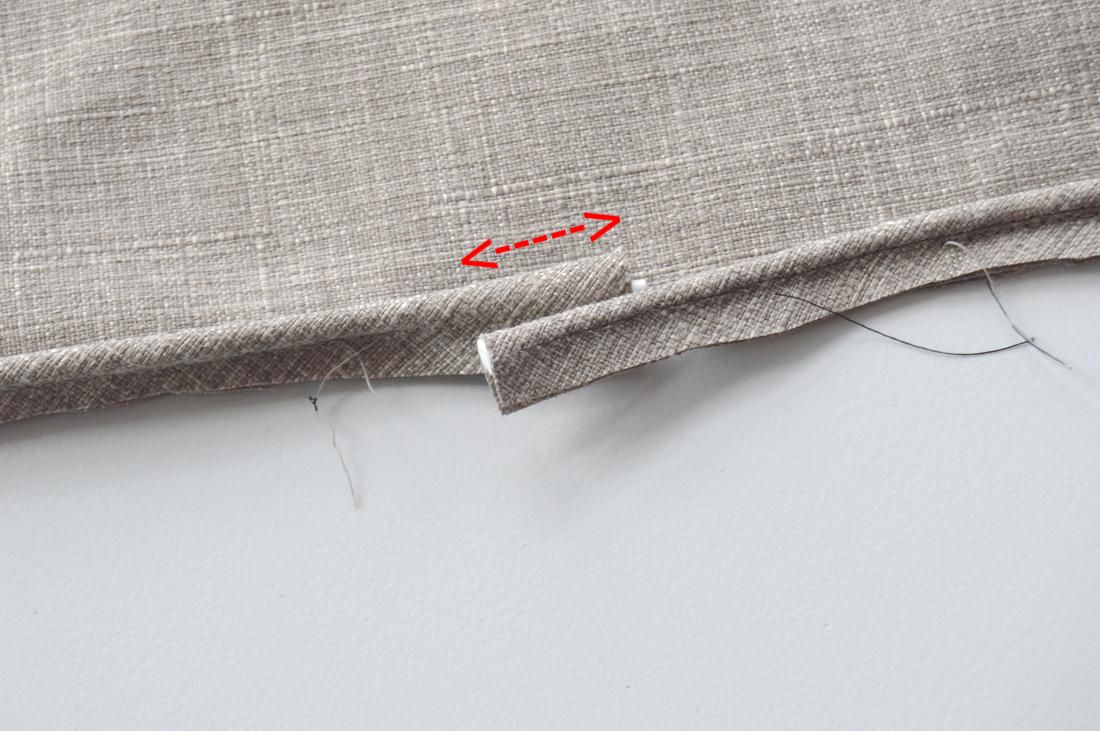 Now take out the stitching of your cording a few inches in each direction, so that you have room to sew the ends together. Match the ends like the picture below at a 90 degree angle, and sew the diagonal. It should look just like the other joins you made for the strips. 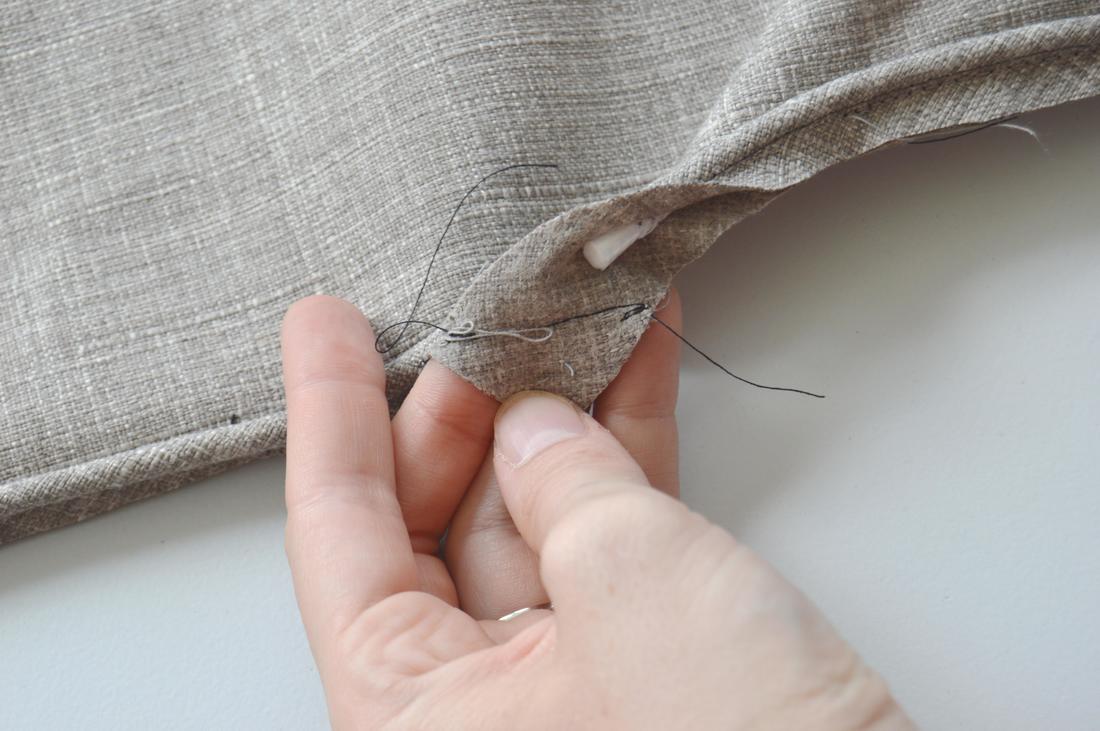 Finally, cut your inside cord so that the ends just meet in the middle, tape them together, and finish sewing the cording to the bottom edge of the pillow like normal. Bam! Perfect continuous cording every time! 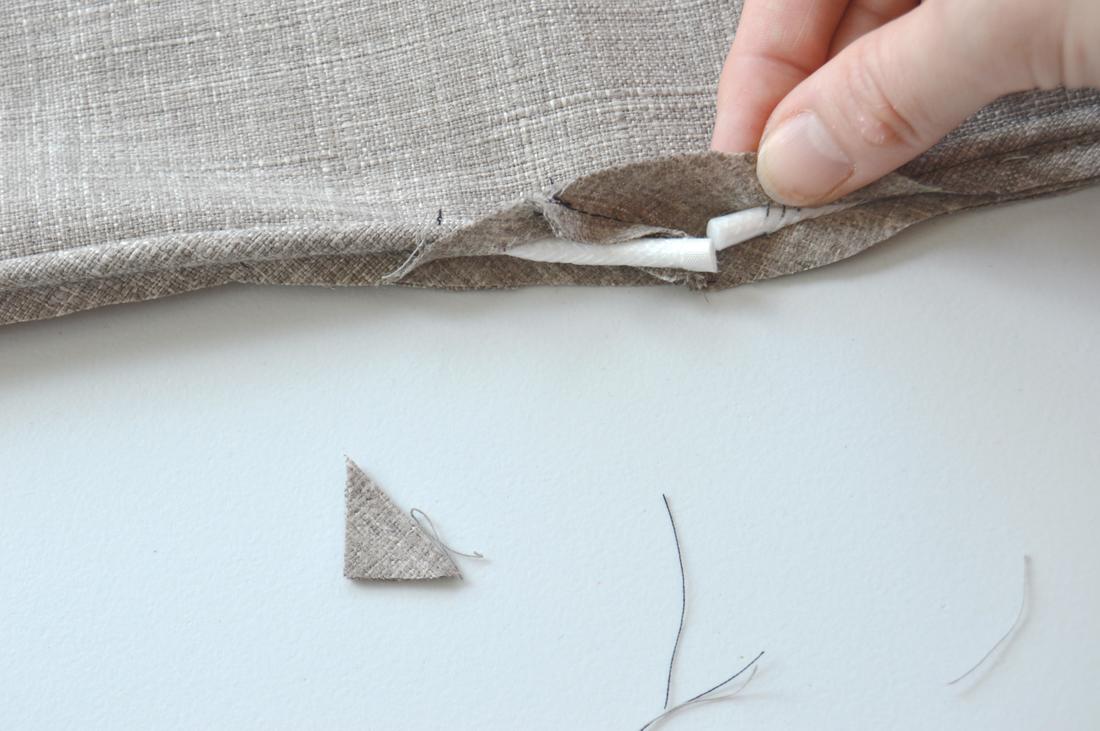 Make sure you do both the front and back of your pillow. 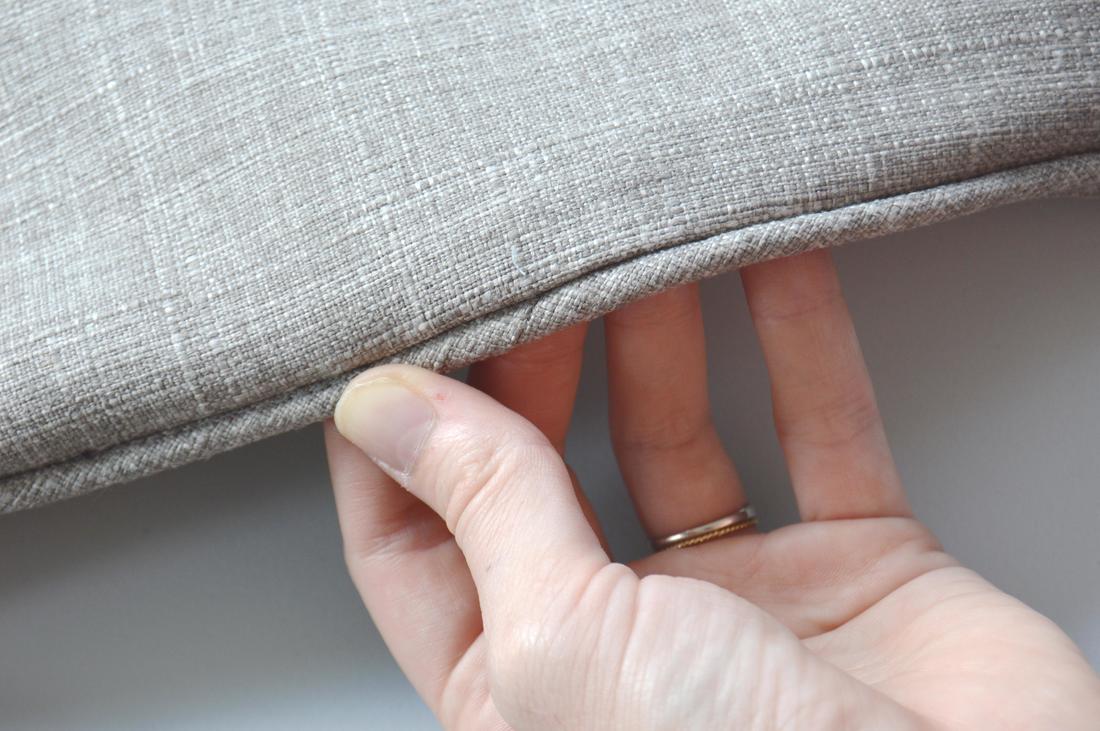
0 Comments
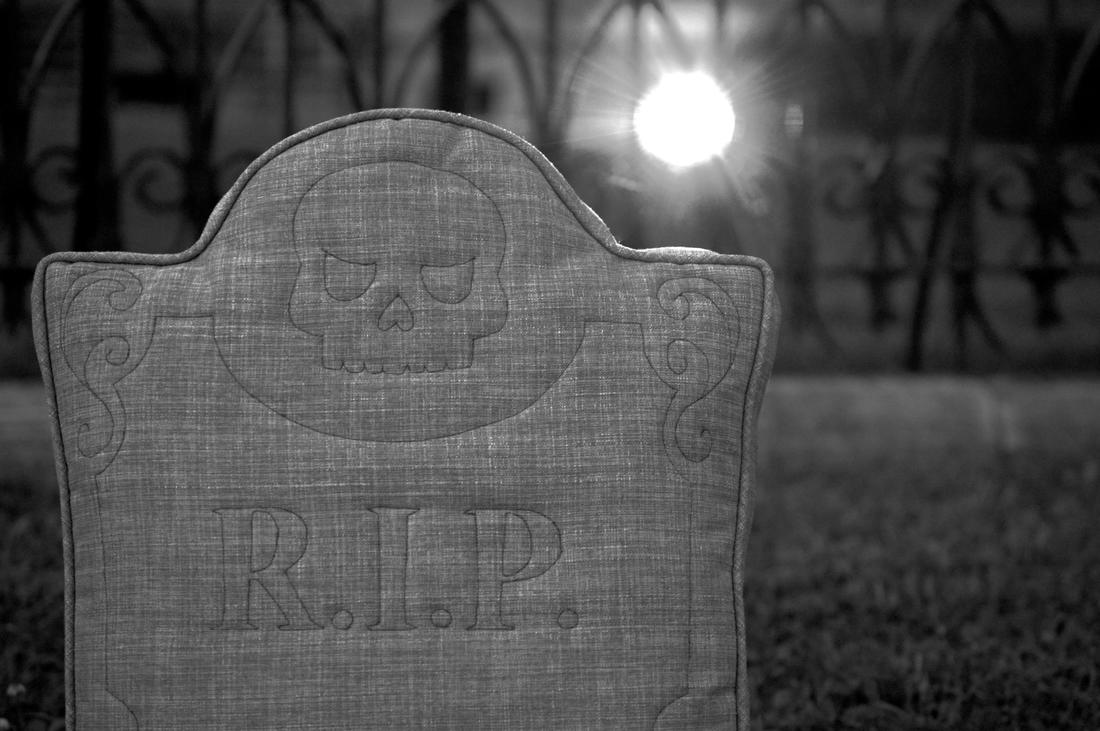
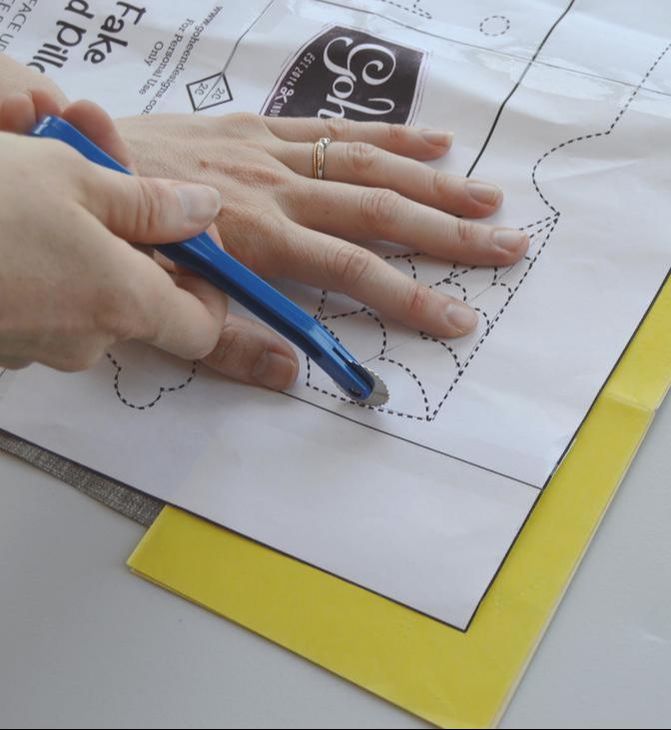
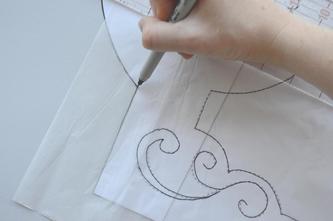
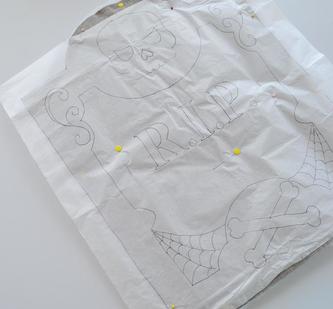
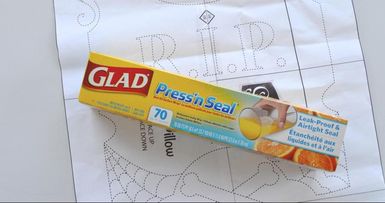
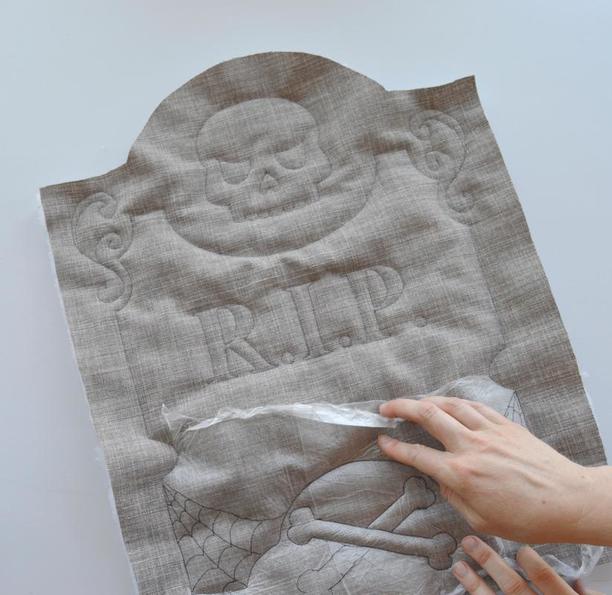 Today on the sewalong, we are getting down to the real business of tombstone sewing. We will be cutting out our fabric pattern pieces, and quilting the front of our "stone". If you missed Part 1 and Part 2, you might want to go back to see what materials you need, and how to put together the PDF pattern. CUT IT OUT! Here is the breakdown of what you need to cut: 2 of Piece A in your main fabric 1 of Piece A in your scrap fabric (this can be the same as your main fabric too if that's easiest) 1 or 2 of Piece A in your batting. Your choice, depending on how much loft you want for your quilted area. I prefer a double layer! 1 of Piece B in your main fabric 1 of Piece C in your main fabric 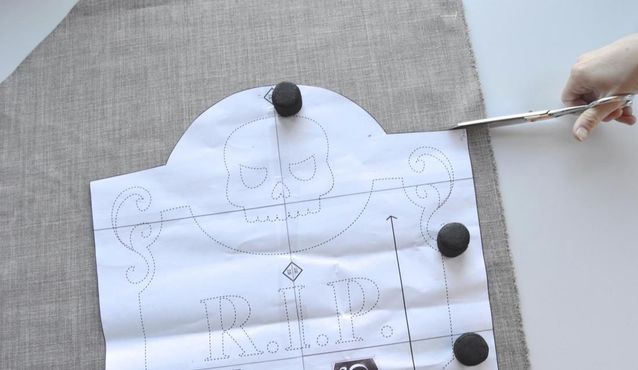 My favorite way to cut out my pieces is to lay the pattern on top of my fabric, weight it down with whatever is handy (this often ends up being a jar of pens, my phone, a stapler, etc) and then carefully cut around it. You could also trace around your pattern pieces with a fabric marker if you prefer, and then move the pattern paper away and cut it out. Sewers choice! Join your B and C pieces at the "corner join" marks. Note: Your boxing (the really really long piece that makes up the edges of your 3D pillow) can be cut out as patterned, or out of one long piece, or if you don’t have pieces of fabric long enough for the pattern, you can join a few together. Simply cut out multiple pieces of the correct width (3.5“) and sew them together (right sides together, ½” seam). There is already one built in seam in the pattern to allow for less fabric waste in the pattern layout. Go ahead and join those now. 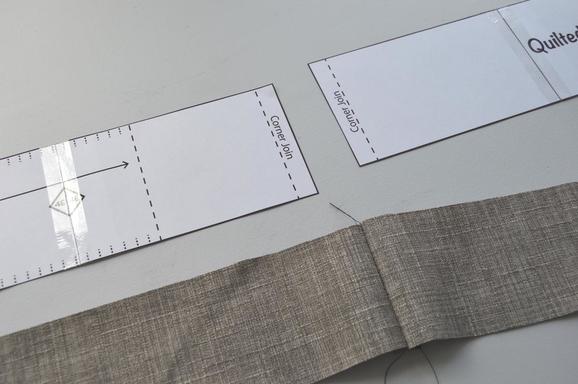 MARK IT! Don't forget to transfer the important marks from your pattern to your fabric. Don't worry about the quilt pattern yet. Just transfer the start/end point onto the RIGHT sides of your two main pieces for A (these will be on opposite corners if both of your pieces are right side up). 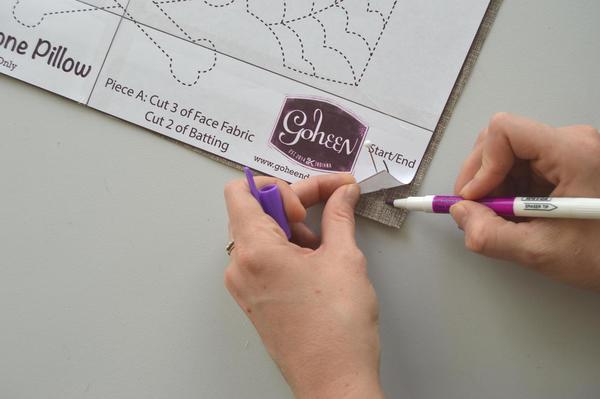 Then for B/C transfer the start, end, and corner lines onto the WRONG side of your boxing strip. The corner marks will help keep your on track while you sew, so that your pillow doesn't get too skewed. Make sure to mark both edges of your strip at these dashed lines. 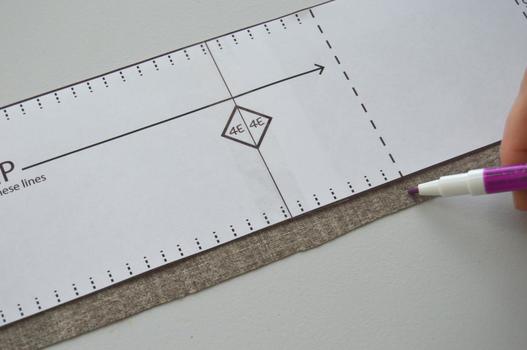 And you will need to clip the boxing in the indicated areas as well. Clipping makes it easier to sew around the curved top of the tombstone. The pattern shows you where, and approximately how far apart to clip. Look for the little dashed lines and the sections that say “CLIP”. Just make sure that your clips are only ½” deep. If it is easier, you can draw a line ½” on the edge of your piece to help you not clip too deep. Note: the pre-clipping is totally optional. You can also clip as you sew around the pillow if you prefer. 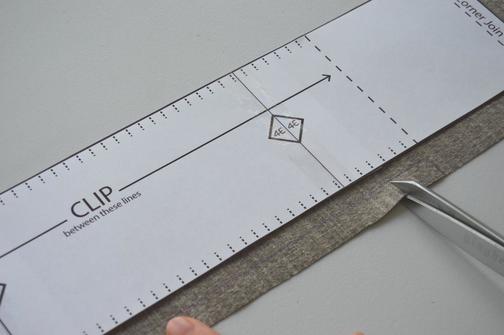 QUILTING YOUR TOMBSTONE Ok now for the fun part: transferring the quilting pattern. There are several methods for doing this, and I've selected three here to demonstrate.
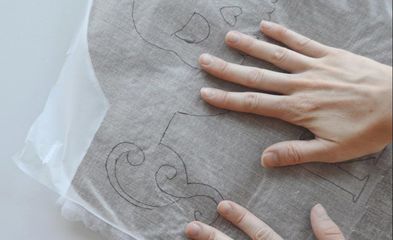
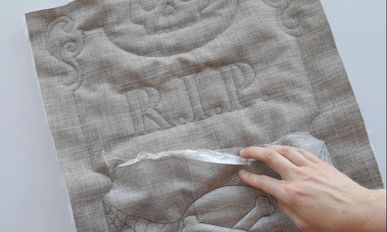
Once you have your pattern traced, and ready to sew, you now create a sandwich: bottom layer is your scrap piece A, then two layers of batting, and top it off with a face fabric piece A, RIGHT side up. Then of course if you are using the press'n seal or tissue paper, that gets aligned on top of that! pin everything carefully in place and get to quilting. Some people use a free motion quilting foot for this part. I'm terrible at this. So I just topstitch it all with a normal foot! I usually set the stitch length a little smaller, and go slow, even hand cranking when necessary to be more precise. Take your time!! This quilting can be time consuming. You can take it in little chunks if you prefer. The next section of the Sewalong isn't for another week, so you can spread this out if you want :) Also, you can always pick and choose which lines you want to quilt. You could always just do an R.I.P. and be done! 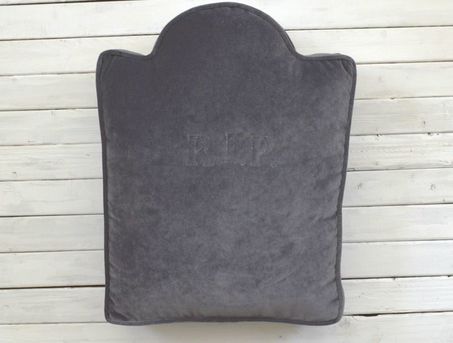 Either way, I'll see you back here in a week! Happy sewing!
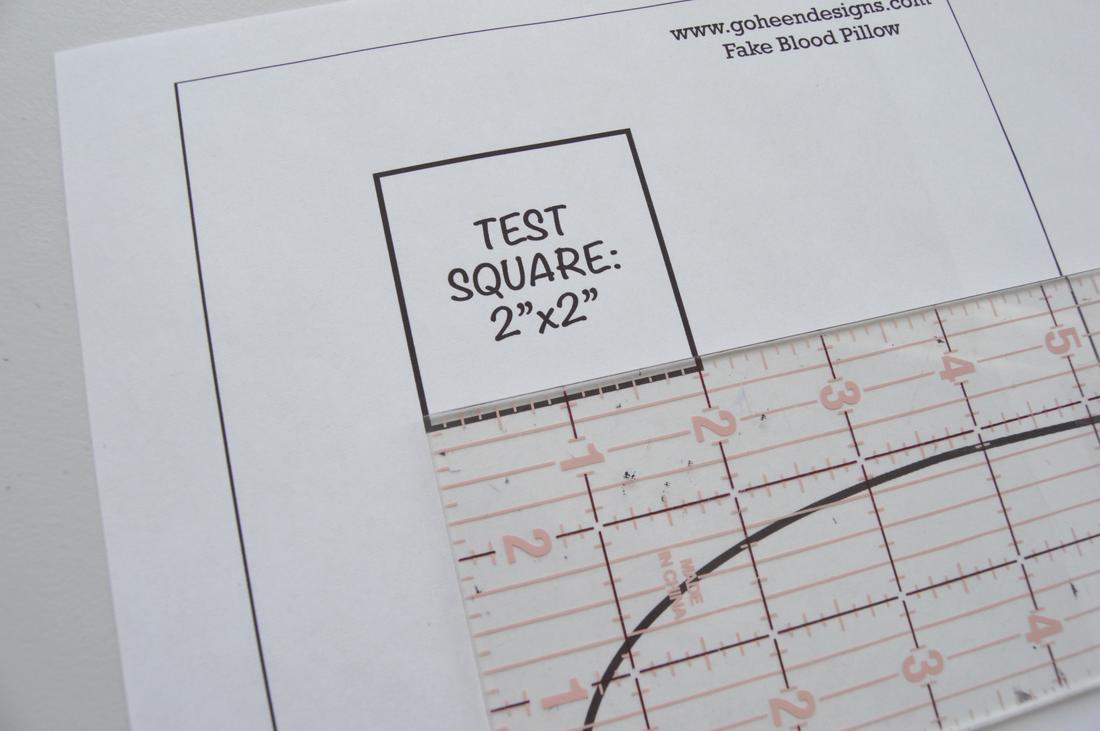
 Welcome to Part 2! Today we will be putting together the pattern! (If you haven't got your pattern yet, click HERE) If you missed Part 1, you will want to go back and check it out because I share all the materials you will need, as well as the schedule for the entire sewalong. LET'S GET STARTED! The first step is to print your tombstone pattern. You will need Adobe Acrobat to open it... When you go to print, make sure that you set your printer guidelines to "actual size" so that your compater doesn't change the size of the image on you. Although with a pillow it's not the end of the world if it comes out a bit small, this can be a big issue with garment patterns, so you should just get in the habit of doing this anyway :) 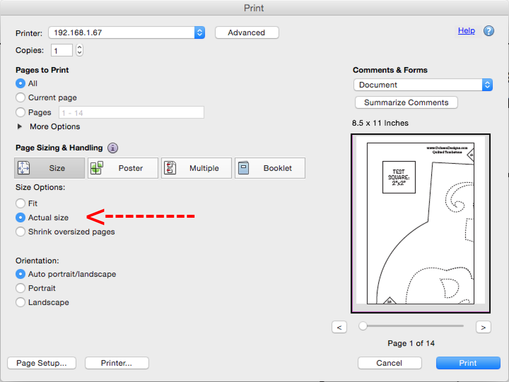
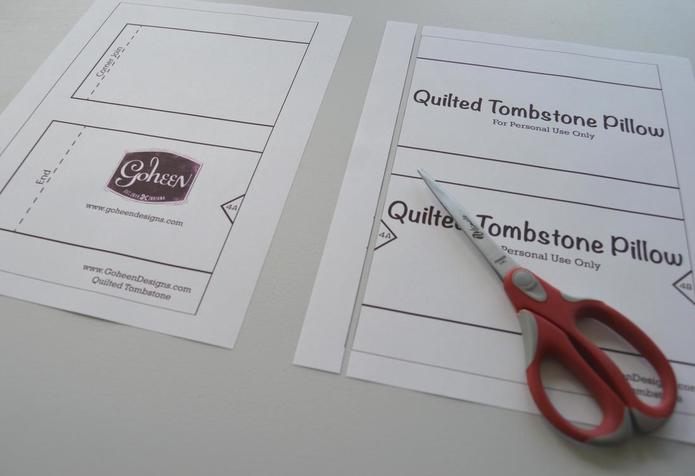
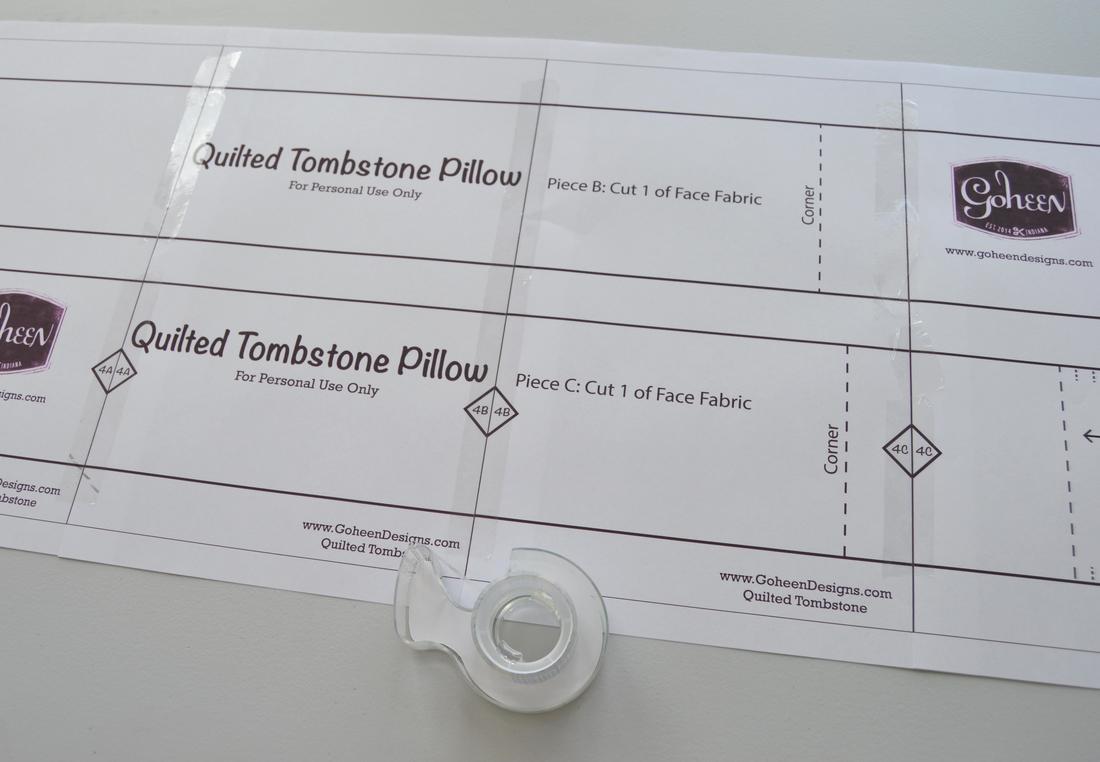
Now take a look at the photo below. This is what we are aiming for when your pattern is all put together. You can refer back to this picture if you aren't sure that you got it right. 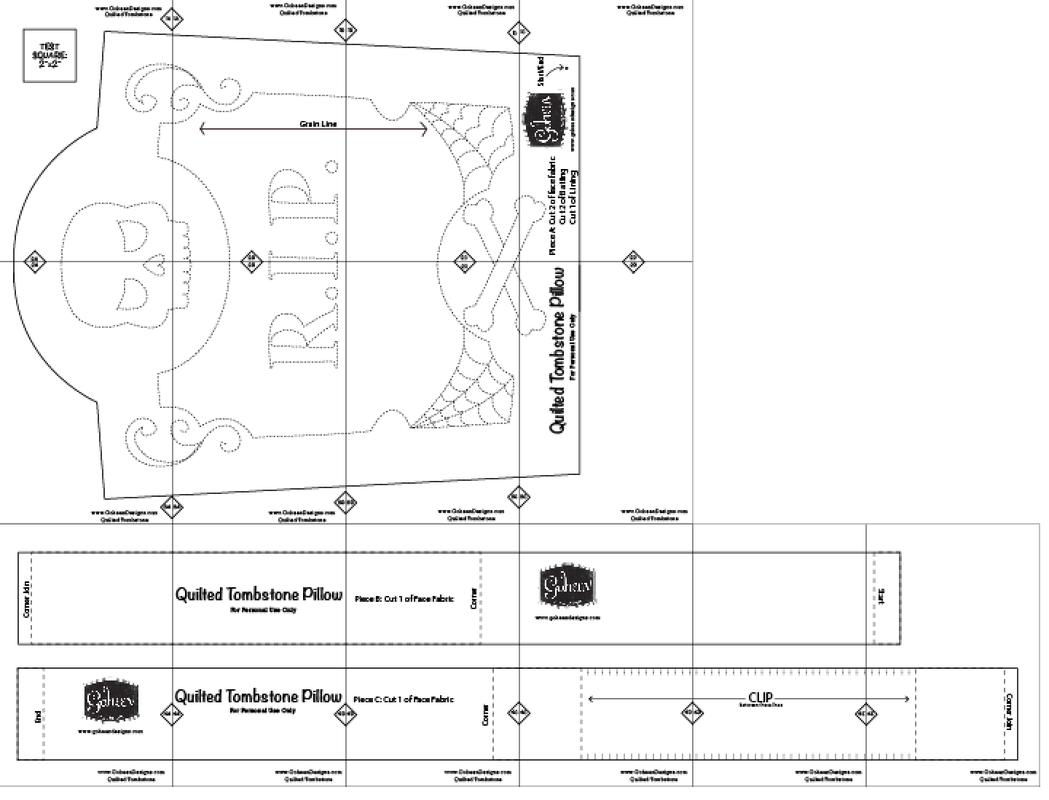 Lay out all the pages so that all the numbers and letters in the diamonds match up. A1 with match with A1 and so on. Once you have the pages in the right order, we can start trimming and taping them. Take the top row, and cut off the extra border along the left side of each of the pages. Then you can tape those cut edges on top of the extra borders still on the right sides of the pages, making sure to match up the diamonds, and any pattern lines.
Once you have each of the rows across done in the same way, you can tape together the rows by cutting off the bottom edge border of the top row and taping it onto the top of the row below. Once you have them all taped together, you can cut out your individual pattern pieces. And now your pattern is ready for use! 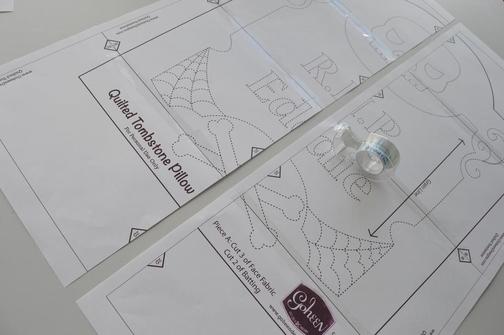 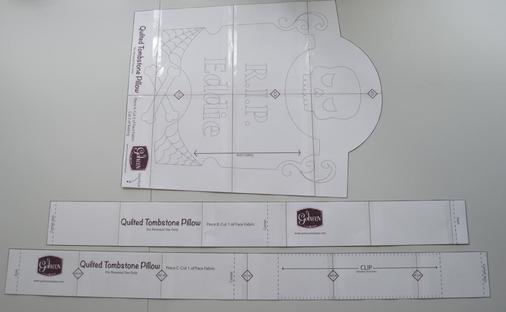 I'll see you back this weekend for Part 3: Cutting out the fabric and quilting the front. Extra tip: I just came across this video by Elizabeth Made This through a Closet Case Patterns Maker Journal email. She shows a great tip for putting together your PDF patterns even faster! Don't Forget: Look at Part 1 for a list of all the materials you need to gather for this weekend!
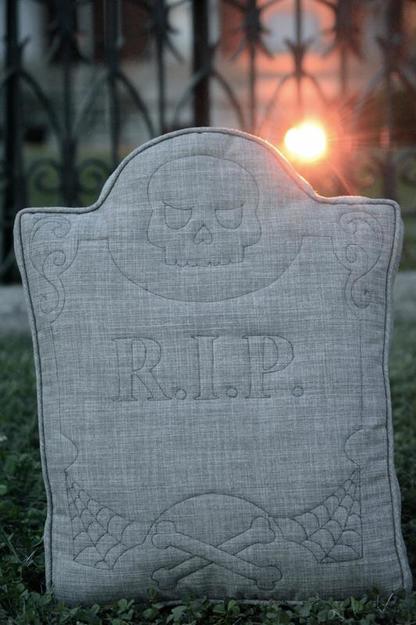
Also, you can ask me questions, and share your techniques and advice with other sewists following along as well! You can leave comments and questions here on the blog, in our Goheen Patterns Sewing Group on facebook, or on instagram with the hashtag #TombstoneSewalong. 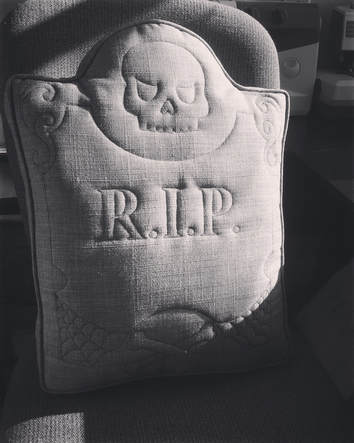 HELLO! Hello and welcome to the Tombstone Pillow Sewalong! It's time to start thinking about Halloween decorations (I just got mine out of storage today!) and this creepy pillow is a great addition to any spooktakular home setup! If you don't have your own copy of the pattern yet, you can pick it up in the Goheen Pattterns shop, or in my GreenGraves Etsy shop. If you would like to order a custom Tombstone (you get to pick what the epitaph is) I can do that too! The Tombstone Pillow Sewing Pattern is rated CONFIDENT on my sewing levels chart. This means that you sew on the regular, are familiar with sewing patterns, and you know your sewing machine like the back of your hand! Basically, if you have never sewn anything before in your life, this one might not be the pattern to start with. HOW IT WORKS Over the next few weeks, I'll publish a series of blog posts taking you step by step through the entire process of making your own tombstone, from PDF pattern to finished pillow. You can sew along with me, ask me questions, and share your techniques and advice with other sewists following along as well! You can leave comments and questions here on the blog, in our Goheen Patterns Sewing Group on facebook, or on instagram with the hashtag #TombstoneSewalong. I'll try my best to answer any questions as quickly as I can, but feel free to jump in and help each other out too! SCHEDULE The Tentative Schedule for the Sewalong is: Aug 17th - Part 1 - Intro, Gathering Materials Aug 20th - Part 2 - Putting together the pattern Aug 23rd - Part 3 - Cutting out the fabric, and Quilting the front Aug 30th - Part 4 - Making cording and Sewing your tombstone together Oct 7th - Part 5 - Flipping, Clipping, Stuffing, and Closing your pillow Show off your finished pillows! To be featured, email me a photo at [email protected] or use #TombstoneSewalong So if all goes according to plan, you will have a finished decoration by Oct 7th! Plenty of time to use it for Halloween 2017! GATHERING YOUR MATERIALS Materials and Tools you need by Aug 20th, for Part 2: - The pattern (available in the pattern shop) - A way to print the pattern (printer at home or at a copy shop) - Paper Scissors - Clear Tape - A ruler or measuring tape Materials and Tools you need by Aug 23rd, for Part 3: - 1yd (1 meter) of any 40-60" wide woven fabric, prewashed. I love using a nice textured grey fabric from the home decor section! - 1/2 yd (1/2 meter) of "lining", prewashed. This can be any fabric at all, it will not be seen on the outside of your tombstone, so it is a great stash buster. - 1/2 yd (1/2 meter) of any quilt batting (18"x22" for you scrap busters) - Thread - Contrast Top stitching Thread (black thread is great on a grey tombstone) - 145" of 5/32 of welt cording (370 cm) Etsy is a great place to find this if it's not at your local craft store. You can also sub in 5/32 inch clothesline found at a hardware store or even a grocery store! - Fabric Scissors - Fabric marker/chalk - Sewing Machine - Pins - Handsewing Needle - Skinny Black marker - Press and Seal OR Transfer Paper OR Tissue Paper That's it for now! I'll see you back for Part 2 on the 20th! Let me know if you have any questions about gathering materials! |
madeline stage
creative business owner. designer. hoosier. crafter. runner. sewer. swing dancer. outdoor enthusiast. entrepreneur. wife. mom. material hoarder. Categories
All
Archives
June 2023
My Instagram Feed:
@GoheenDesigns |
 RSS Feed