
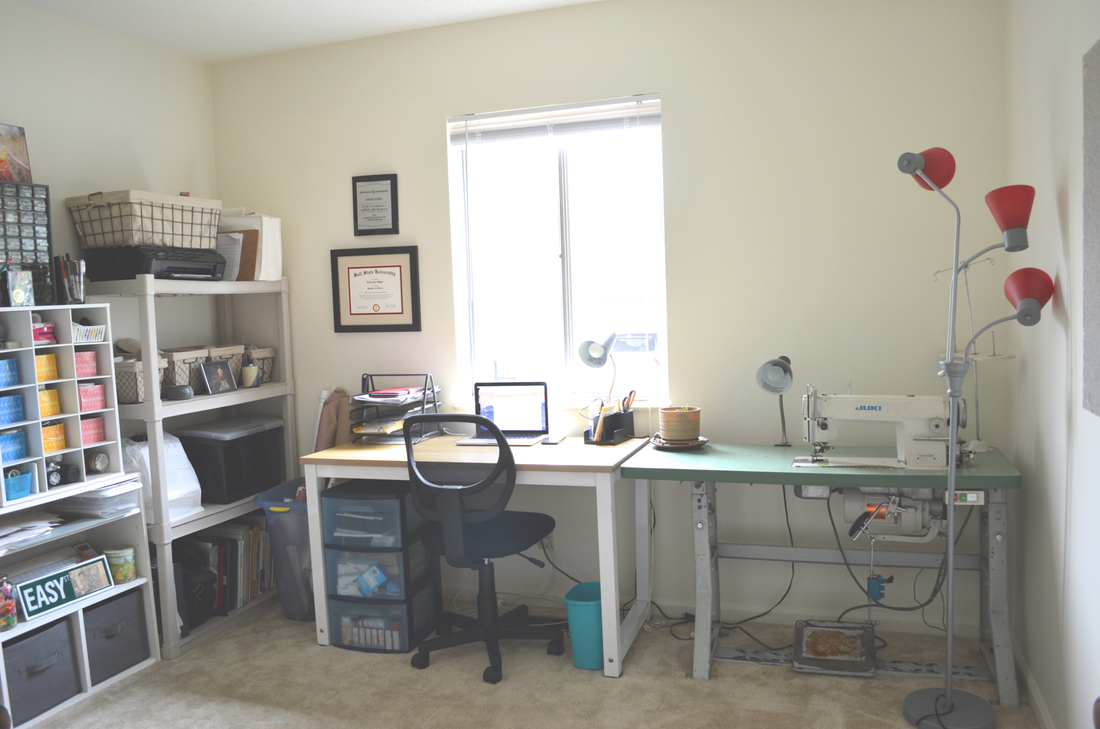
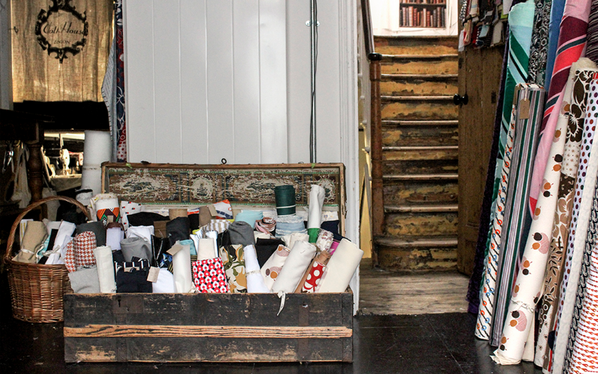
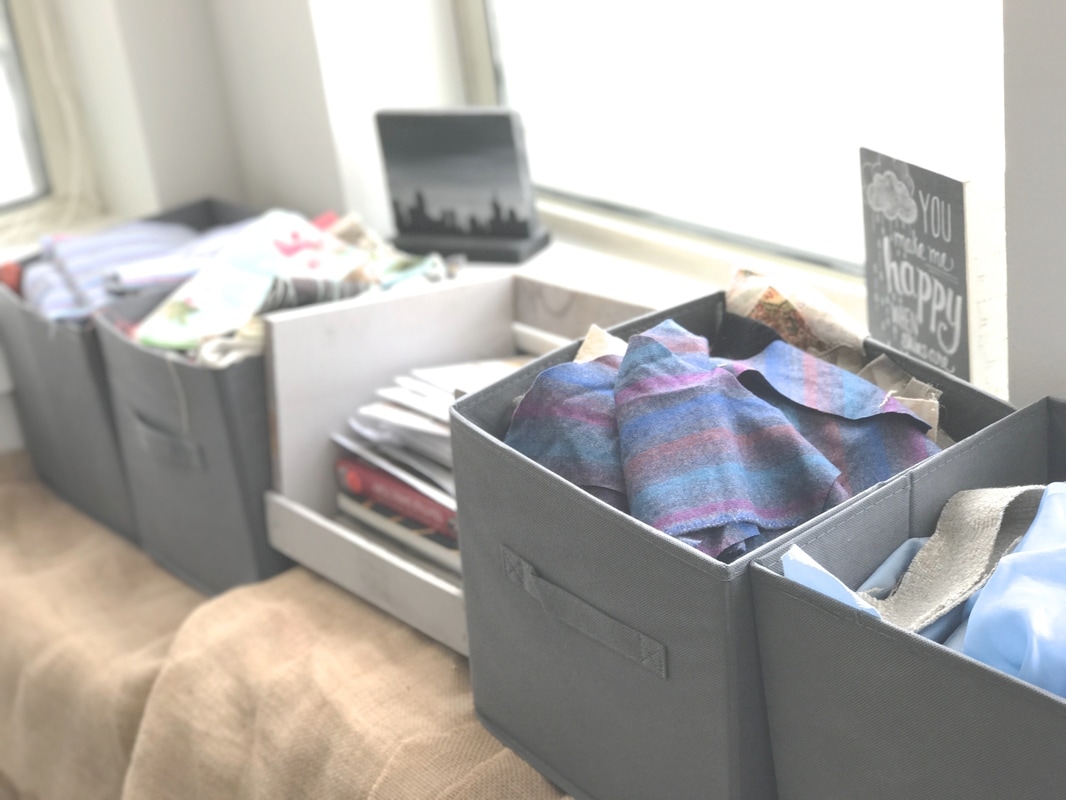
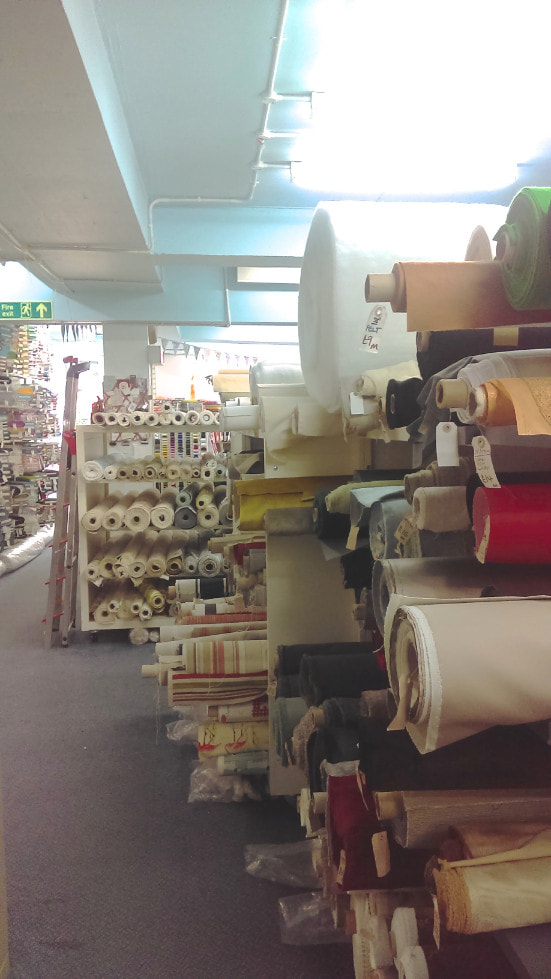
 Along with having a baby in July, we also moved apartments. I'll spare you the long dramatic story of the stressful moving. Here's the short version: newborn baby + postpartum packing + new apartment issues + cockroaches + moving everything we own three times + breaking the new lease + living out of an empty apartment + finding a new apartment last minute. Fun stuff. But the end result is that we now have a great new apartment in the suburbs of Indianapolis. And it has TWO BEDROOMS. Yaaasssss! With all of my business stuff taking up so much room in our apartment, we knew that adding in Finnegan and all his baby stuff would mean needing more space than our downtown one bedroom. And because Finn is sleeping in our bedroom, and doesn't actually need his own space yet (we rarely tell him to "Go to your room!") the second bedroom is officially the craft room! And I cannot be more excited. I've never actually had a craft room before! Between lots of feedings and nap times, I've finally managed to put all of my stuff into some sort of semblance of organization, and I'm ready to give you a tour! 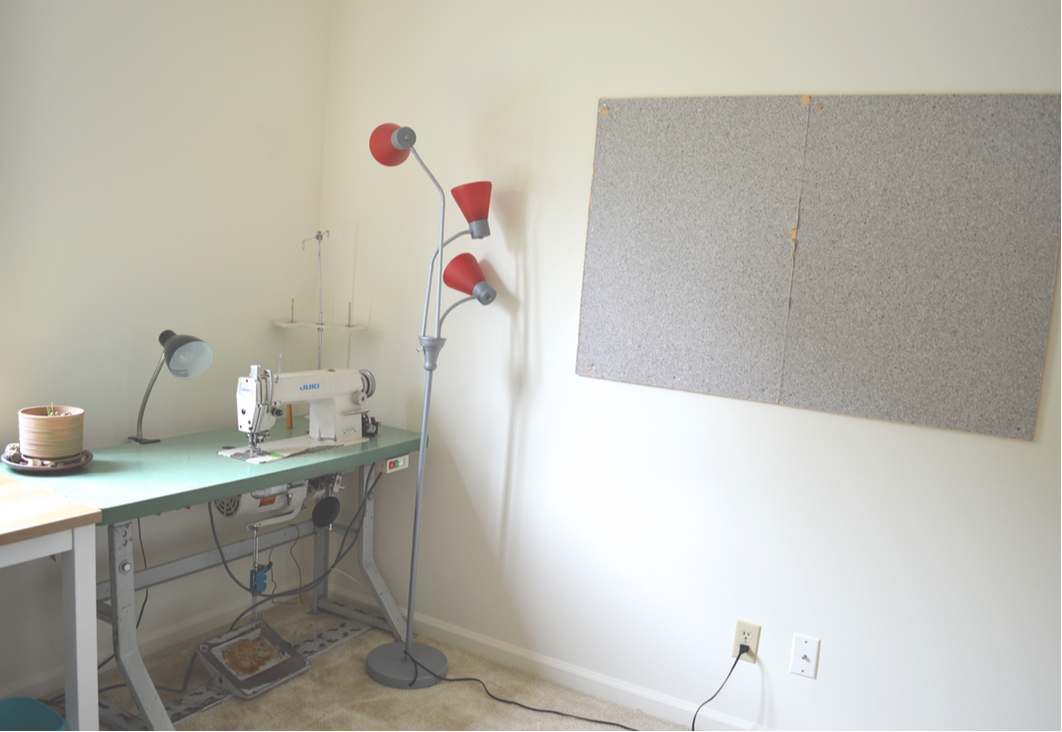 Starting off on the right side of the room, I've set up my industrial machine, along with giant cork boards on the righthand wall. The space in front of the wall is where I'll put up my 6 foot folding table when I need to, for cutting and paper patterning days. To the left of my industrial machine is the desk, which is actually a shared desk for both me and my husband.   Just to the left of the desk, I have my large paper patterns. These are my own designs, and also the printed out PDF patterns that I've bought. I roll them up, rubber band them, write the name of the pattern on the outside, and store them standing up in this laundry basket, along with my large roll of patterning paper.  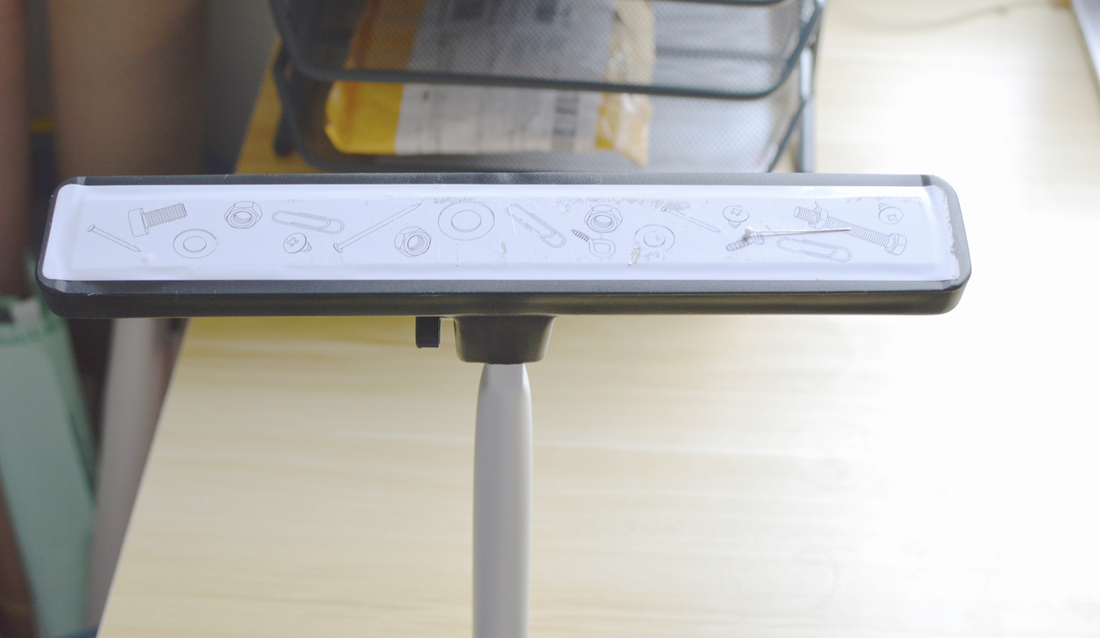 I also have my new magnetic sweeper stored here. It's a telescopic pick up tool meant for nails and screws that I got from the hardware store. I use it to sweep along the floor and pick up any loose pins that I may have dropped before I vacuum (or before Finn comes in to play). 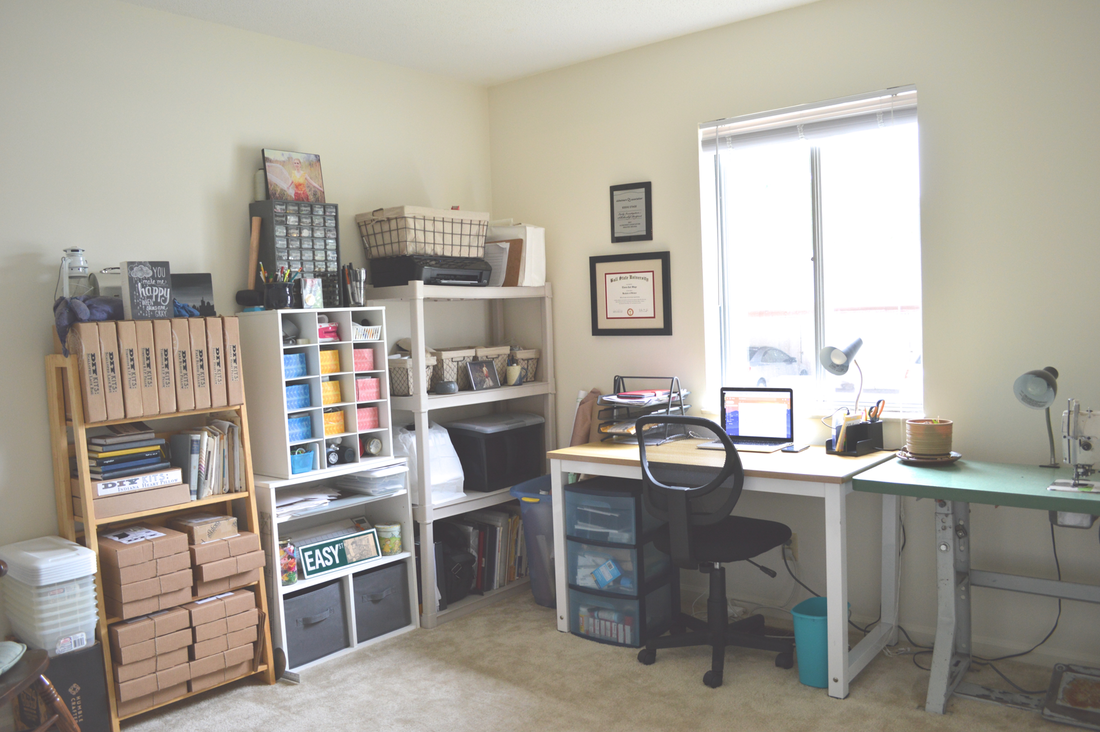 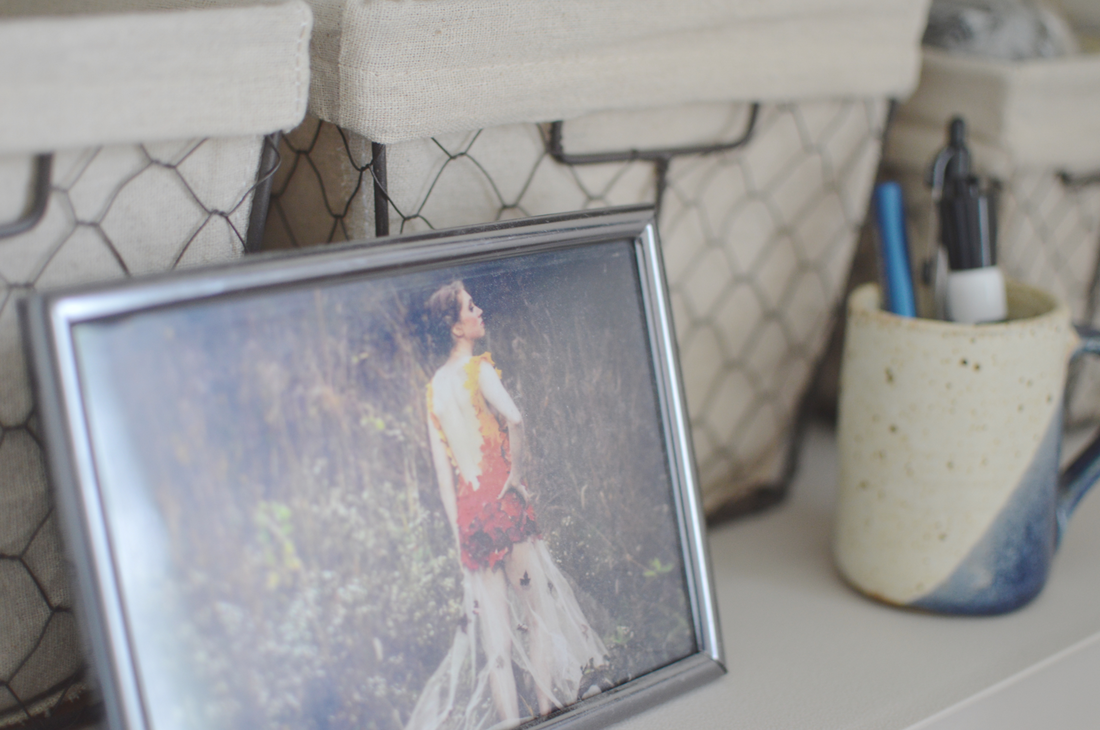 Next is the big utility shelf in the corner. On the bottom I have all of my sewing books and magazines, along with my camera. The next shelf has my serger and our filing box. Up one more has four cute baskets full of different odds and ends (one is full of zippers, one is full of everything I need to tag and price my physical products, etc etc). The top shelf has my Huskystar sewing machine, the printer, and the large basket full of all my shipping supplies. 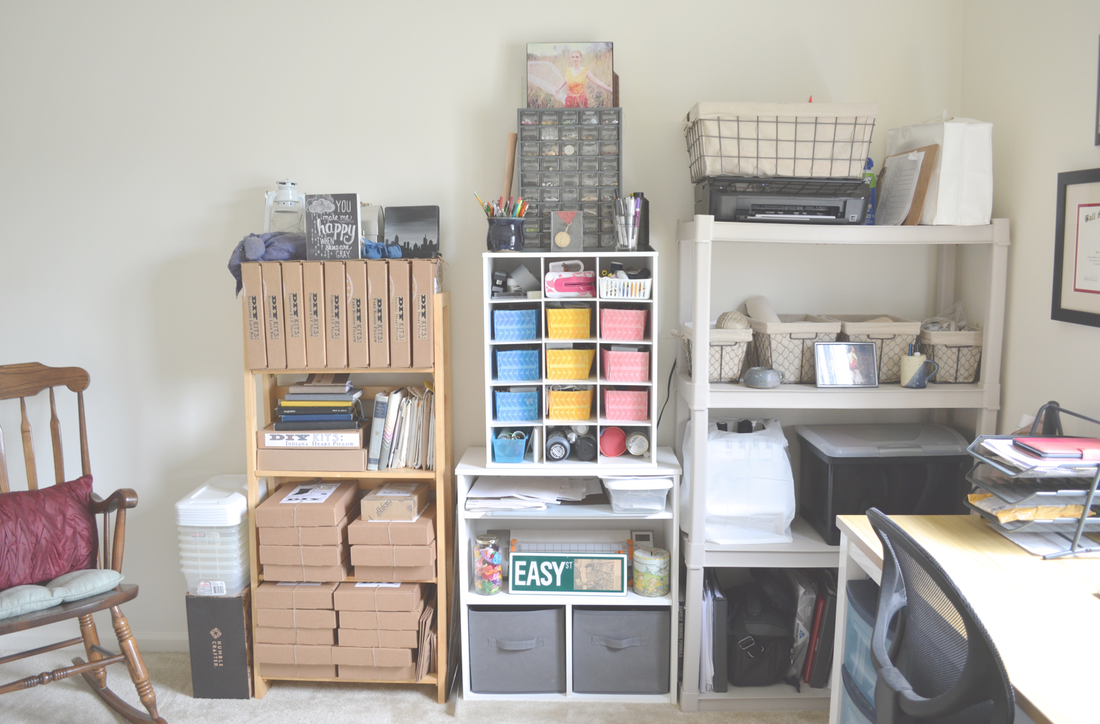 The setup to the left of the utility shelf is kind of a catch all storage unit. Anything from needles to rivets to chalk paint to elastic to buttons to glue is stored here. The top part is a hardware organizer that I picked up at the thrift store and the white middle section is actually a shoe cubby, and my colorful boxes that I use for drawers? Kleenex boxes. It's the only thing that I could find tat was the right size when I first set it up. To the left again, we have the kit shelf (also I store my rulers in between these two shelves). All my DIY kits that are ready to go, along with the supplies I need to put the kits together are stored here. And then also my notebooks and my enveloped sewing patterns. 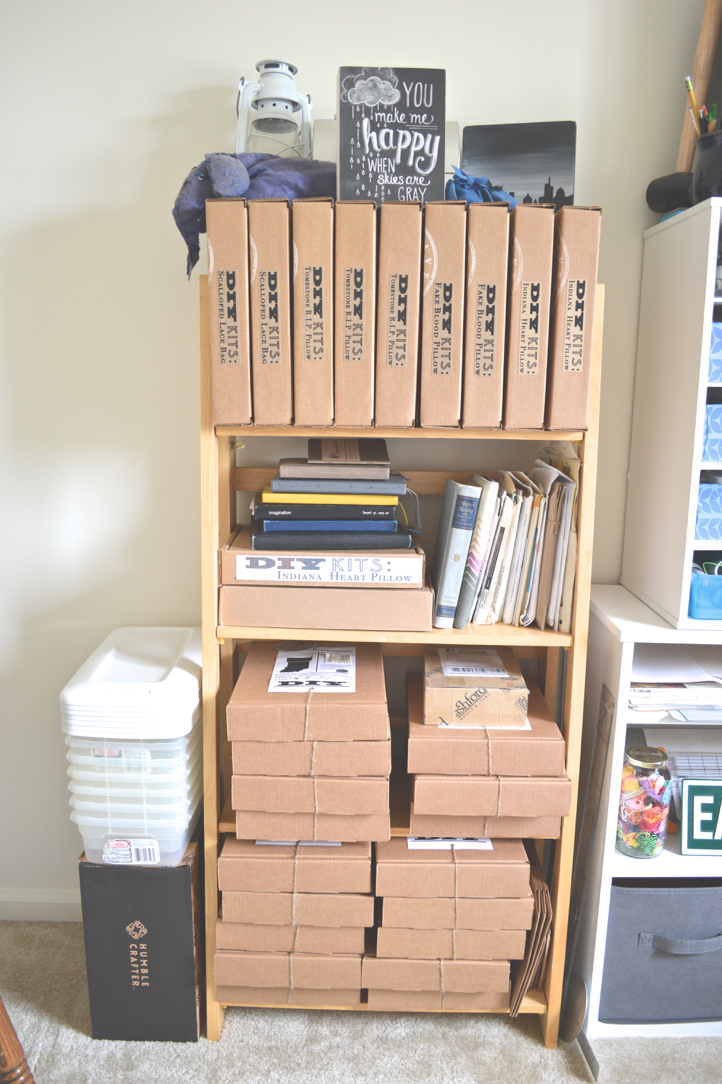 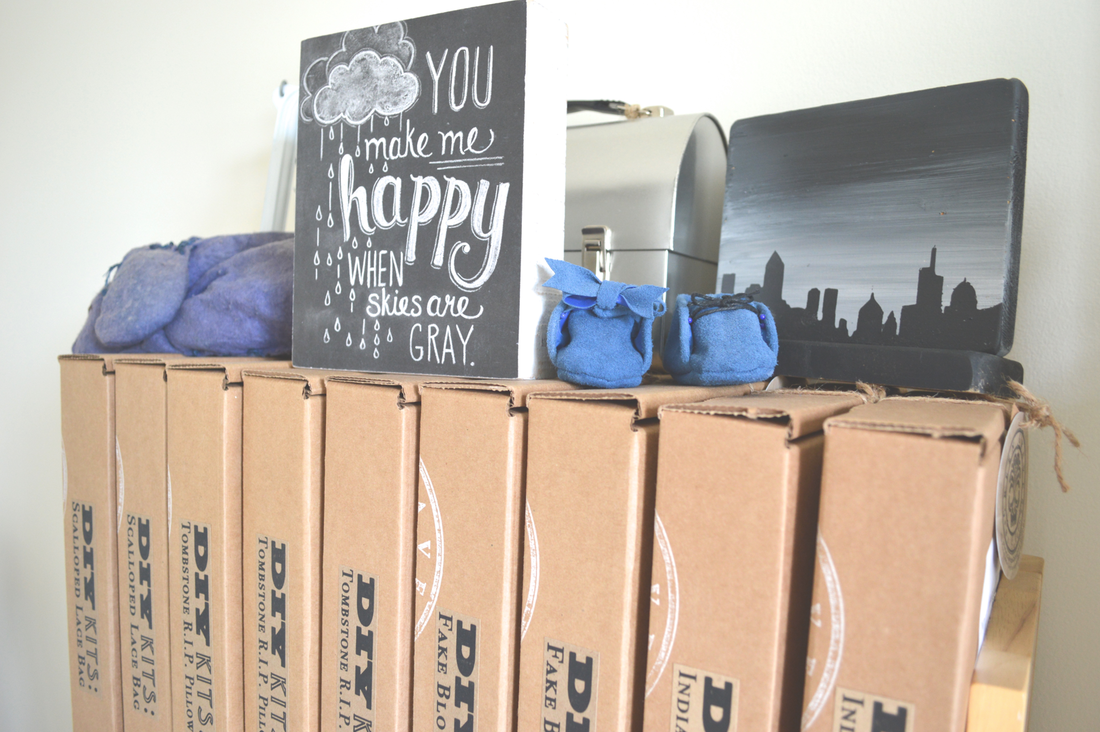  The last wall of my craft room has my mannequin, my spinning wheel, and the rocking chair (according to Eddie it's so that he can feed and rock Finn while visiting with me while I work. Or vice versa.) 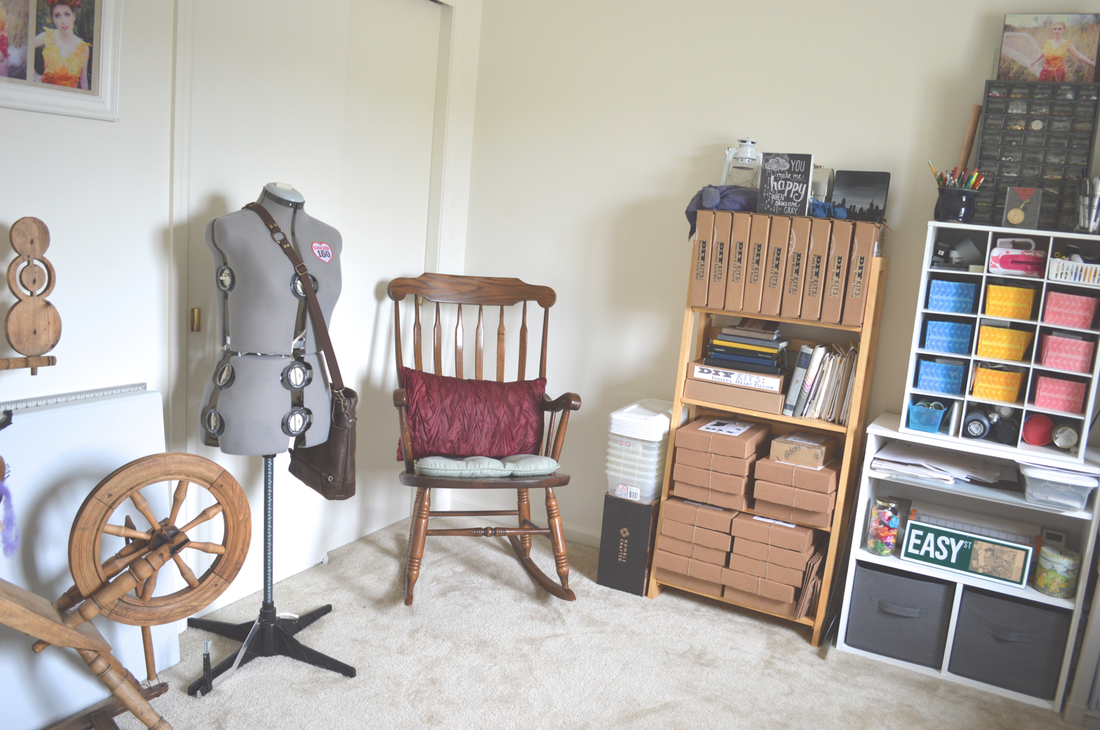 Hidden behind the rocking chair is the closet for this room. Which is STUFFED with all the rest of my sewing supplies. It actually reminds me of this dorky show I used to watch as a kid called Zaboomafoo with this now-terrifying puppet lemur. The Kratt brothers would always have to get into this closet to find something and everything would fall out every time. I'm not QUITE at that point yet, but I'm gonna have to watch myself. Here's a peek inside. The baskets have different types of fabrics in them that go to specific products, and the hangers are full of the rest of my selection of fabrics (that I have here with me. I have a ton more at my parents house. Sorry mom! I love you!) The top shelf of the closet is full of already made products ready to be shipped out or head to a craft show. 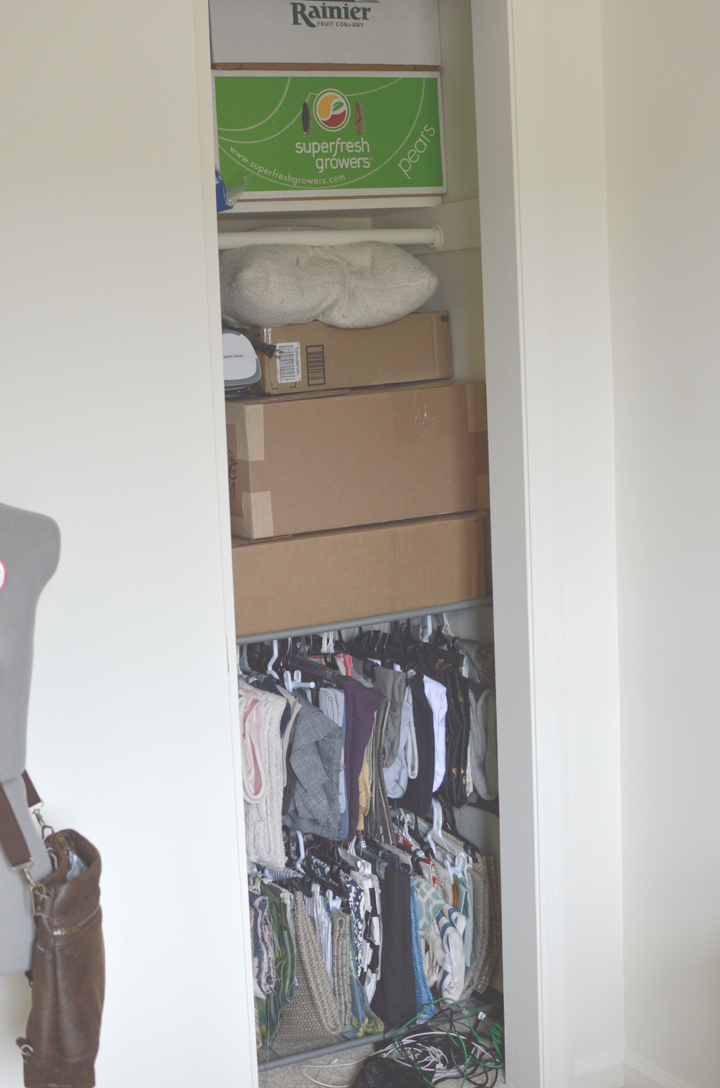 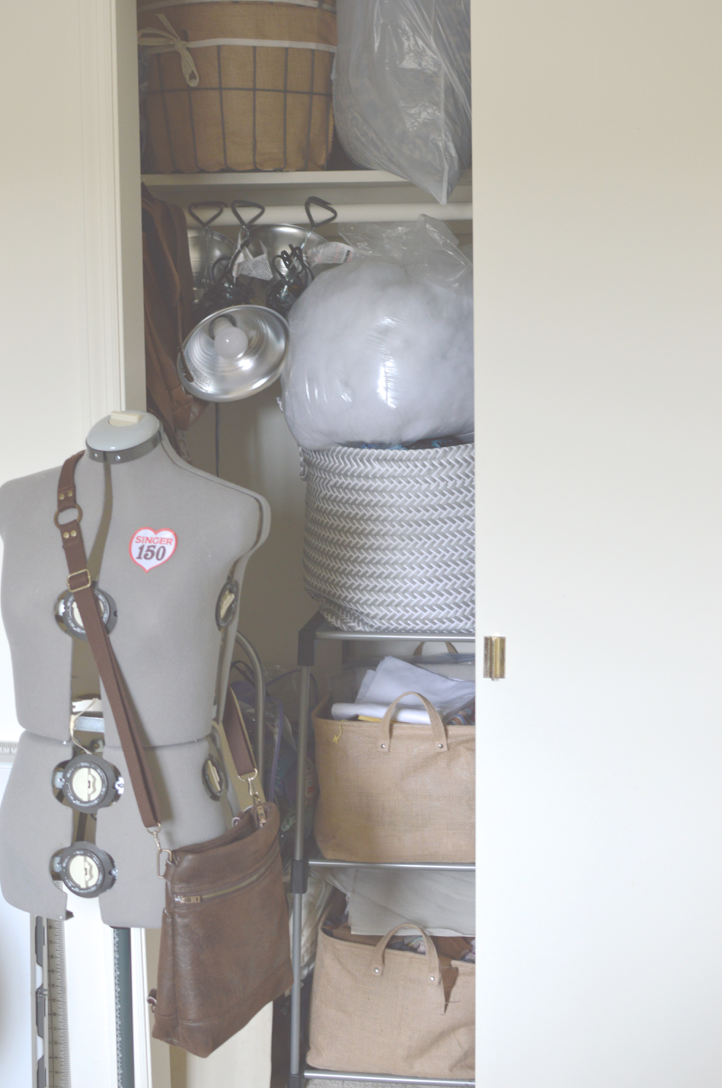 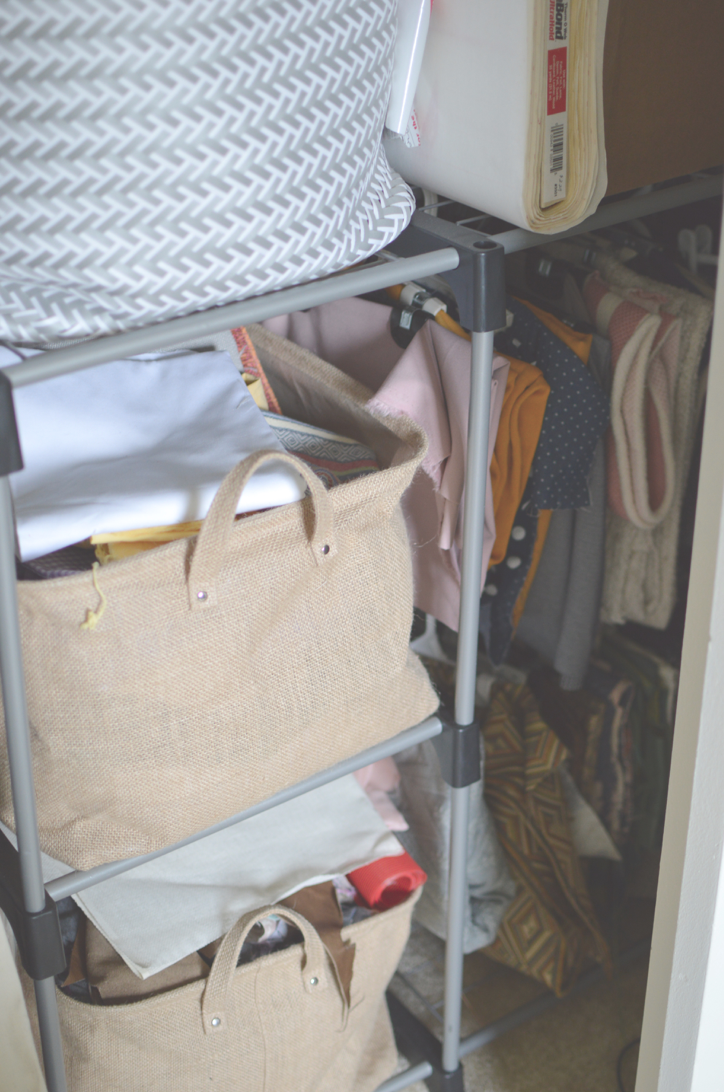 Whew! That's the deep dive into my current organizational setup. I'd love to answer any questions you guys have, or hear how you organize things like fabric and patterns. I love to get new ideas from other people, and I'm sure that we will be completely reorganizing once Finn actually needs his own room. But for now I'm super excited to have this space to keep all of my work in one place and keep it from taking over the entire apartment again! Ok except for my rolls of fabric. Those are under the bed. But that doesn't count, right?
1 Comment
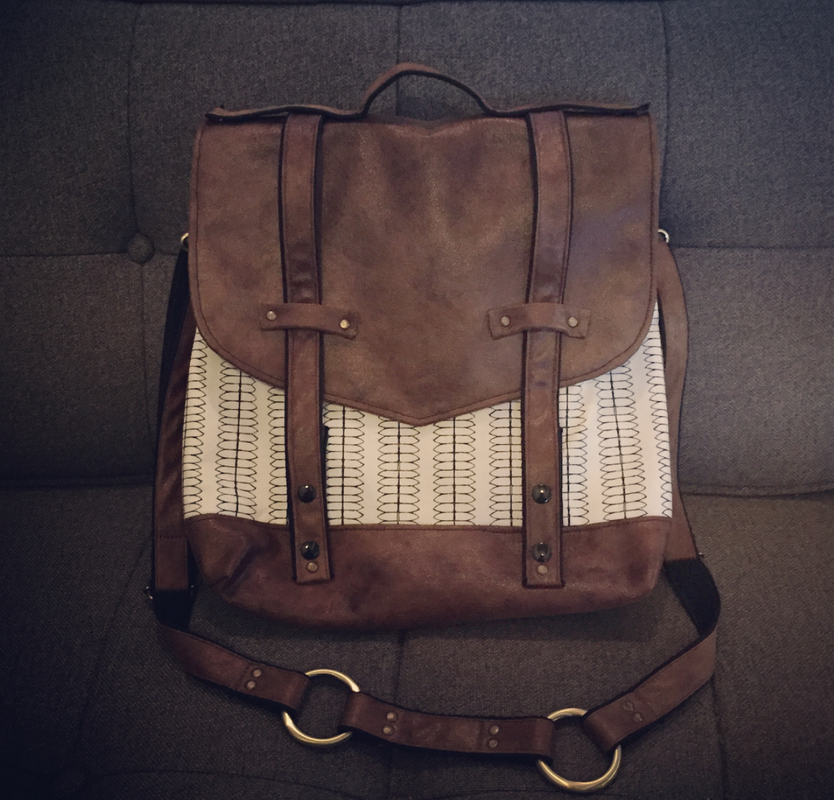
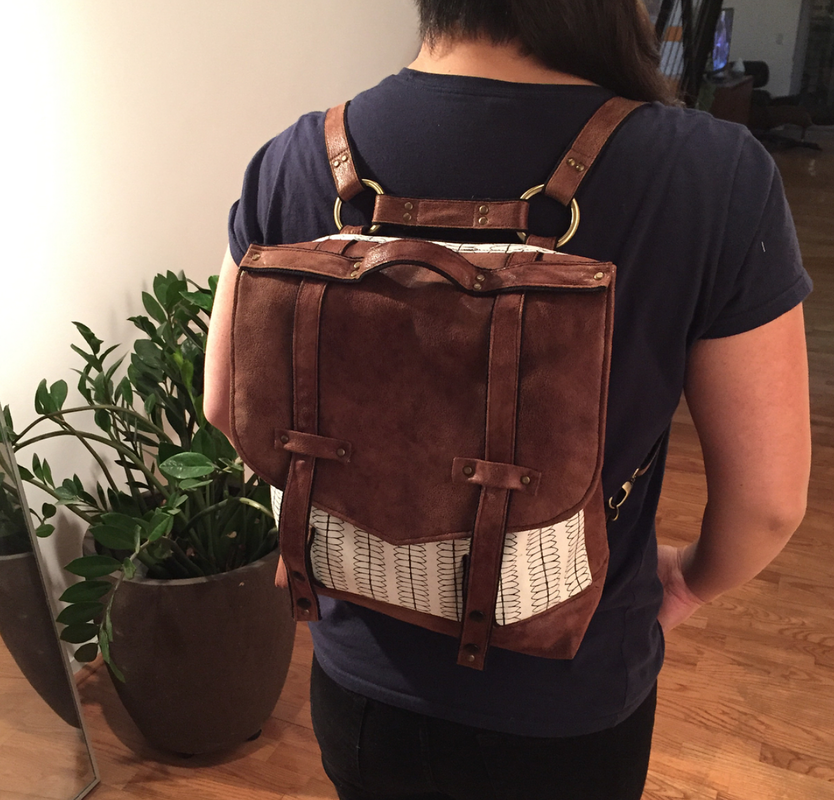
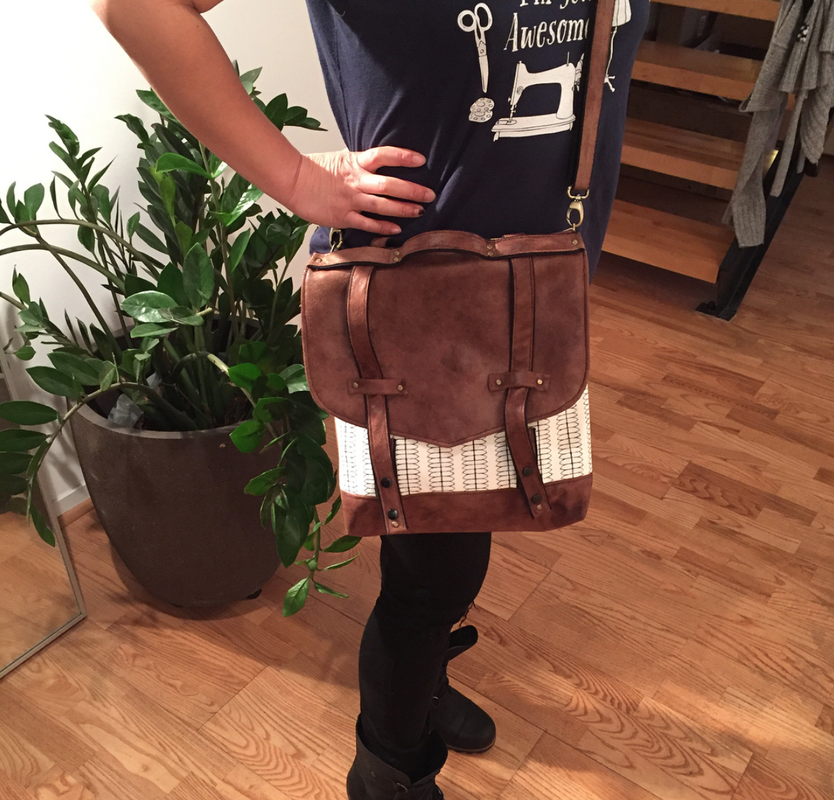
I've been so excited to write this blog post because it's about my first time helping someone test a pattern. I didn't know people in the sewing community did that for each other! I've been discovering a wonderful group of people on Instagram and one of the people I follow is @GoheenDesigns. One of her posts said: "Pattern Testers Needed!!" 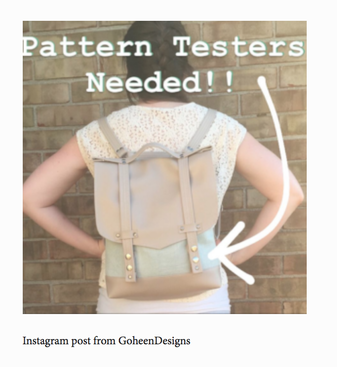 So I thought to myself "what's the worse that could happen?" and decided to write and said I'd be willing to volunteer. My fear was that this bag looks soooo complicated to make, and as y'all know - I'm still a beginner-ish at the art of sewing. But even with that, Madeline (owner of Goheen Designs) said she would love for me to try it. I received the instructions on May 4th and she said she would be interested in getting all feedback back by the 28th. With me going on a trip to Orlando on the 24th for the rest of the month, I needed to get working on this right away. I wanted to make sure that if I found it too challenging, I would have that feedback for Madeline before I left for Orlando. THE PATTERN FILE I received an email from Madeline with a ZIP file. Within the Zip file, there were 8 files: 2 A0 format files, 2 Tiled, and 2 Wide format files. There were 2 files of each because the Huxley bag gives you a Large and a Small version of the bags. In addition to the patterns, there was a file with instructions (all 47 pages of it!), and a file with testing parameters. I decided, based on the suggestions in the instructions that I will go with the View A in Large. Why? Because the instructions had the View A as the primary, with the zipper option as the alternative view. And Large because I wanted to use it for my Mac laptop and the instructions suggested to use the Large version if I wanted to make one that fits a laptop. Once I find some free time, I might try the alternate view and make the one with the zipper, I've seen some pictures online already of this view and it's also oh-so-pretty. PRINTING THE PATTERN The next day, I went over to FedEx office to get print the pattern out in wide format. I've never done this, and I don't even remember the last time I went to FedEx/Kinkos to get something printed. It was probably 10+ years ago when I had to do a school project. Anyway, the rep knew exactly what to do with the file I provided and soon after, I was walking out of the store with this really long print out that was rolled very nicely. Wow, did this exercise just saved me an hour of printing out, cutting and taping the pattern? Yes it sure did! Totally worth it! FedEx charged me like 12 bucks for it, so yes, definitely worth it! FOLLOW INSTRUCTIONS When I first started reading the instructions, I got really scared! I've never seen sewing instructions that would take 40+ pages to describe, so it was really overwhelming. But when I showed it to the beau and he said in a nonchalant tone of voice: "this will be so great for you babe, you'll learn so much going through it", this alone encouraged me to move forward and instead of overwhelm feelings, I was now super excited! I immediately went upstairs to my fabric stash to see which fabrics I will be using for the bag, soon to realize I didn't even know how much I needed of each. Oopsie - back down to read the instructions. :) Once I started with the instructions page by page, it didn't seem as scary anymore. It's like when you have a huge project and if you look at the big picture, it can get very overwhelming. But if you break it into sub-tasks, you're like "I've got this". This is how I tackled this pattern testing as well. I started thinking - "ok, let's do page 1 and 2", and next thing I knew, I was done and onto page 3. The directions were super clear and easy to follow. I did have a small hiccup with the handle reinforcement, but a quick email to Madeline and a fast response, straighten my confusion and was able to move forward in no time. 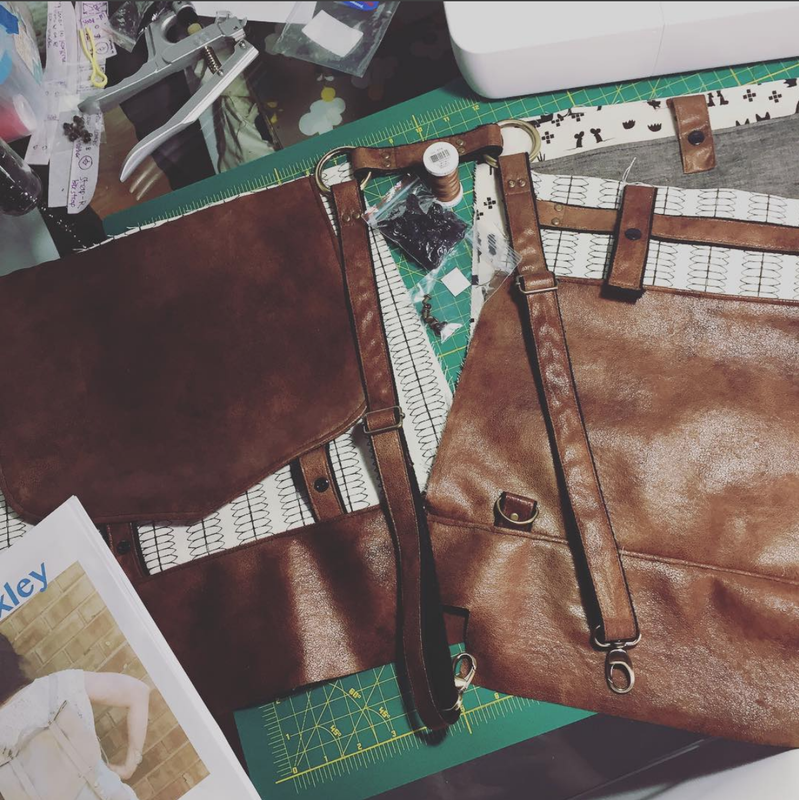 Work in progress... MATERIALS I USED:
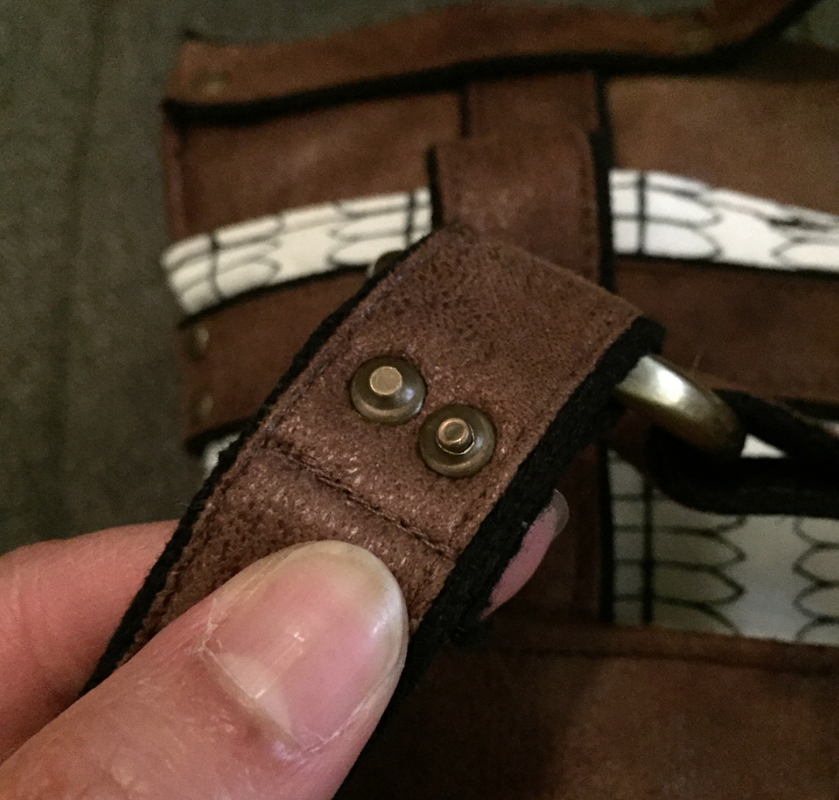
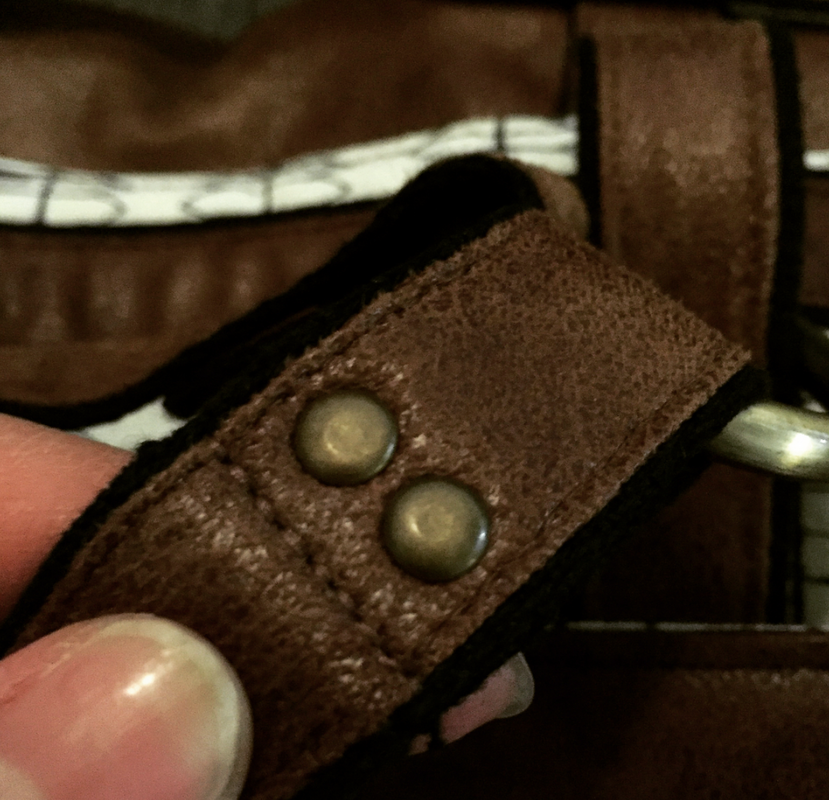
THE HARDEST PART Believe it or not, it was the rivets. I've never used rivets before, and I didn't know which tools to use. I googled and youtube'd several resources and at the end, I was still confused. I purchased a set of snap and rivets setters kit on Amazon based on this YouTube video on How to Set Rivets, but when I tried using the tools, mine didn't come out good at all. When I used the hammer alone, it came out ok. I mean, it totally makes sense to use a tool that's concave so that when you hit the rivets with the hammer, it doesn't flatten the cap. Perhaps I had rivets that didn't need the concave tool? Or maybe I had the wrong tool? I don't know, I'm still confused about this one...
THE RESULT And here is the result of this pattern test - I am in LOVE with it. It's super cool that you can switch how you wear the bag from one shoulder (messenger type) to backpack to hooking it on your bike and go! I've gotten so many compliments already from my friends and I'm sure this pattern will be such a good seller! In all honesty, it's a really good challenge and I feel like I've learn many more useful skills now that I've gone through this. Yes rivets - I'm looking at you!
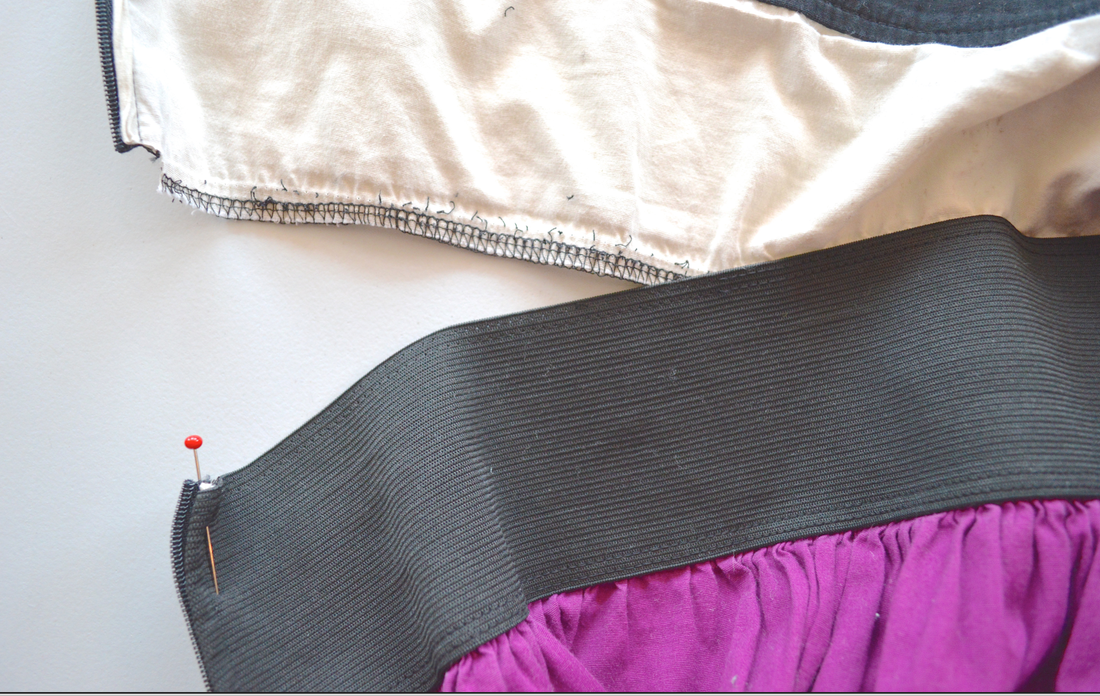
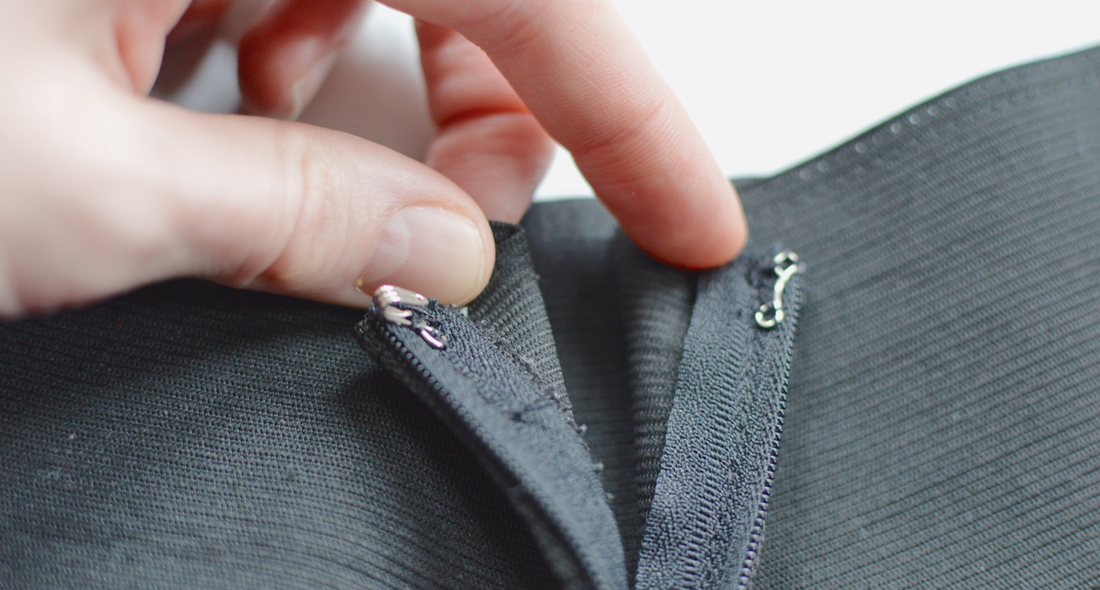
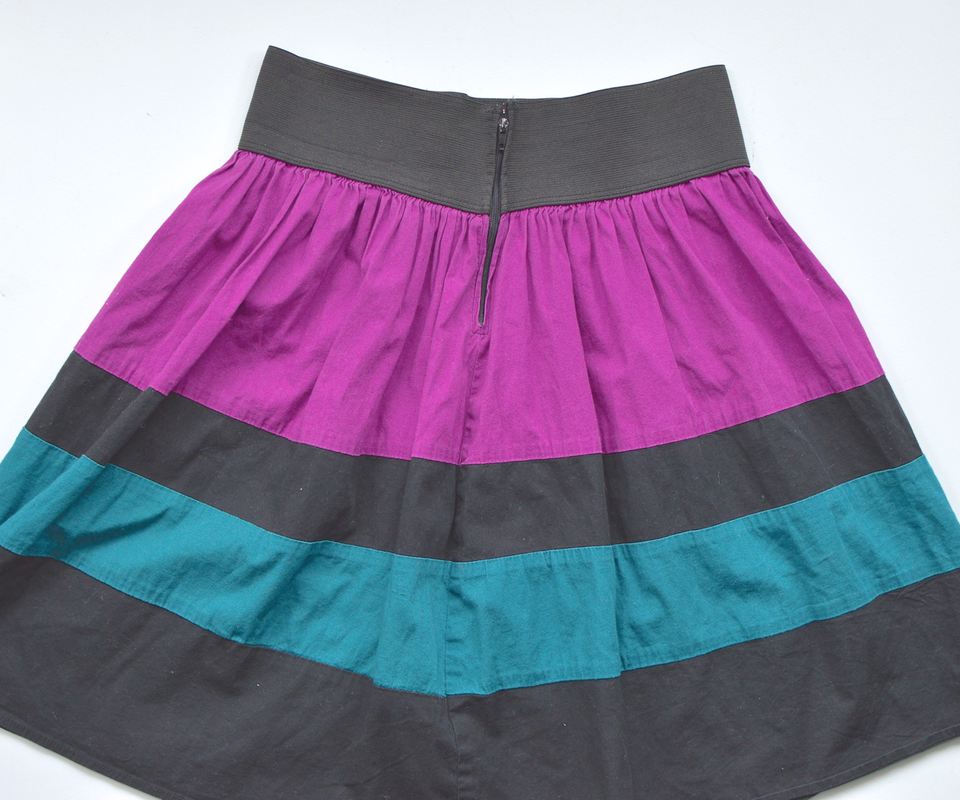
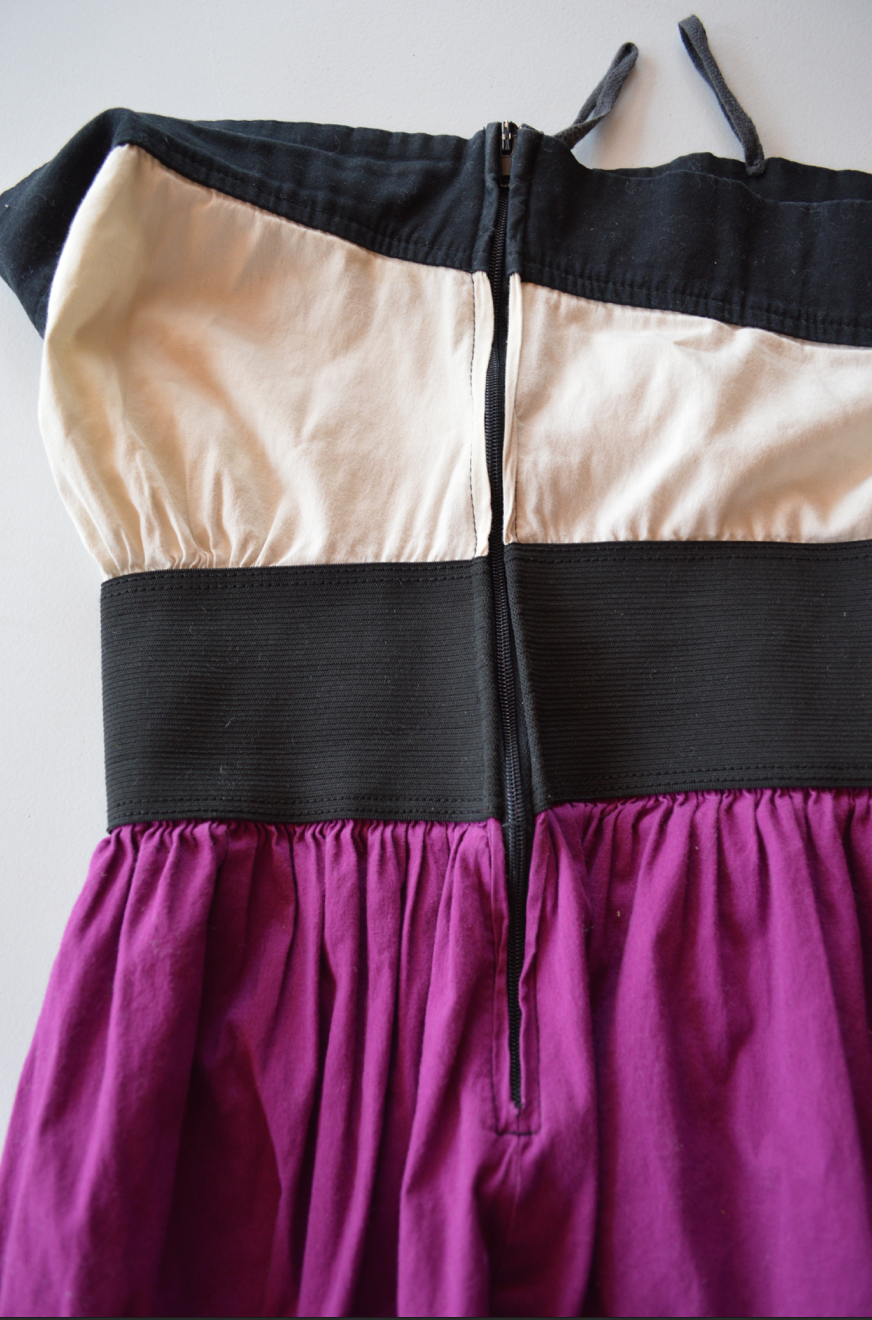
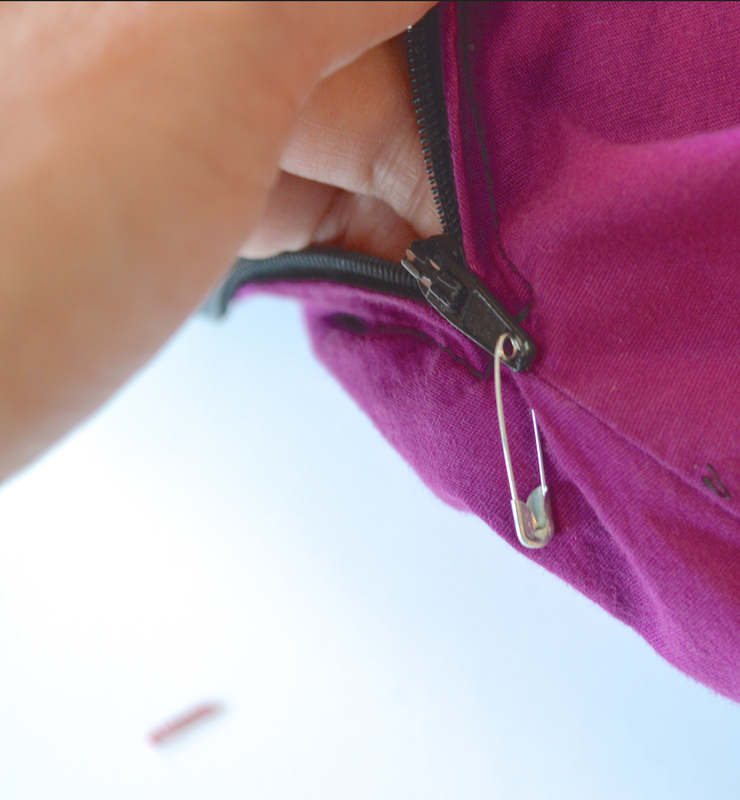
All in all, the project took me about 10 days from start to finish. But it's not like I worked on this bag every single day. I didn't have all the materials, so some days I'd be sitting here just waiting for the items to arrive. And other days - well, I got distracted with other sewing projects. :) I would say though, if I did this continuously - it probably took me 3-4 days to finish. What do you guys think? Like the bag? Want to join the challenge? If you're interested in sewing your own Huxley bag, head over to GoheenDesigns|Huxley as she has now officially launched the pattern! Hurray! 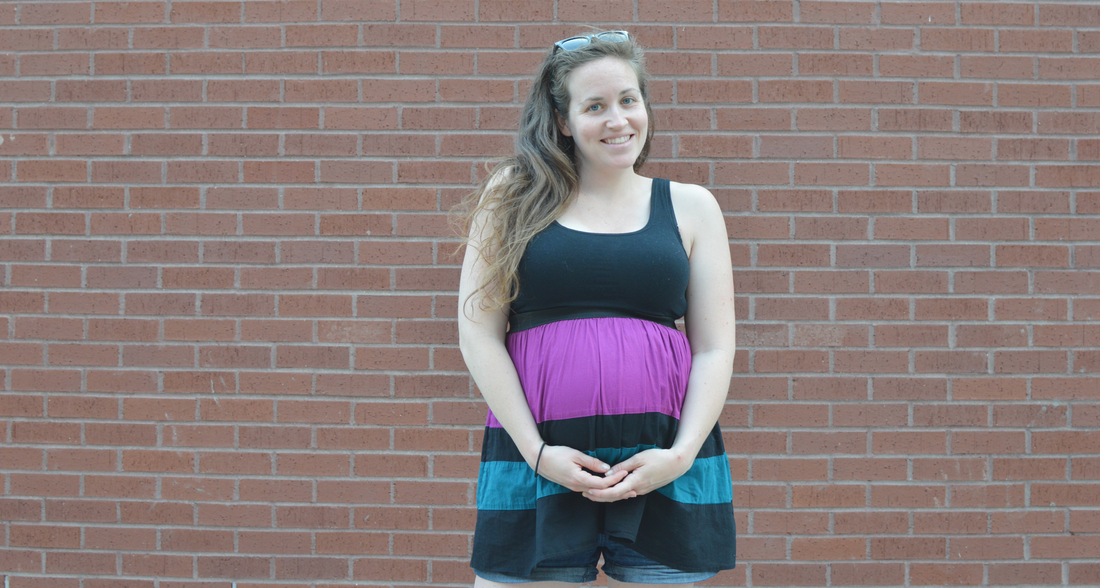 Sometimes it is so exciting to create a totally new me-made garment! That excitement can get other things pushed to the bottom of the list, like repairing the clothing I already have. I'm pretty good at repairing anything me-made, I think because I really appreciate those pieces more. But I've been trying to get better at repairing, altering, and refashioning not just the things I've made, but the rest of the clothing in my closet as well. I've been doing better (see my invisible jeans mending post) but there is still a lot of room for improvement. I would say that about 80% of my closet is second hand clothing, which I love, but they often come with little things wrong with them that, if I fixed them, would make me love them even more. A lot of them are easy fixes too! But my intentions to fix them often end up leaving me with a pile of mending that sits there for months at a time. 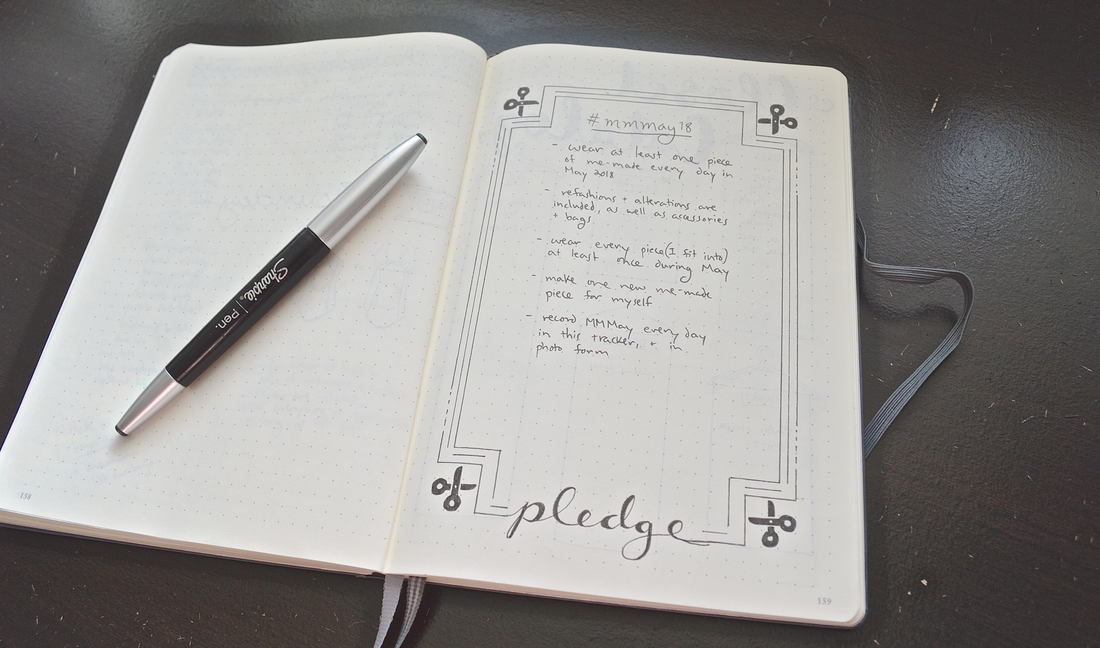 Me Made May has been very inspiring for me in terms of finally getting these things mended and altered. I decided that since my me-made wardrobe is pretty limited while I'm pregnant, that I would include wearing things that I've mended and altered as well as the completely self made pieces. And I'm loving it! It has really motivated me to do those alterations, and to appreciate those pieces more! Here are a few examples of my alterations: The polka dot top:  I got this shirt at a second and shop, and I love the color and pattern, and the style of the shirt! Whenever I go swing dancing, it always pops into my head as a perfect little retro looking top to wear. The problem is, with swing dancing (as with many things in life) you have to be able to raise your arms with ease. And this shirt did not allow for that. What an easy fix! I just had to take off the sleeves, and turn under the raw edges. And yet... it sat in my mend pile for about a year before I touched it.  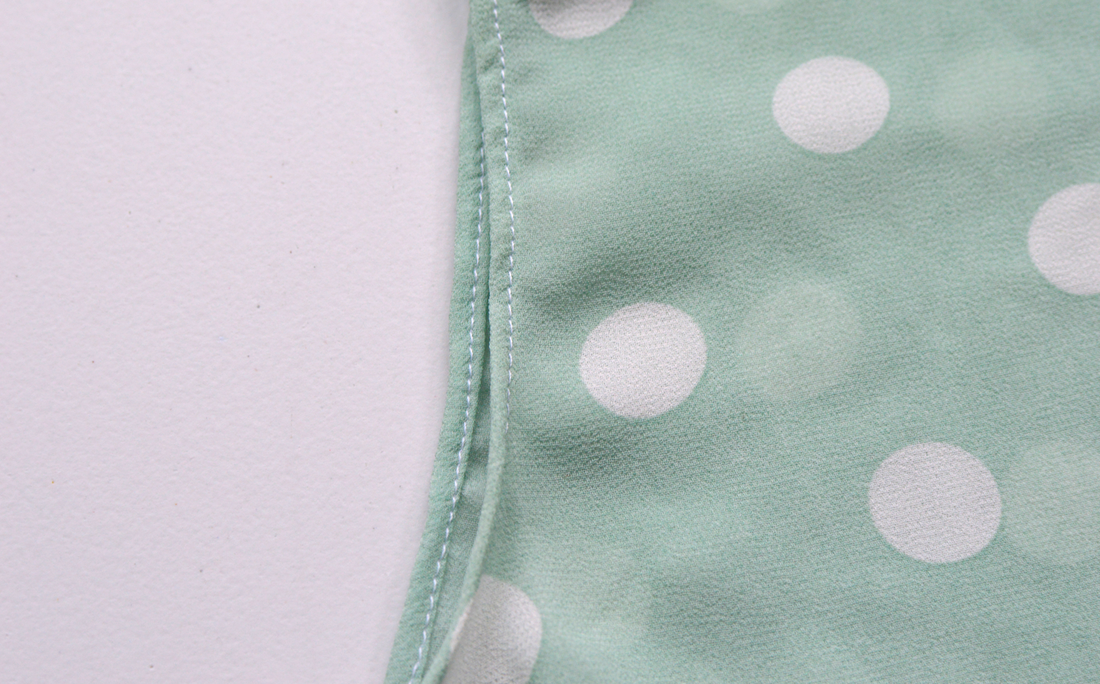 The Striped Dress: 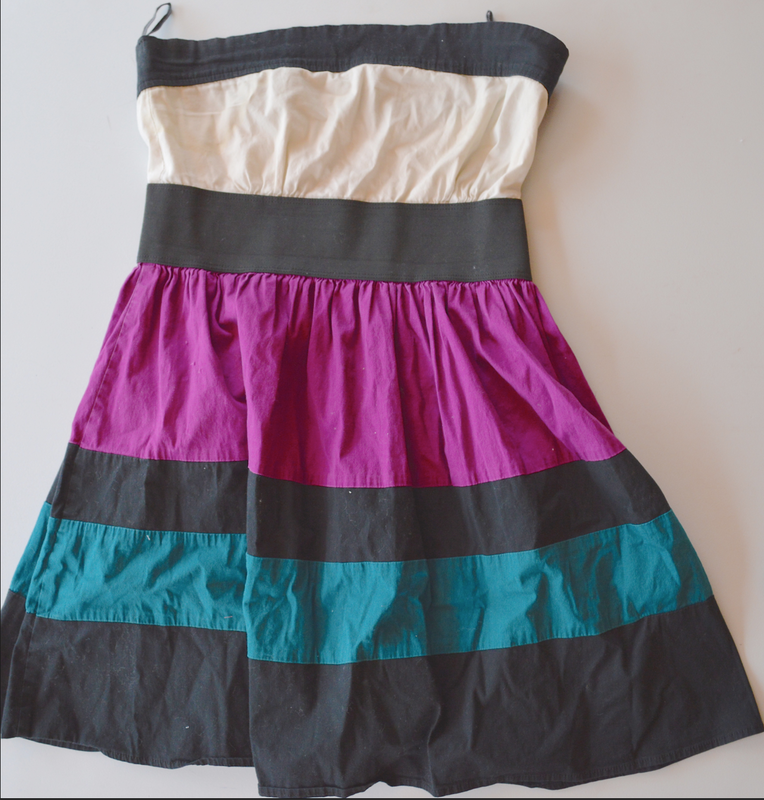 This dress is another second hand piece of clothing that just wasn't quite right. It was a strapless dress, but had absolutely no support on top, which led to a lot of yanking up to make sure everything was covered. On top of that, the white of the bust area was not only slightly see through, but also had some staining in the pits. Solution: take off the top! This was another really simple fix. I seam ripped the top from the bottom, cut the zipper down, (safety pinned the zipper down so I wouldn't accidentally pull it off during alterations) and then hand tacked the zipper in place and a hook and eye at the top of the elastic. Voila! Skirt.
   Altering the ready to wear clothing that I already have is such a quick easy sewing project. Sometimes it's nice to sit down and be able to accomplish an entire project in a half hour. I also feel like RTW clothing often gets the short end of the stick. I know the quality isn't always great, but that doesn't mean we shouldn't be using all the discarded second hand clothing that already exists. Wear it out. And then repair it! RTW deserves to be repaired too! I just need to make it more of a priority.... 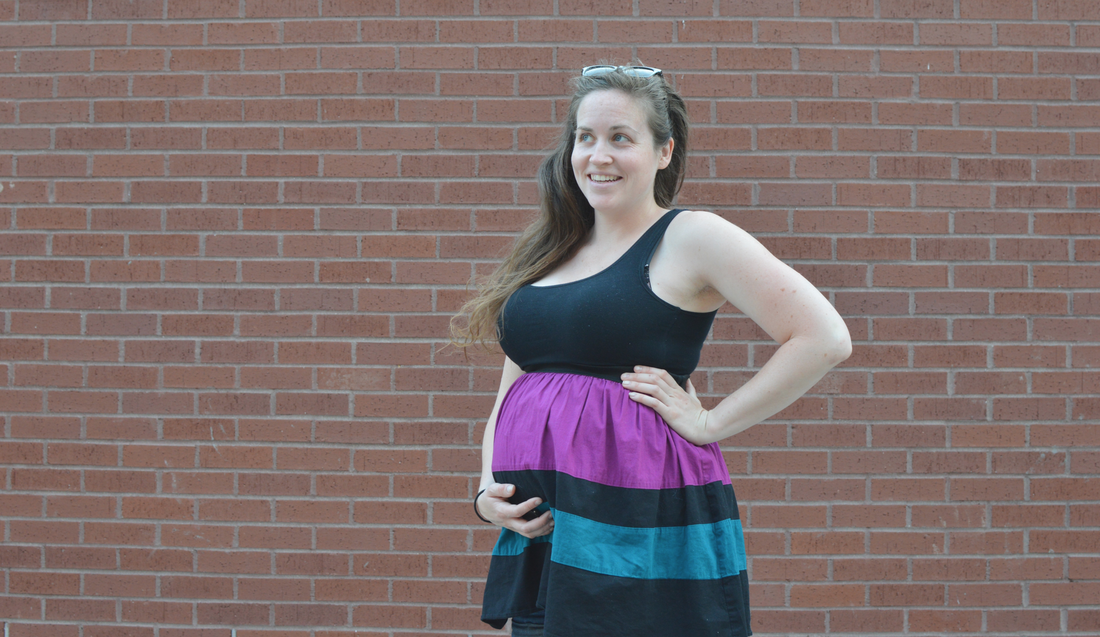 I've got a great little downloadable freebie for you guys! 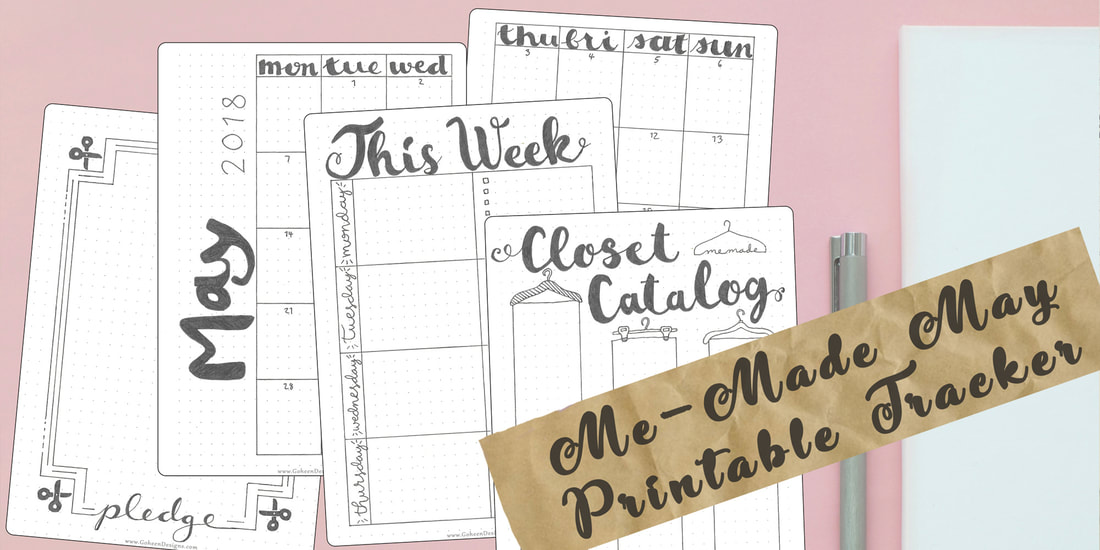 I've always loved the idea of Me-Made-May, but I've always been intimidated by it. For those of you who don't know, MMMay is a challenge started by Zoe Edwards of SoZo to help sewists develop a better relationship with their handmade wardrobe. It is a huge deal on instagram every year, because most people pledge to wear all handmade for the entire month, and post a selfie every day on instagram using the #MMMay18
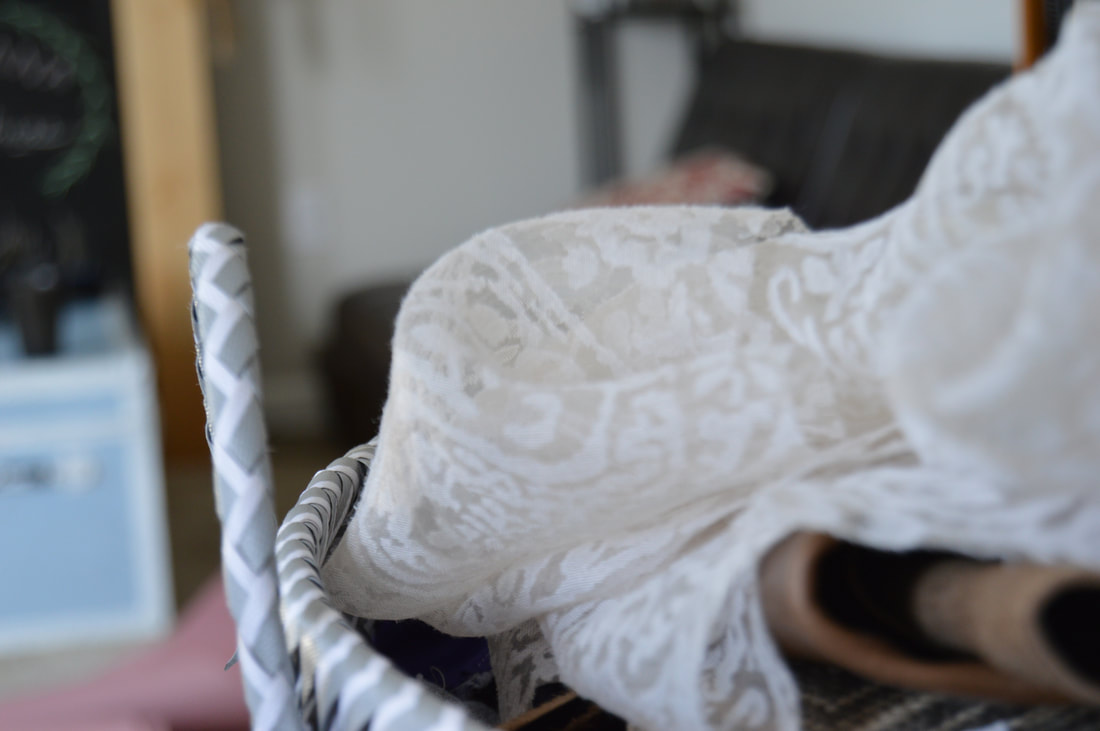
Which is super intimidating right?? My handmade wardrobe is not nearly filled out enough to wear only handmade all month. And posting a picture of myself every day to instagram is quite a commitment for me. But then, I listened to episode 38 of the Love to Sew Podcast, which featured Zoe and the MMMay challenge. And Zoe emphasized that this challenge is NOT a photo challenge, and it is NOT the same challenge for different people. You get to choose what you want to challenge yourself to do. You don't have to wear me-mades from head to toe. And you don't have to post an instagram selfie every day. You can track your challenge however you want! So of course, my mind jumped straight to bullet journaling! I'm obsessed with my bullet journal, and I love creating new spreads to help me keep track of my life, so I whipped up a few pages to help me track my newly inspired MMMay!  A couple of my pattern testers made a particular request after reading through my Inara instructions. After seeing one of the photos of my grey robe at the end of the instructions, they each let me know that they would love to read a blog post about how I added the lace to it. The good news?? It was super duper simple to do!
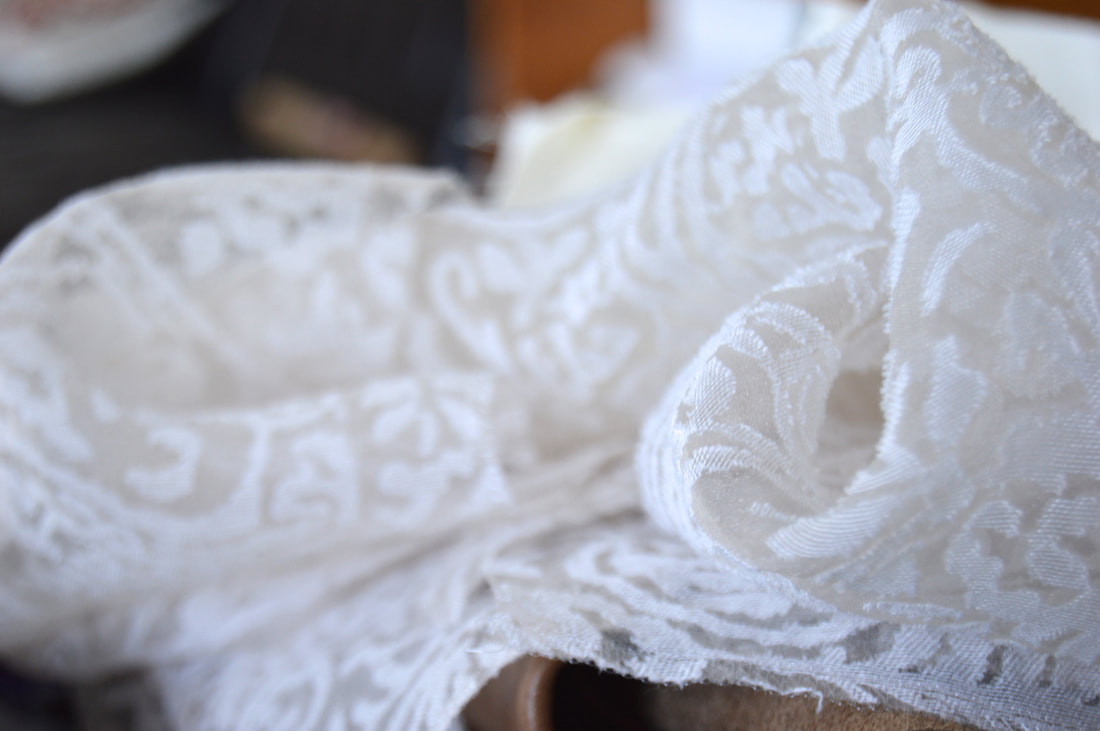
The great thing about lace (most lace anyway) is that your can cut it, and it doesn't fray. So really, this beautiful lace overlay was really as simple as cutting out pieces of lace that I loved, pinning them in place where I thought they looked good, and then I chose a matching thread color and topstitched the pieces down. Easy as pie. I'm not sure why people say this, pie seems like a rather intimidating dessert to make. Easy as.....no bake cookies. There you go.  Topstitching along with the pattern of the lace. If that sounds wayyy too simple, here are a few details and tips of what I did, in case you are planning on replicating it: - I placed the lace onto the robe after sewing the side seams but before the bottom hem step, and before adding the binding. In retrospect, the stiffness of the lace did weird things to my hem, so next time I'd hem and THEN add the lace overlay, and then put on the binding. I added the sleeve lace after hemming the sleeves, and as you can see it lays much nicer! - The lace sleeve bands are 3" tall. The lace around the hem is about 4", except at the sides where it goes up to 8" above the hem. I LOVE the way the higher lace on the side seams accentuates the curve of the hem. - As you can see in a photo below, I didn't have one nice big piece of lace to work with. There are actually several parts that are pieced together. But the beauty of matching your thread color is that you can only tell that it's pieced if your eyes are about a foot from my butt. And I don't usually let people get quite that close to my rear end. - I added a final touch of lace to the center back neck of the robe. I love that it brings the triangular motif of the hem to the back of the robe as well. - Unfortunately I cannot point you in the direction of this beautiful lace I used. It was a small sample piece in my stash from when a local fabric store was downsizing. #makeyourstash 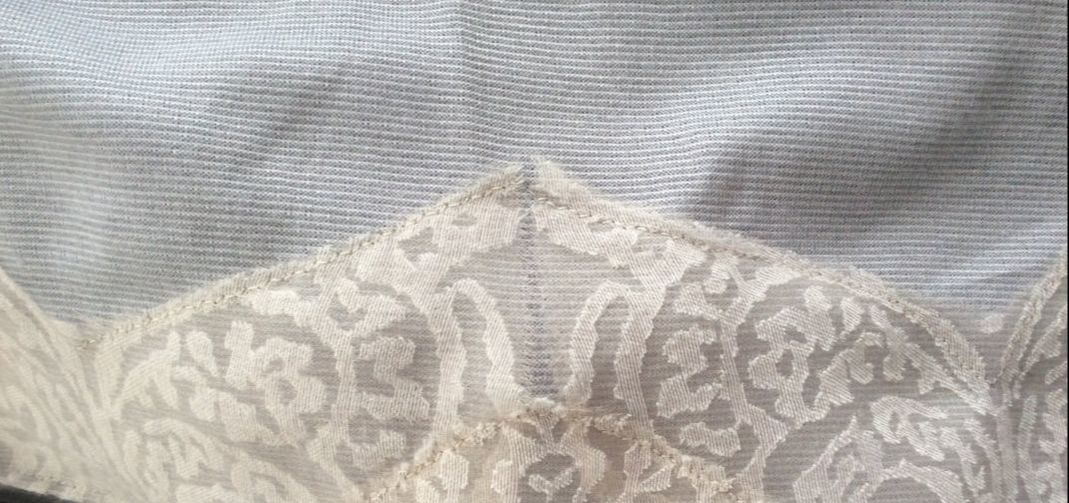 This is the center back of my Inara robe hem. Pretty much a patchwork of lace! 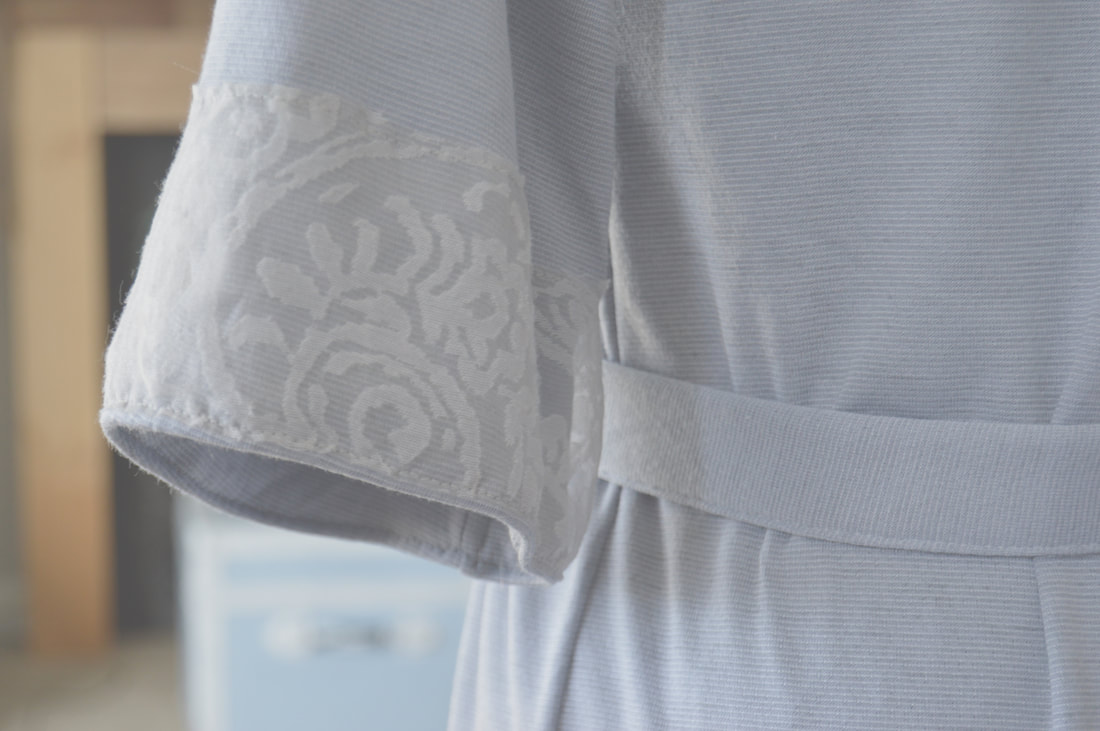 I would LOVE to see how you guys hack The Inara pattern to make it your own style, this way or any other way! And if you have any questions about what I did, just comment below! In the meantime, I'm now going to go make myself some no bake cookies....
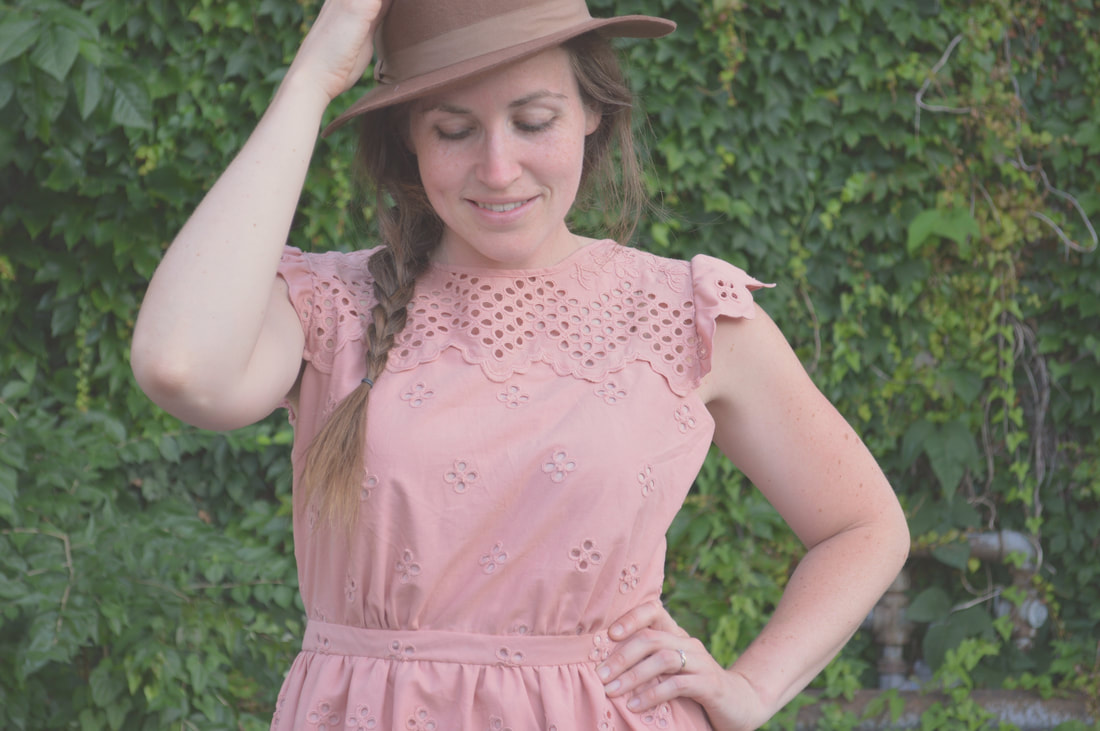
If you haven't seen Sylvia's Epic Halloween Quilt on FlyingParrotQuilts.com, you need to drop everything and go look! I am absolutely in love with her quilt blocks, and her color choices! One day, I will make this quilt for myself! Mark my words! I'm extra excited to see her Round-up for it this year because she gives my Tombstone Pillow a mention! I would love to see someone make both the quilt and the Tombstone pillows for an epic Halloween bed set. Because you know that's what is going to happen over here at the Stage household one day.   I was originally going to include this blog post in with the London Sewing Tour of 2017, but my love for this magazine spilled over into too many words, so I decided to separate it from the fabric shopping tour. I spotted this magazine in the Manchester airport during our layover on our way to London this summer, and instantly loved it. I took a picture of it so that I could remember what it was called, but then when I was in the public toilet Eddie snuck back and bought it for me (this is typically how things go in our relationship. I want something but will never allow myself to buy it, and then Eddie forces me to get it or surprises me with it) So, I had a very pleasant 2 hour layover reading my new magazine!  Apparently, there is a reason I’ve never come across La Maison Victor in Indiana, because this is the first issue in English! One of the biggest things about this magazine that I love is the overall aesthetic. The photos are just the right mix of being beautifully professional but without everyone looking like mannequins. I have very strong opinions on sewing pattern photos and illustrations, often finding that even if a pattern itself is trendy and modern, the photo in the pattern catalog still somehow makes it look like something from the 2000’s, just slightly too out of date to be appealing. 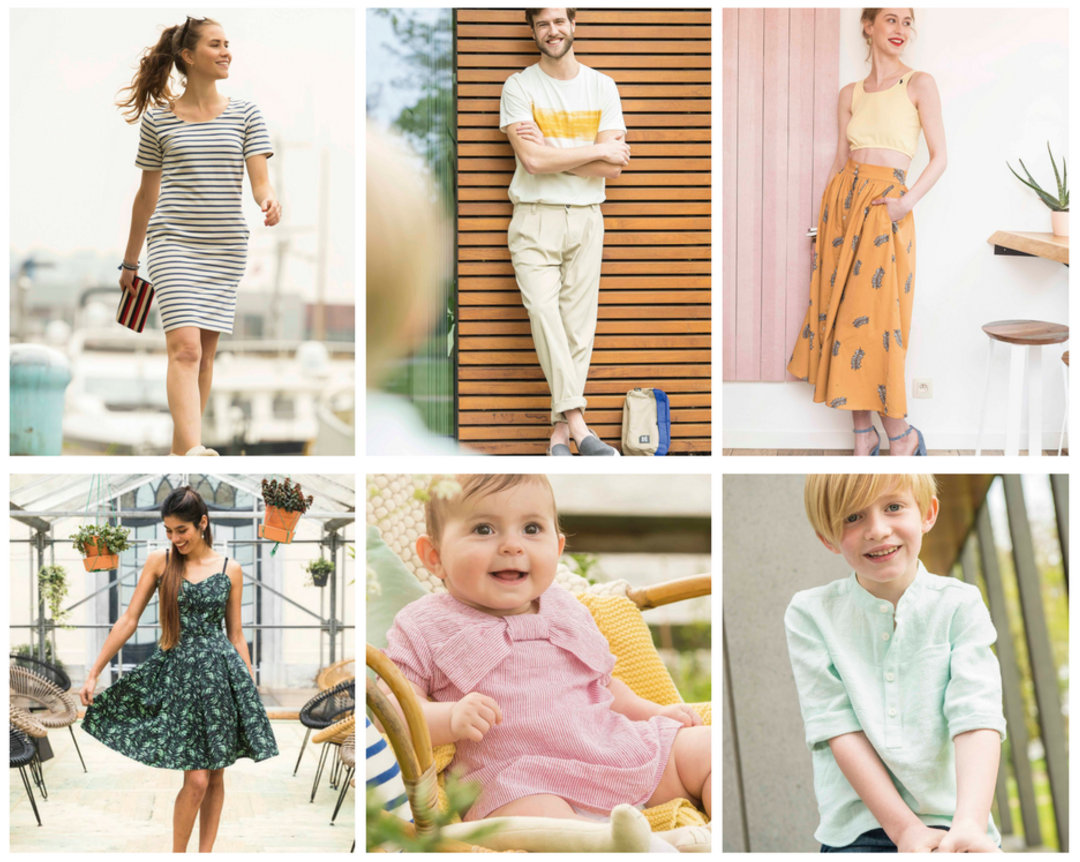 Anyway, along with the beautiful inspiration you get from this issue, you also get 8 free sewing patterns with full size pattern pieces! 8 patterns for £5.99 is a steal! Speaking as someone who has designed patterns, I really don’t know how that is even possible. Something else that I really appreciate about La Maison Victor is that they offer not just women’s patterns, but also men’s, children’s and baby’s patterns too! Along with the sewing patterns, there are other DIY projects sprinkled throughout too including an extremely cute sweater you can knit, a DIY flower crown, and a couple of home décor projects too. Different skill levels, very inclusive sizing, and step-by-step tutorials add even more to this already delightful magazine. The only thing that I don’t know yet is how well the patterns are made, because I haven’t had a chance to test one out yet. But once I do, I’ll let you all know!  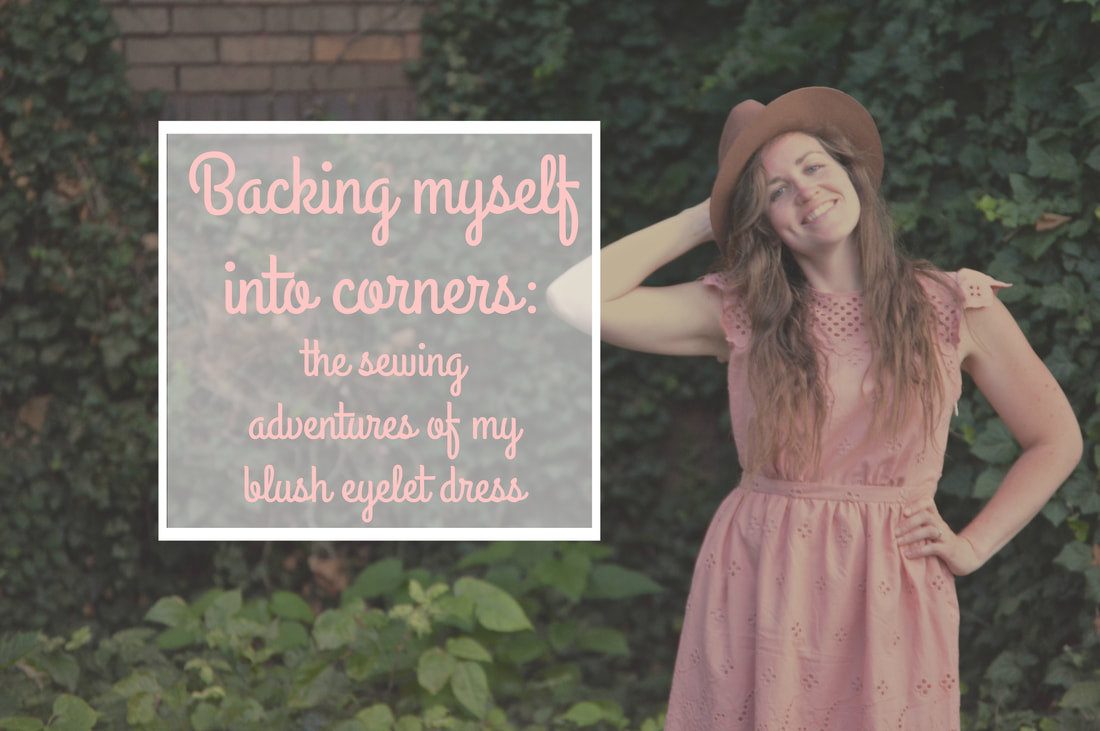 You know when you just see a fabric and you absolutely fall in love with it? Yeah. That’s what happened to me at Let’s Sew. I was there on a trip with my ASDP group this past spring, visiting one of our members’ sewing workrooms, and we decided to check out the local fabric store while we were there. Let’s Sew is a great store full of beautiful garment fabrics and quilting fabrics (that are good enough quality to also be used for garment making!) I had intended to just go to look, and not to buy anything. Ha. You know how that goes. I spotted a beautiful blush eyelet fabric on a roll against the wall, and that was it. I didn’t know what I would make with it, but it was coming home with me! 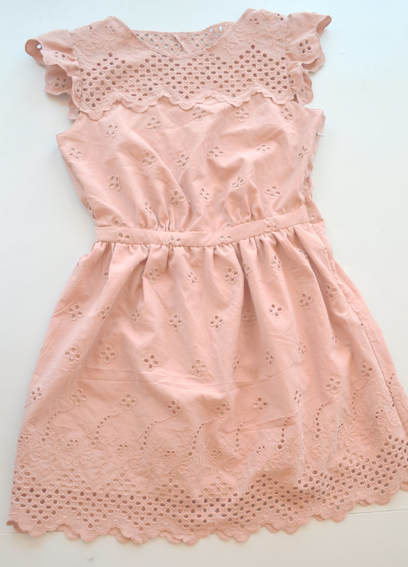 I started sketching in the car ride home, and by the time we made it back, I had a plan. ….That I worked on intermittently for the next 4 months…. The downside to working a day job where I sew, and owning a side business that also involves me sewing for hours, is that you end up having very little time and energy for getting sewing done for yourself. This is actually the first whole project I’ve taken on just for me in years. 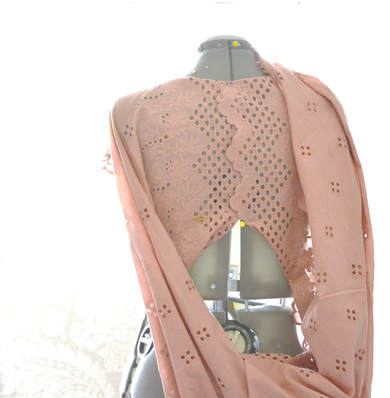 I started out by playing around with the fabric on my dress form, and then drafting the pattern for my new dress. I actually drafted it specifically for the fabric that I had bought. I hadn’t known what I wanted to make with the fabric in the store, and I was trying not to overbuy, so I really had a very limited amount to work with. I started with 1.5 yds of the face fabric, and 1 yard of the lighter pink lining fabric. I also wanted to draft the pattern very specifically for fabric use because as an eyelet fabric, it had the most beautiful border on the edges! There were certain parts of the dress that I wanted to make sure that I used that border for. The bottom hem, the front yoke, and the center back for certain were going to be out of the border pattern. I would have used more for the sleeves, but I didn’t have any more even for that. Instead, I ended up tracing around the scallops of the edging in order to create the sleeve edge, mimicking the look. 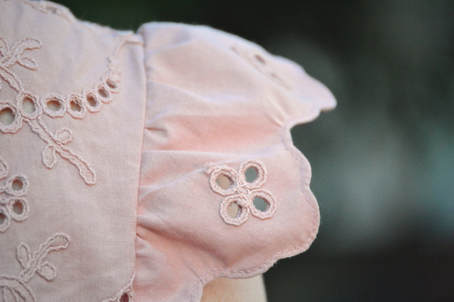 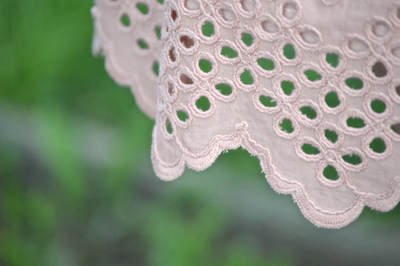 So after pattering a new dress, the logical next step is to make a muslin, to test the pattern out. But I have this bad habit of not making a muslin before diving in to a project, and true to form, I didn’t make one for this dress. I don’t make a lot of time for sewing for myself, and when I do, I never want to lose that precious time to a test run, even when I know I’m risking the entire project by choosing not to do one. I cut all my pieces out with a 1” seam allowance to give me some wiggle room, but I definitely had some “Oh shit” moments during the process, when I thought I’d completely screwed it up. Although if I’m honest, every new project I do goes through a moment or two (or five) when I feel like I’ve completely messed it up and I can’t stand looking at it. Luckily I usually get passed this feeling, and I did with my pink dress too. 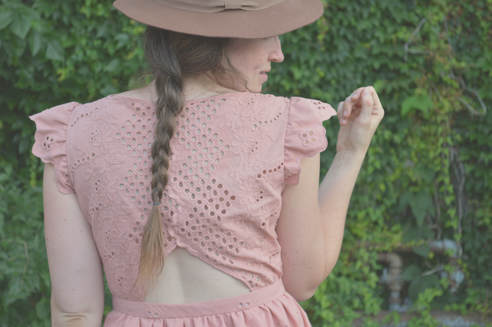 Originally, I had drafted this pattern to have an elastic waist. But once I tried it on, I did NOT like the way it looked. It bunched in all the wrong places, and I wasn’t satisfied with the look of the elastic on the open back of the waist. It just didn’t look finished to me. So I decided to pivot, and add a waistband in place of the elastic. I scrounged up enough fabric to create the band, and gathered the skirt and top into the band and it looked much better! But by adding a waistband, I had backed myself into a corner. I had gone all out with this dress in terms of finishing the seam allowances. I had decided to make the insides just as pretty as the outsides, and went with french seams, along with all sorts of bound edges and Hong Kong seam finishes. But my late-in-the-game pivot meant that in order to be able to put the dress on (kind of important…) without the elastic waist I now needed a zipper opening in the side seam. The side seam that was already perfectly frenched. (definitely an "oh shit" moment) This lead to a lot of procrastinating, in the form of googling tips for how to put an invisible zipper into a French seam. But in the end, I just had to wing it. It was pretty much hand sewing to the rescue. My bright white zipper did end up taking away from the sophisticated look of my dress innards, but a lot of hand sewing at least made it look cleaned up and presentable. 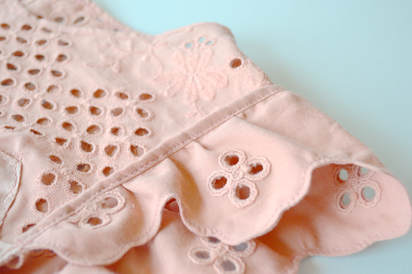 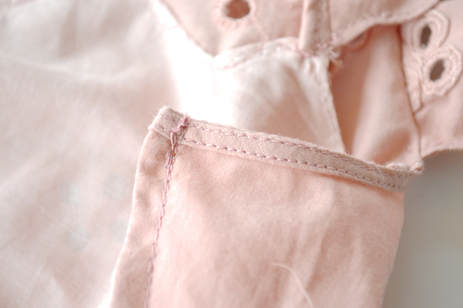 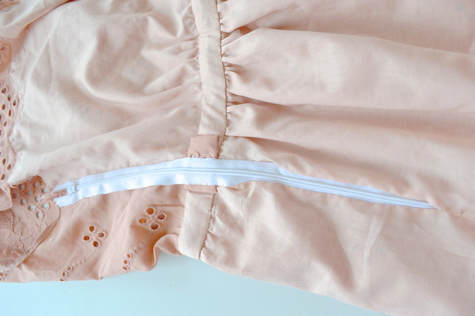 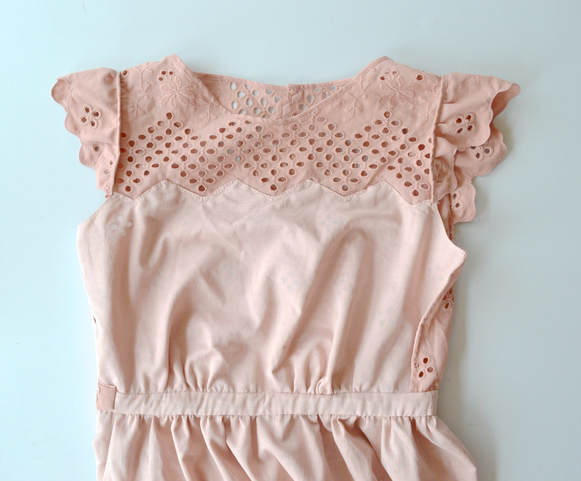 As with any project (especially one that I don’t make a muslin for...), I already have improvements in mind for my next go with this pattern. But overall I’m pretty happy with the way it turned out! I definitely had fun trying to take some pictures of it! I’ve been eyeing this ivy wall down the street from me for a while, and I got Eddie to come with me to cut out the awkward selfie shenanigans. He said he would only come with if he could pretend he was a real photographer and dress the part. Apparently this is how Eddie thinks photographers dress: hat, glasses, and cut off jean shorts. He is so adorable.  
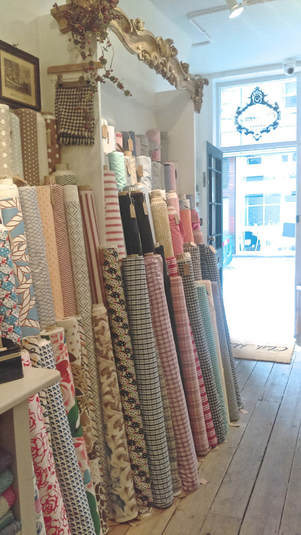
  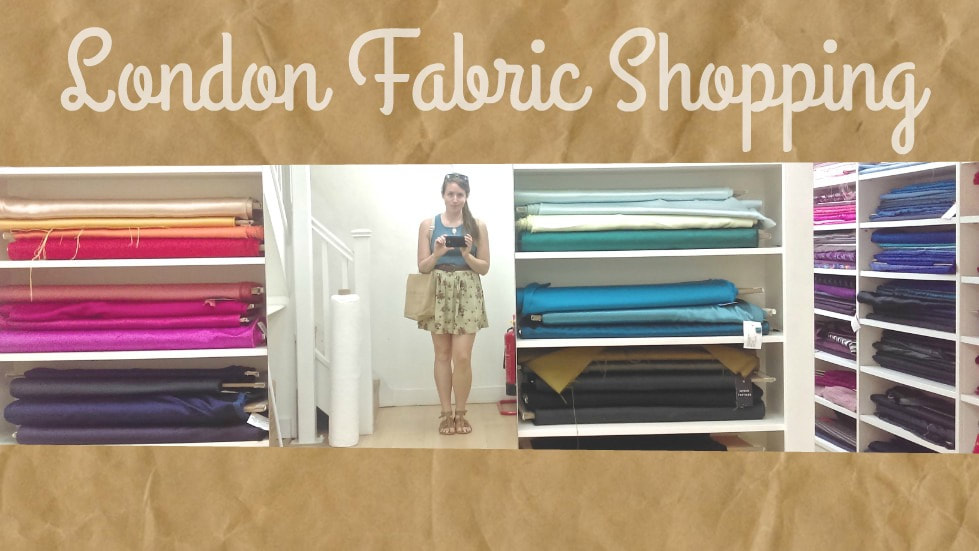 One of the benefits of having super cool bosses (I’m including myself in here of course) is that I get to travel without worrying about using up too many vacation days. The factory life of having only 5 vacation days for an entire year is over, and now I can basically take off as much time as I can afford to! This summer has been a great example of this perk. I not only went on a family adventure to Alaska at the beginning of the month, but I also just got back from a work trip to London! Eddie was there participating in an Alzheimer’s conference, and I was able to tag along! Along with the normal sight seeing we accomplished, I also took the time when Eddie was in the conference to go on a bit of a sewing holiday tour of London. Here are a few of my favourites from the trip: (excuse the blurry photos, I was using my phone!) 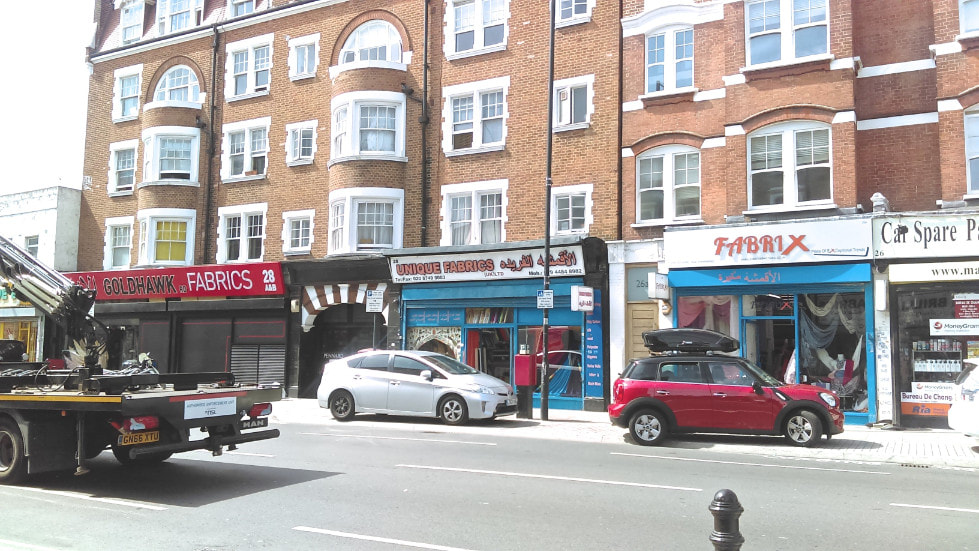

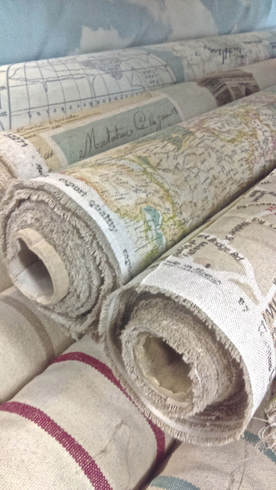
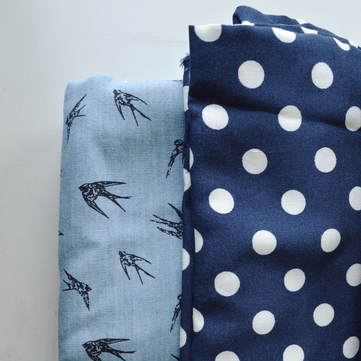
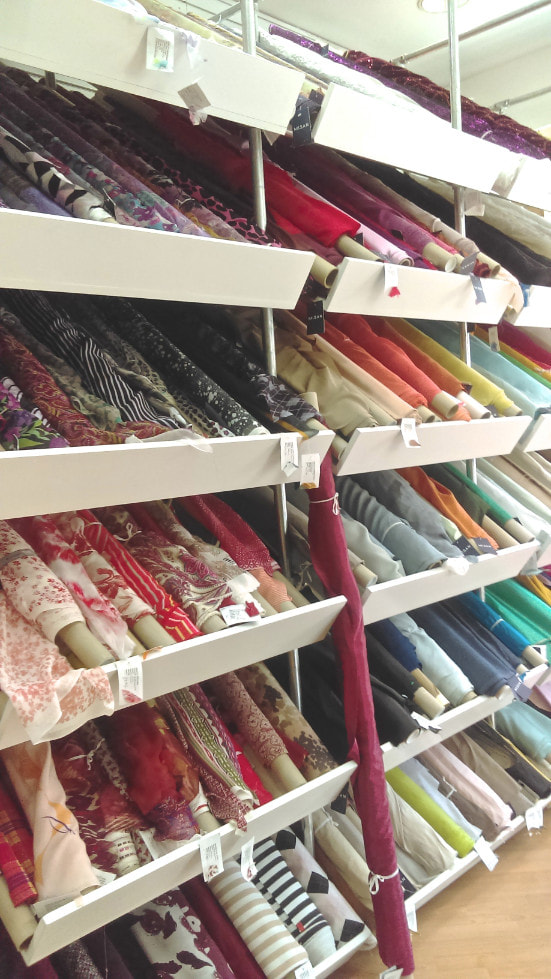
 Fabrics Galore Fabrics Galore was another fabric shop that stuck out to me. Their window display was stellar, and I really enjoyed their fabric selection! I love very modern prints, and this store was full of them, especially, their home décor section. I’m just sad I didn’t have any projects in mind that would fit these beautiful fabrics! I love anything cactus, world map, or insect related, and this store had all of those! They also had lots of skull fabrics, and even a sort of cork fabric! I ended up finding a beautiful cotton chambray with birds on it, and decided that I needed a shirt or a shirt dress out of it. Or both.
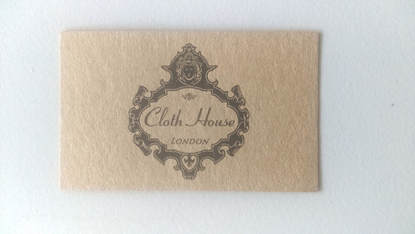
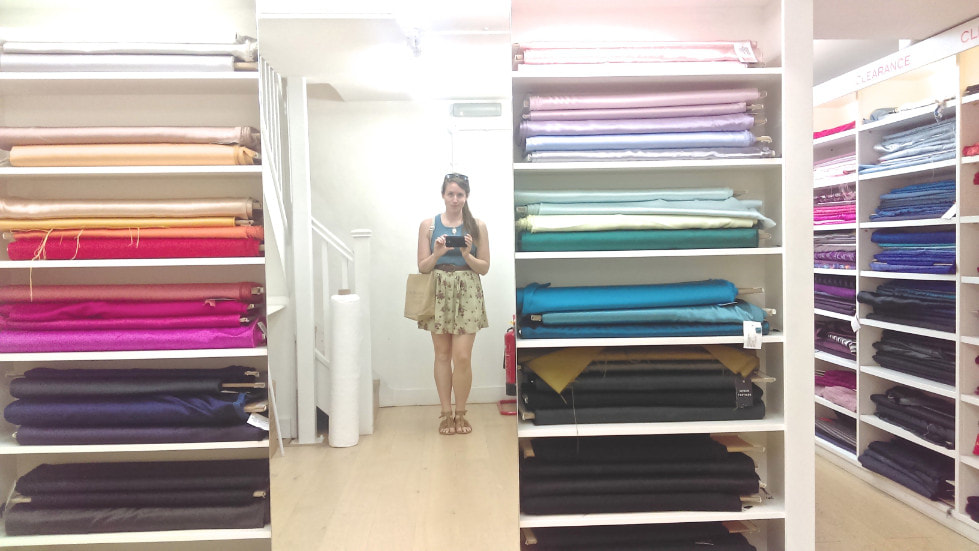
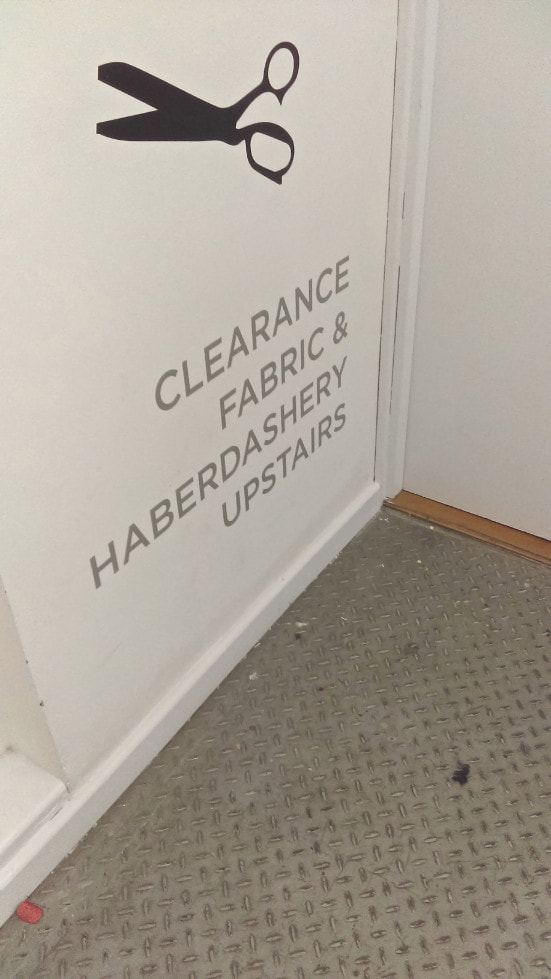
 Cloth House Warehouse I found out later in the week that Cloth House had a separate warehouse location that was *gasp* having a huge sale. This second location is going to be closed for renovations this summer (and apparently summer starts in August across the pond, as the sale ended July 28th) so when I visited, prices were ridiculously low in order to move inventory out. I’m talking £2 a metre for 60” wide rolls of cotton or silk fabrics, £5 a metre for wools, and specialty fabrics. It was a very small room full of fabric and several people shopping, each trying to set aside a personal stash of fabric rolls for when they were ready to purchase. And I loved it!! I love a good deal, and I love digging through fabric and seeing other people super excited about sewing too! I bought myself 5 metres, and I think I left that store the most empty-handed of anyone in there. Here’s what I got: 1m blush mesh, 1m black mesh, 1m light grey jersey, and 2m of some sort of blue cotton bottom weight knit.  Needless to say, I had to use an extra carry-on bag to bring home my new prizes. There were so many more stores that I walked past, or stepped inside for a bit. Too many to talk about individually here. I’ve added a few more photos just to give you a taste. Oh, and I absolutely love that in the UK, notions are “haberdashery”. Absolutely brilliant!
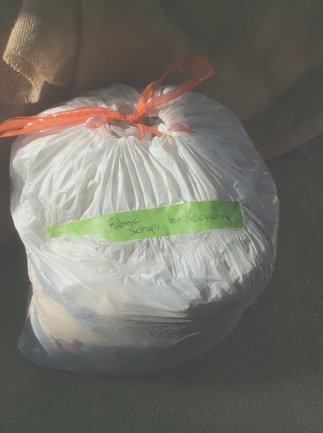
  I’ve always hated throwing away fabric. Even the little pieces. As you probably know, I have an entire Etsy shop dedicated to reusing fabric remnants! So why in the world it didn’t occur to me to recycle my fabric scraps before… I don’t know! I have no excuse! Except that maybe, just like everyone else, I didn’t really know you could! Oh I knew you could reuse fabric, and I do a lot of that. But I didn’t’ really know you could recycle it. But then I watched this video (if you haven’t seen it yet, it is worth watching!): And it blew my mind. Zero waste. ZERO. And then I watched True Cost on Netflix. Which is another eye opener. I recommend watching that too. It really got me motivated to do everything I could to lessen my negative impact in the fashion and manufacturing world. True Cost is a documentary that came out in 2015, about the impact the fashion industry has on the world. According to the film, there has been a 500% worldwide increase in clothing consumption when you compare it to the 90’s. There is also a huge increase in the amount of clothing that is disposed of every year. The average American wastes 82 lbs of textiles in a single year. The U.S. Environmental Protection Agency estimates that 85% of post-consumer textile waste ends up in our landfills, and that textile waste makes up almost 5% of all landfill space. But what can I do to help this?? I went on a Google spree. I became obsessed! I looked up everything I could on how to recycle fabric in my area. I know that not all of these options are going to hold up everywhere, but these ideas will at least help you get started! 
 With all the different people and groups I’ve reached out to about fabric scraps, I’ve developed a bit of a system in my apartment. I now have a series of containers where I separate my fabric scraps into large, small, and unusable. Once I fill up my containers, it’s time to pass them along. The unusable scraps go into a trash bag marked “fabric scraps” and get delivered to one of the thrift stores. The larger pieces go to the 4-H and Project Linus groups. And the small pieces go to the kids just learning how to sew! I have a spreadsheet complete with everyone’s contact info, and I rotate who gets the next delivery of fabric goodness.
|
madeline stage
creative business owner. designer. hoosier. crafter. runner. sewer. swing dancer. outdoor enthusiast. entrepreneur. wife. mom. material hoarder. Categories
All
Archives
June 2023
My Instagram Feed:
@GoheenDesigns |


 RSS Feed