
I've been so excited to write this blog post because it's about my first time helping someone test a pattern. I didn't know people in the sewing community did that for each other! I've been discovering a wonderful group of people on Instagram and one of the people I follow is @GoheenDesigns. One of her posts said: "Pattern Testers Needed!!" 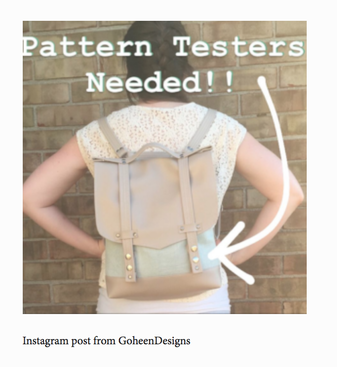 So I thought to myself "what's the worse that could happen?" and decided to write and said I'd be willing to volunteer. My fear was that this bag looks soooo complicated to make, and as y'all know - I'm still a beginner-ish at the art of sewing. But even with that, Madeline (owner of Goheen Designs) said she would love for me to try it. I received the instructions on May 4th and she said she would be interested in getting all feedback back by the 28th. With me going on a trip to Orlando on the 24th for the rest of the month, I needed to get working on this right away. I wanted to make sure that if I found it too challenging, I would have that feedback for Madeline before I left for Orlando. THE PATTERN FILE I received an email from Madeline with a ZIP file. Within the Zip file, there were 8 files: 2 A0 format files, 2 Tiled, and 2 Wide format files. There were 2 files of each because the Huxley bag gives you a Large and a Small version of the bags. In addition to the patterns, there was a file with instructions (all 47 pages of it!), and a file with testing parameters. I decided, based on the suggestions in the instructions that I will go with the View A in Large. Why? Because the instructions had the View A as the primary, with the zipper option as the alternative view. And Large because I wanted to use it for my Mac laptop and the instructions suggested to use the Large version if I wanted to make one that fits a laptop. Once I find some free time, I might try the alternate view and make the one with the zipper, I've seen some pictures online already of this view and it's also oh-so-pretty. PRINTING THE PATTERN The next day, I went over to FedEx office to get print the pattern out in wide format. I've never done this, and I don't even remember the last time I went to FedEx/Kinkos to get something printed. It was probably 10+ years ago when I had to do a school project. Anyway, the rep knew exactly what to do with the file I provided and soon after, I was walking out of the store with this really long print out that was rolled very nicely. Wow, did this exercise just saved me an hour of printing out, cutting and taping the pattern? Yes it sure did! Totally worth it! FedEx charged me like 12 bucks for it, so yes, definitely worth it! FOLLOW INSTRUCTIONS When I first started reading the instructions, I got really scared! I've never seen sewing instructions that would take 40+ pages to describe, so it was really overwhelming. But when I showed it to the beau and he said in a nonchalant tone of voice: "this will be so great for you babe, you'll learn so much going through it", this alone encouraged me to move forward and instead of overwhelm feelings, I was now super excited! I immediately went upstairs to my fabric stash to see which fabrics I will be using for the bag, soon to realize I didn't even know how much I needed of each. Oopsie - back down to read the instructions. :) Once I started with the instructions page by page, it didn't seem as scary anymore. It's like when you have a huge project and if you look at the big picture, it can get very overwhelming. But if you break it into sub-tasks, you're like "I've got this". This is how I tackled this pattern testing as well. I started thinking - "ok, let's do page 1 and 2", and next thing I knew, I was done and onto page 3. The directions were super clear and easy to follow. I did have a small hiccup with the handle reinforcement, but a quick email to Madeline and a fast response, straighten my confusion and was able to move forward in no time. 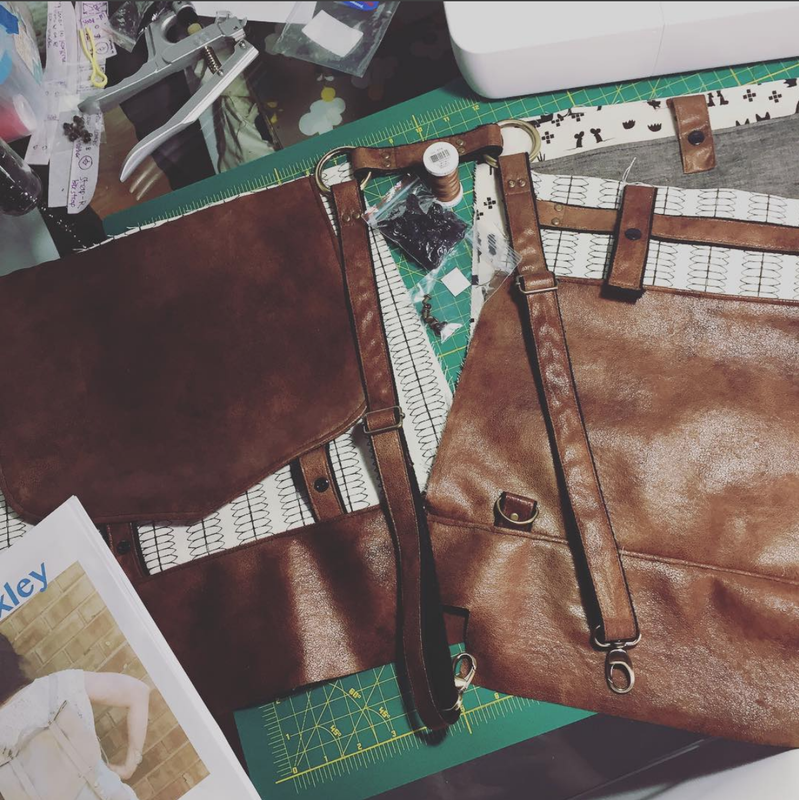 Work in progress... MATERIALS I USED:
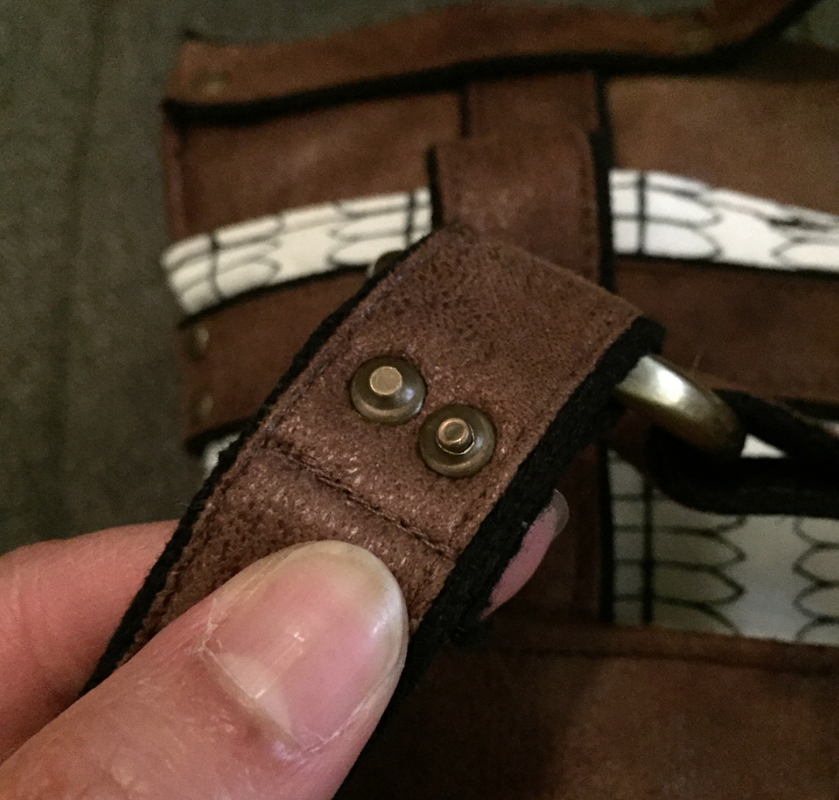
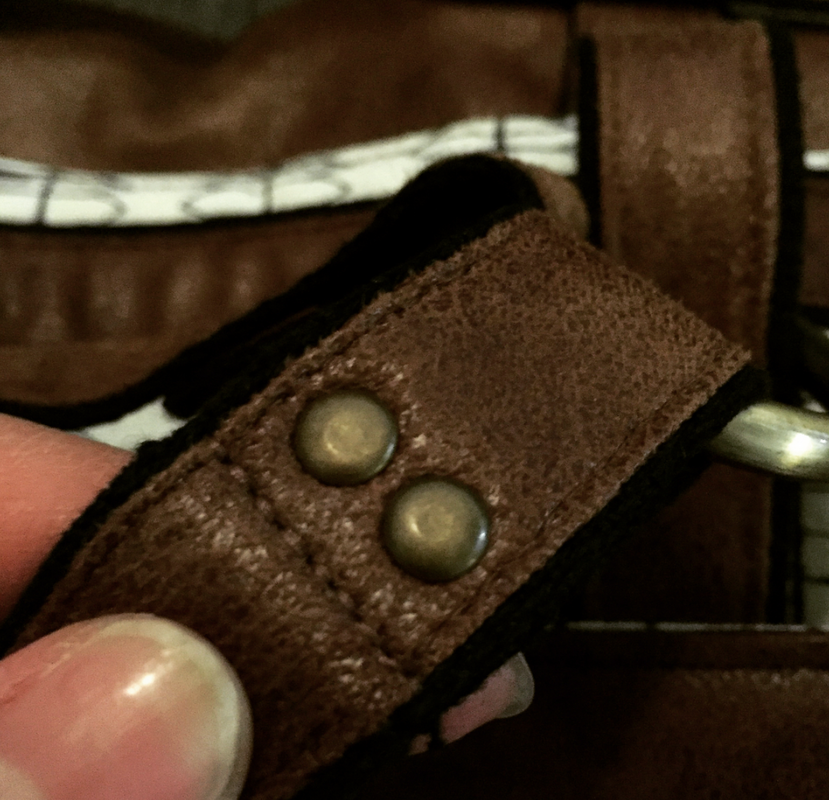
THE HARDEST PART Believe it or not, it was the rivets. I've never used rivets before, and I didn't know which tools to use. I googled and youtube'd several resources and at the end, I was still confused. I purchased a set of snap and rivets setters kit on Amazon based on this YouTube video on How to Set Rivets, but when I tried using the tools, mine didn't come out good at all. When I used the hammer alone, it came out ok. I mean, it totally makes sense to use a tool that's concave so that when you hit the rivets with the hammer, it doesn't flatten the cap. Perhaps I had rivets that didn't need the concave tool? Or maybe I had the wrong tool? I don't know, I'm still confused about this one...
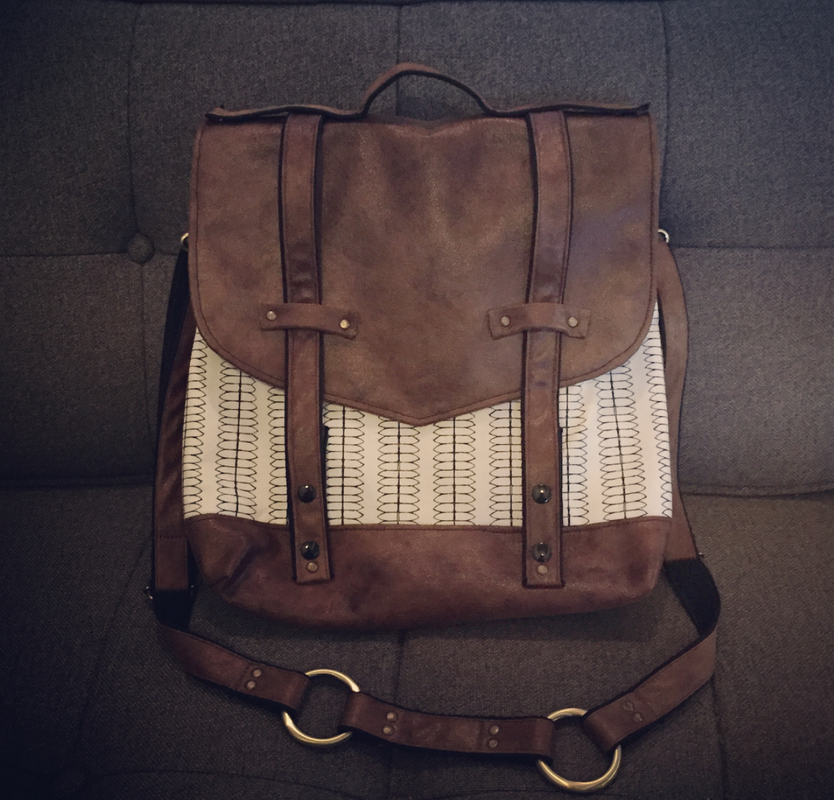
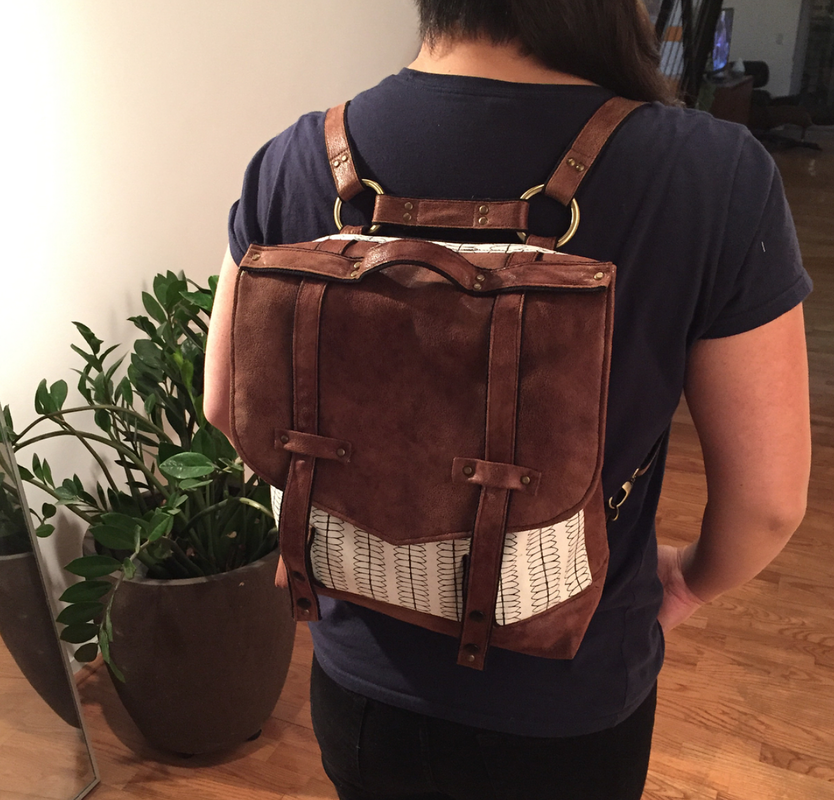
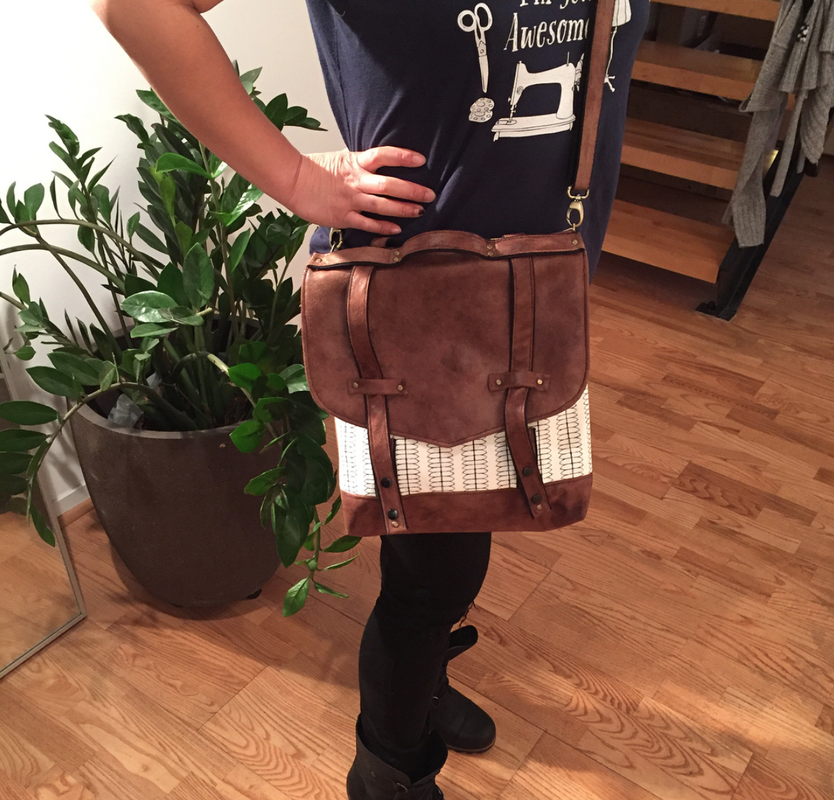
THE RESULT And here is the result of this pattern test - I am in LOVE with it. It's super cool that you can switch how you wear the bag from one shoulder (messenger type) to backpack to hooking it on your bike and go! I've gotten so many compliments already from my friends and I'm sure this pattern will be such a good seller! In all honesty, it's a really good challenge and I feel like I've learn many more useful skills now that I've gone through this. Yes rivets - I'm looking at you!
All in all, the project took me about 10 days from start to finish. But it's not like I worked on this bag every single day. I didn't have all the materials, so some days I'd be sitting here just waiting for the items to arrive. And other days - well, I got distracted with other sewing projects. :) I would say though, if I did this continuously - it probably took me 3-4 days to finish. What do you guys think? Like the bag? Want to join the challenge? If you're interested in sewing your own Huxley bag, head over to GoheenDesigns|Huxley as she has now officially launched the pattern! Hurray!
2 Comments
Linda Seemann Korte
9/23/2021 05:33:25 am
Hi! I am interested in testing bag patterns for you. I am an experienced bag maker and enjoy the challenge and excitement of trying something new! Looking fo reward to hearing from you!
madeline stage
9/24/2021 09:21:57 am
Hi Linda! I'd love to have you as a bag tester. Send an email to [email protected] and I'll add you to my email list specifically for pattern testers. That way you will be notified when I'm searching for testers for my next pattern. Thanks! Leave a Reply. |
madeline stage
creative business owner. designer. hoosier. crafter. runner. sewer. swing dancer. outdoor enthusiast. entrepreneur. wife. mom. material hoarder. Categories
All
Archives
June 2023
My Instagram Feed:
@GoheenDesigns |

 RSS Feed