|
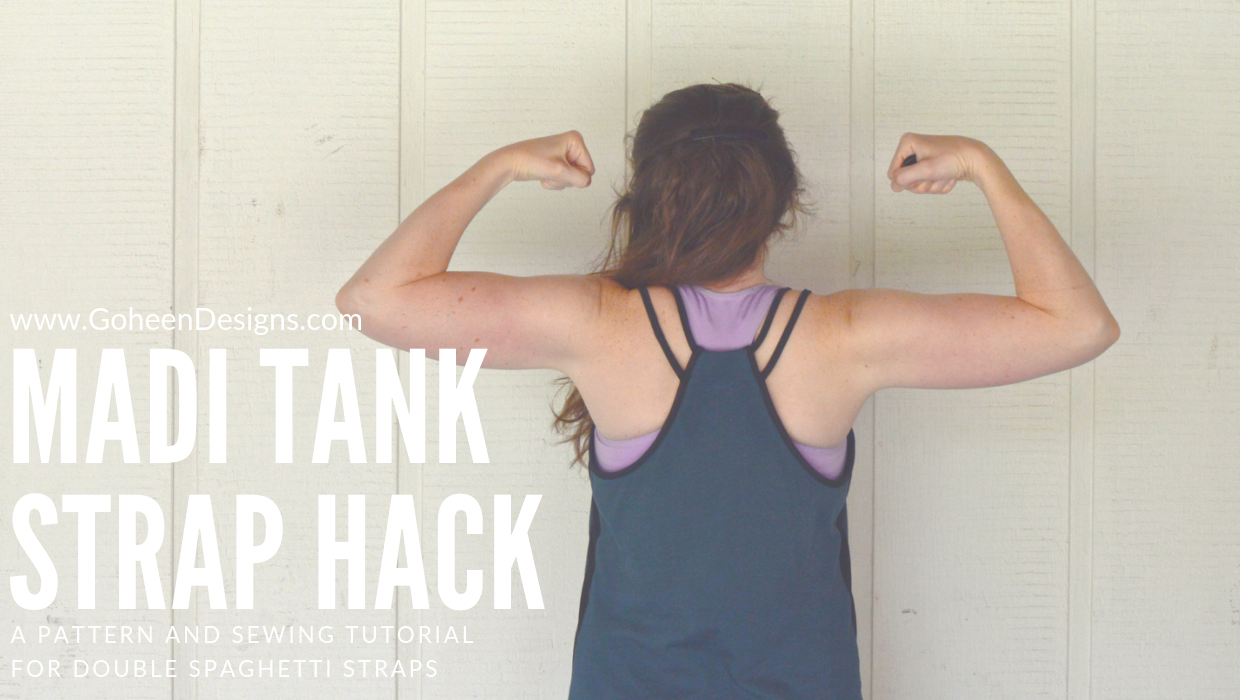
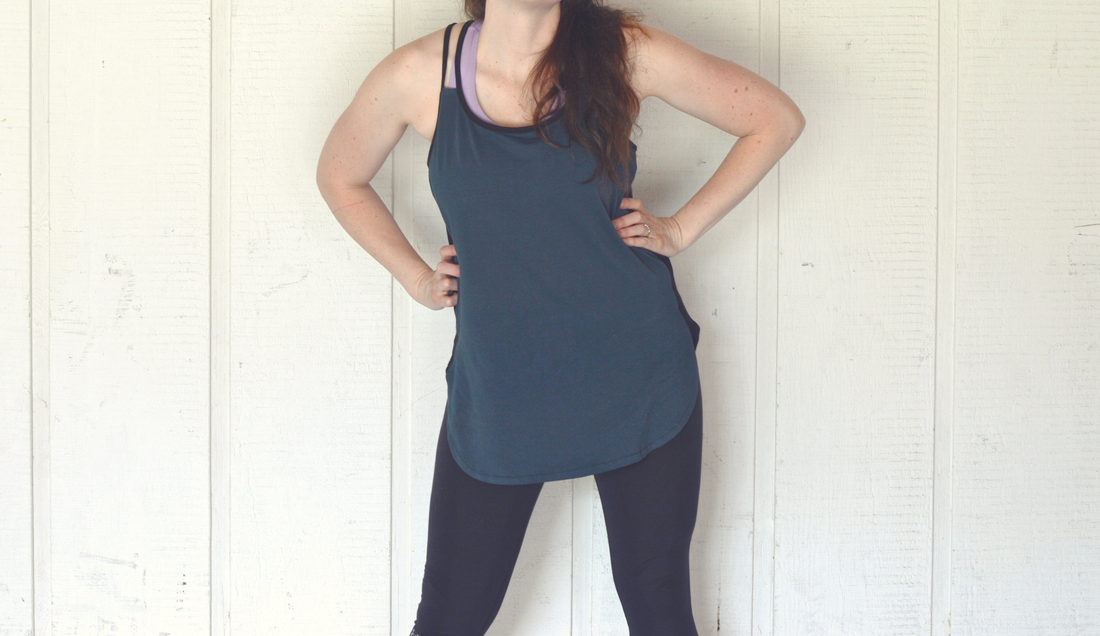
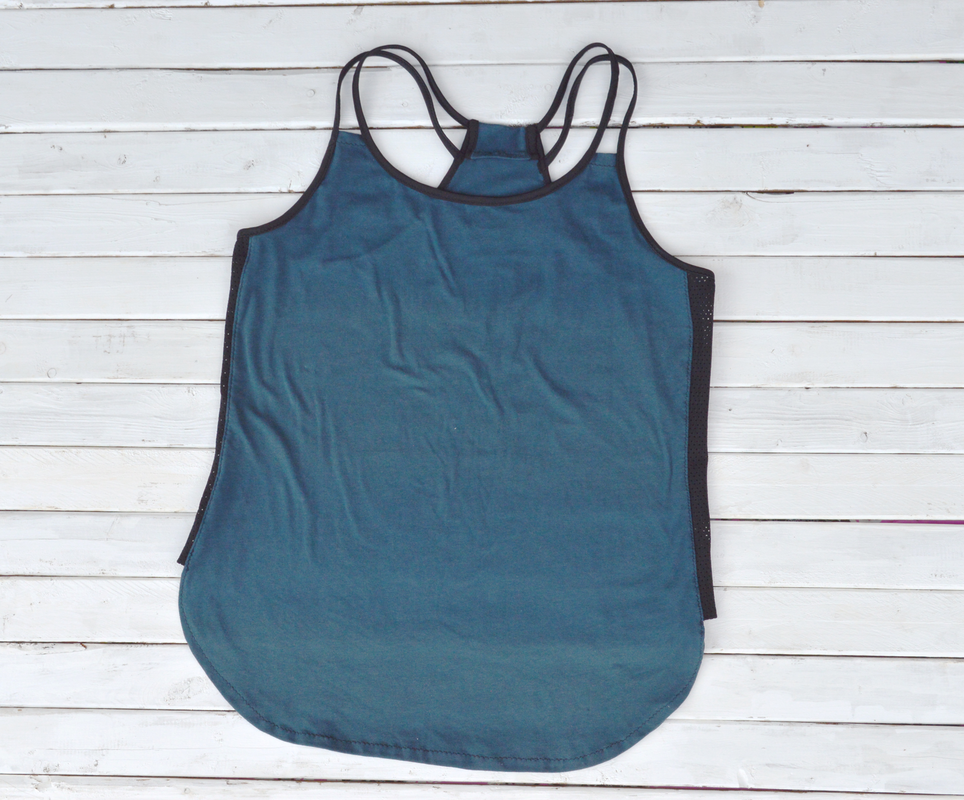
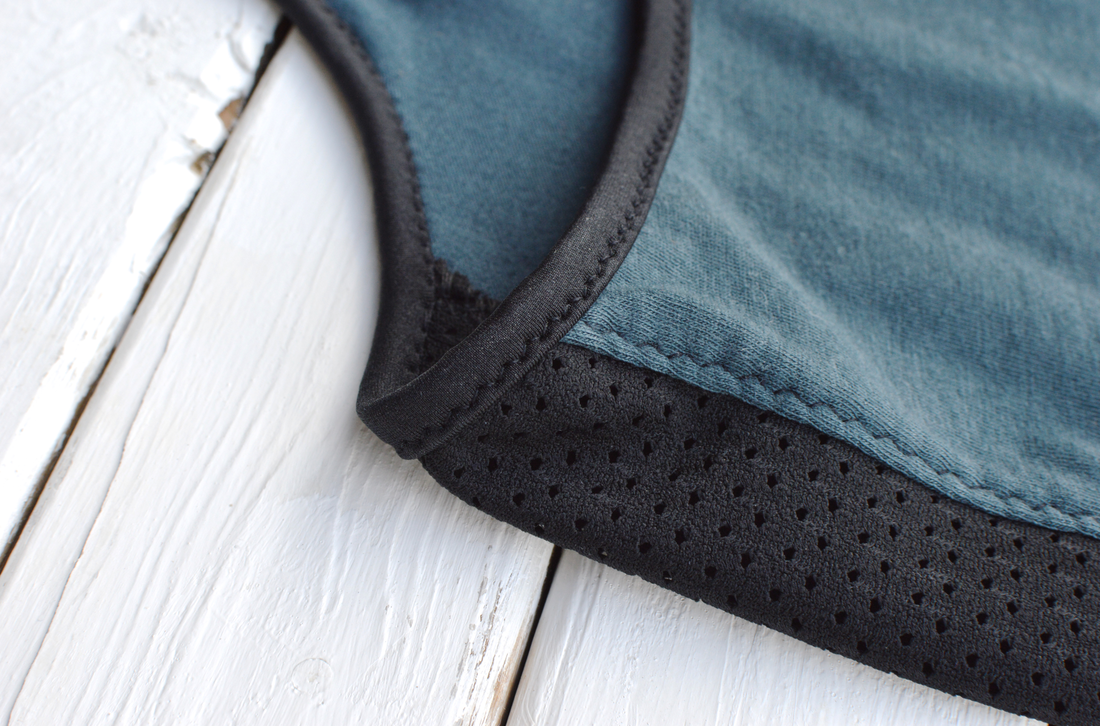
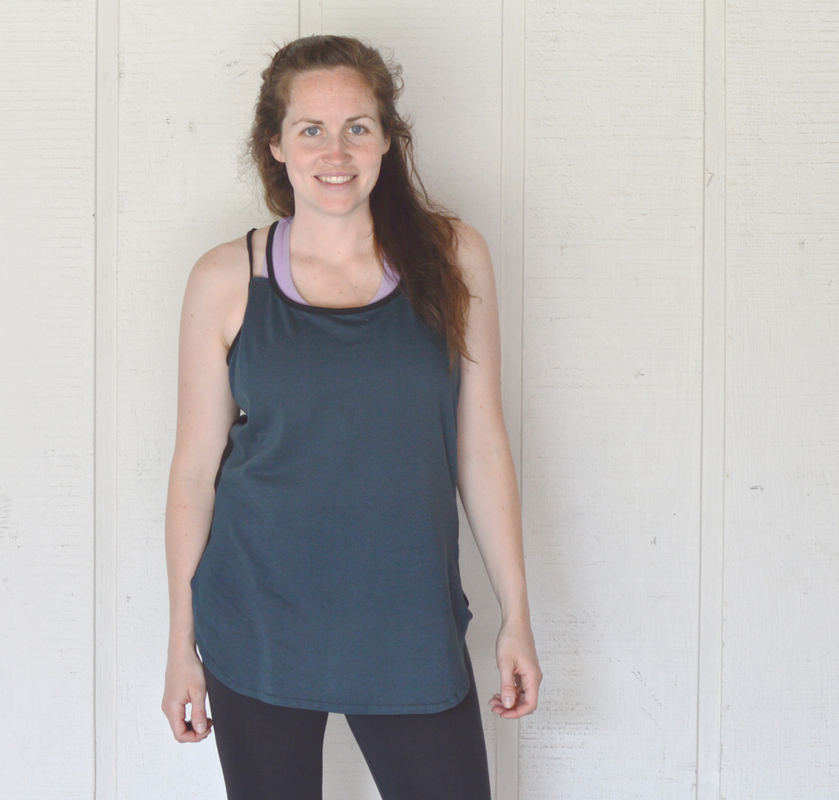
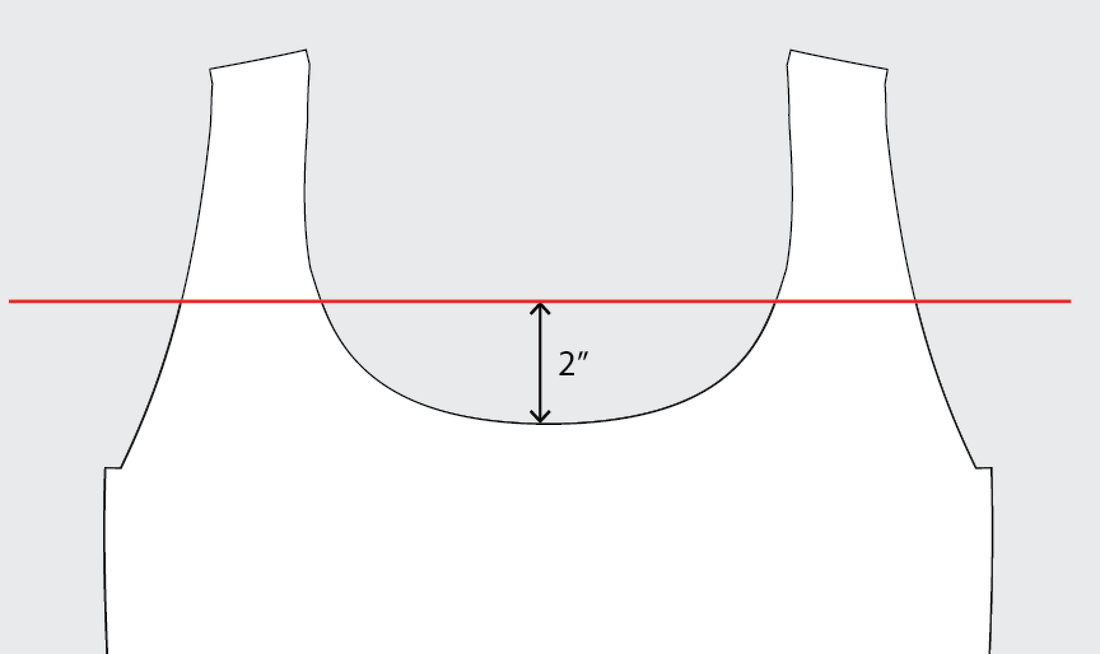
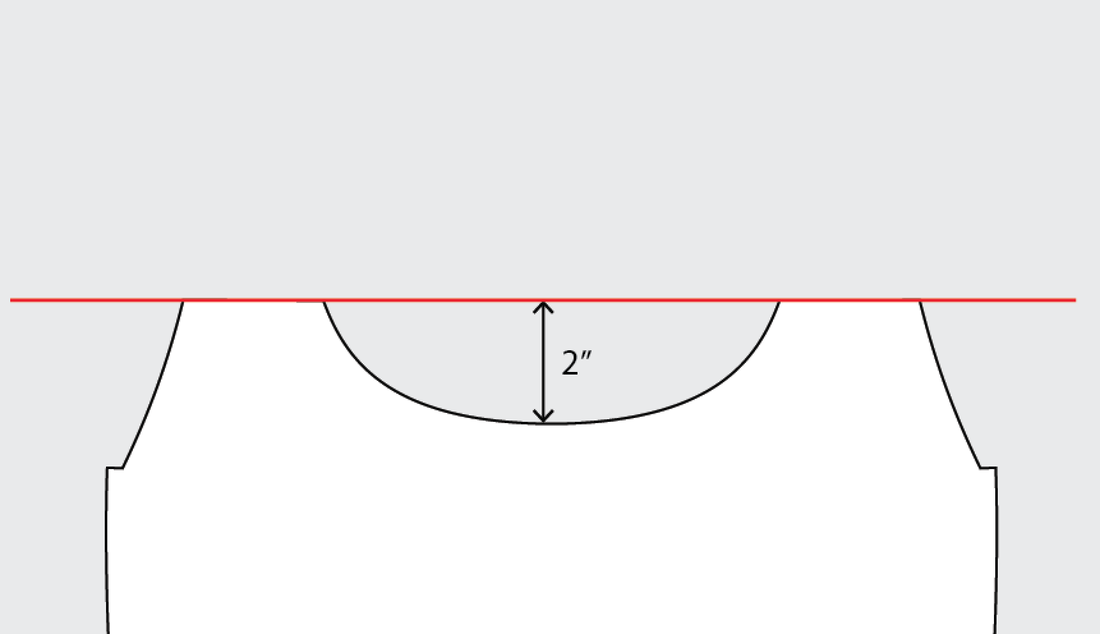
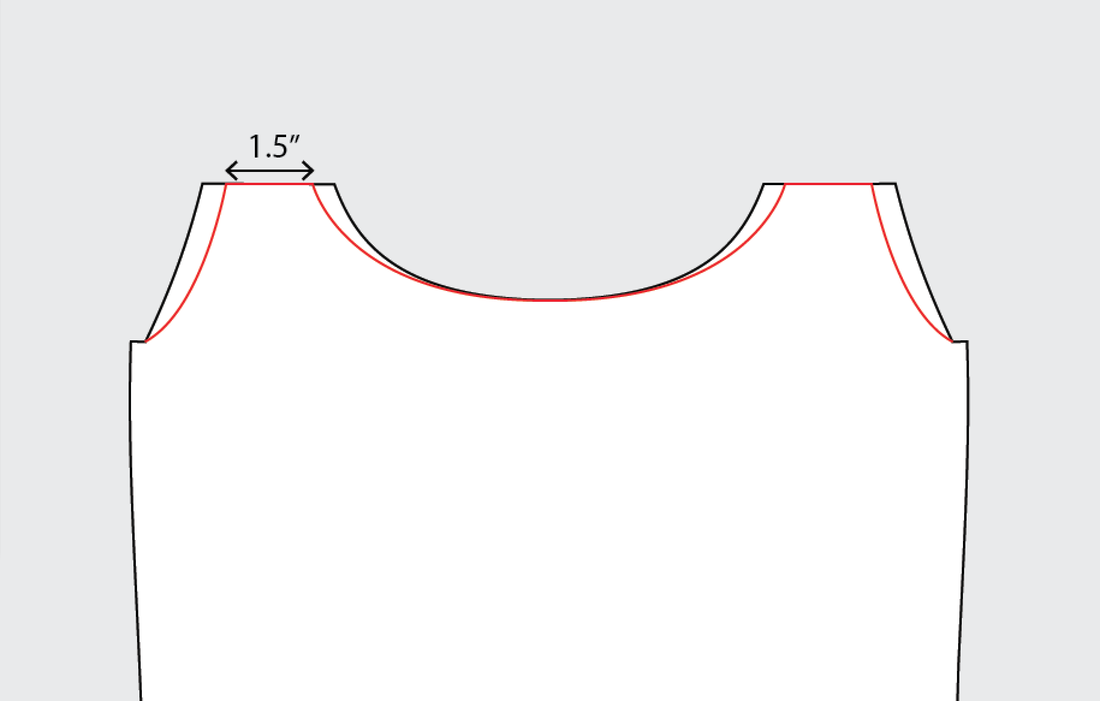
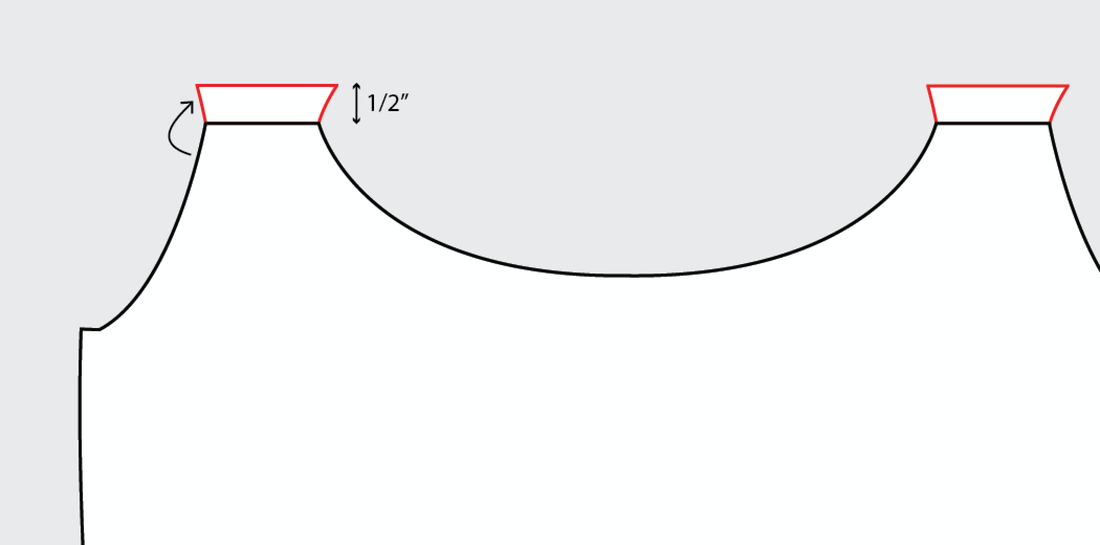
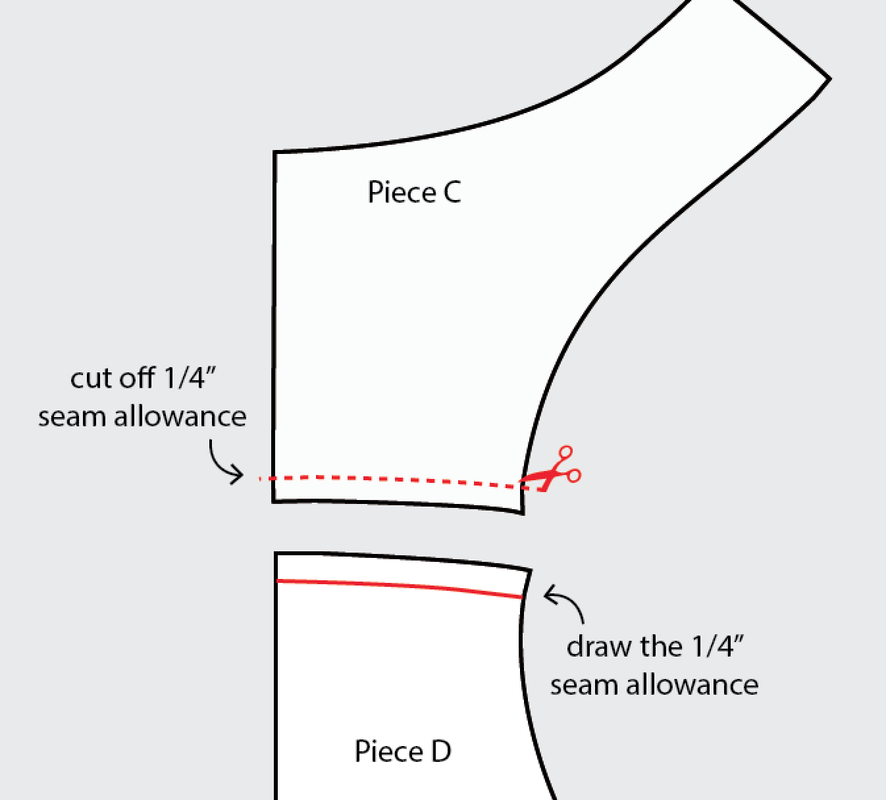
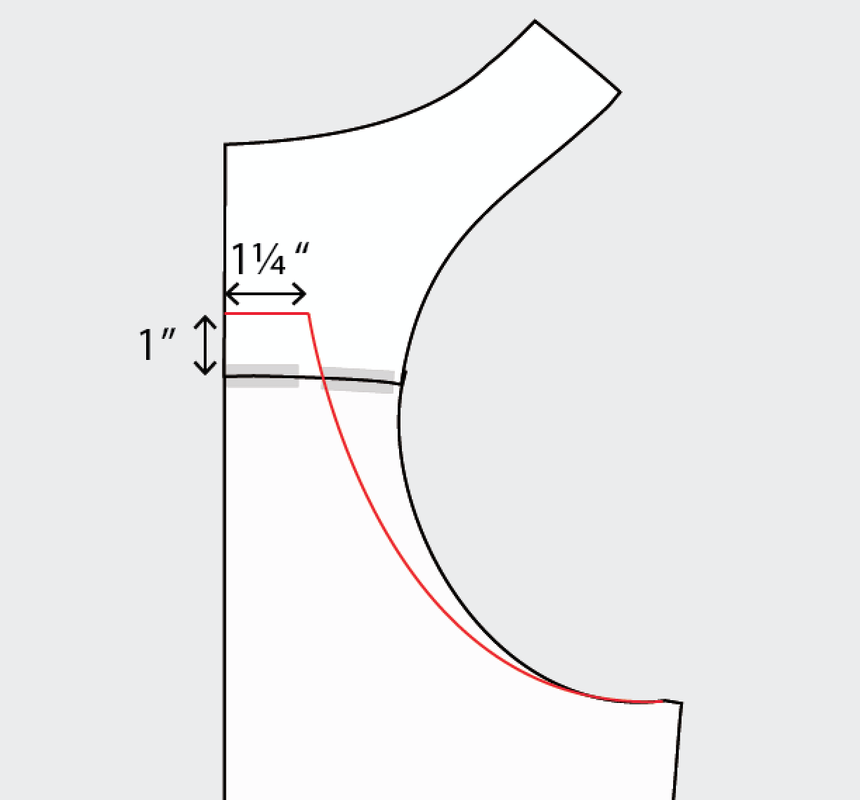
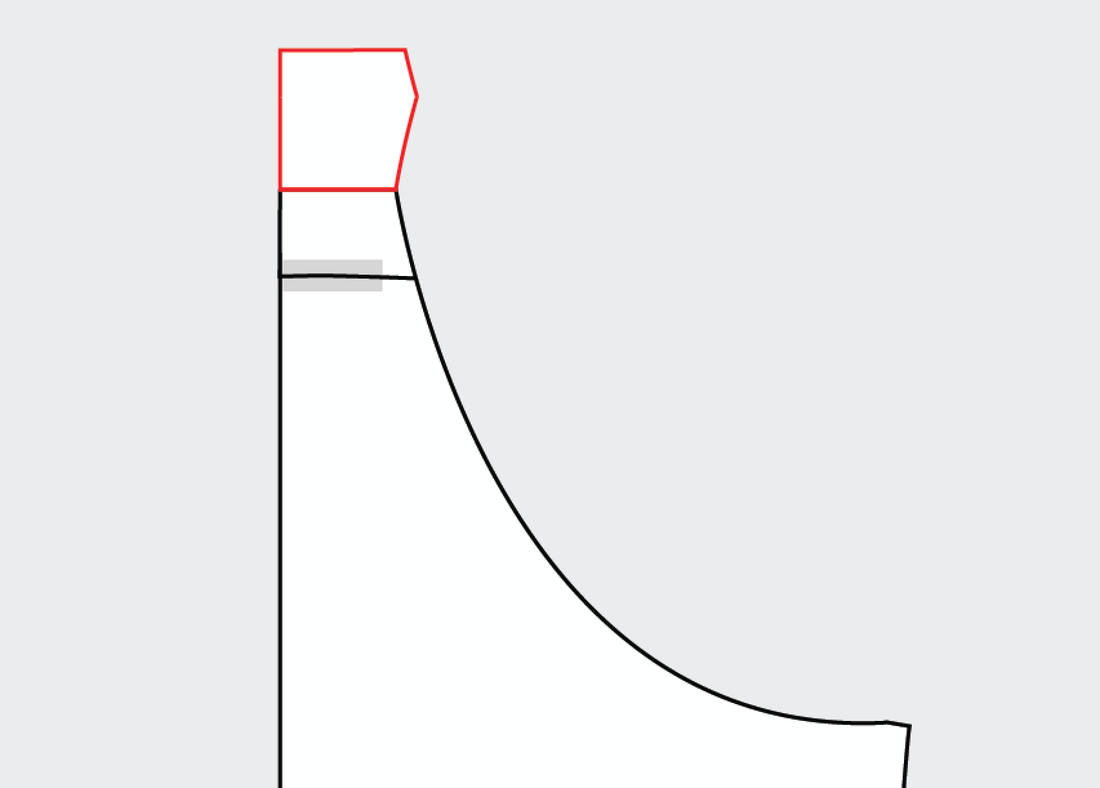
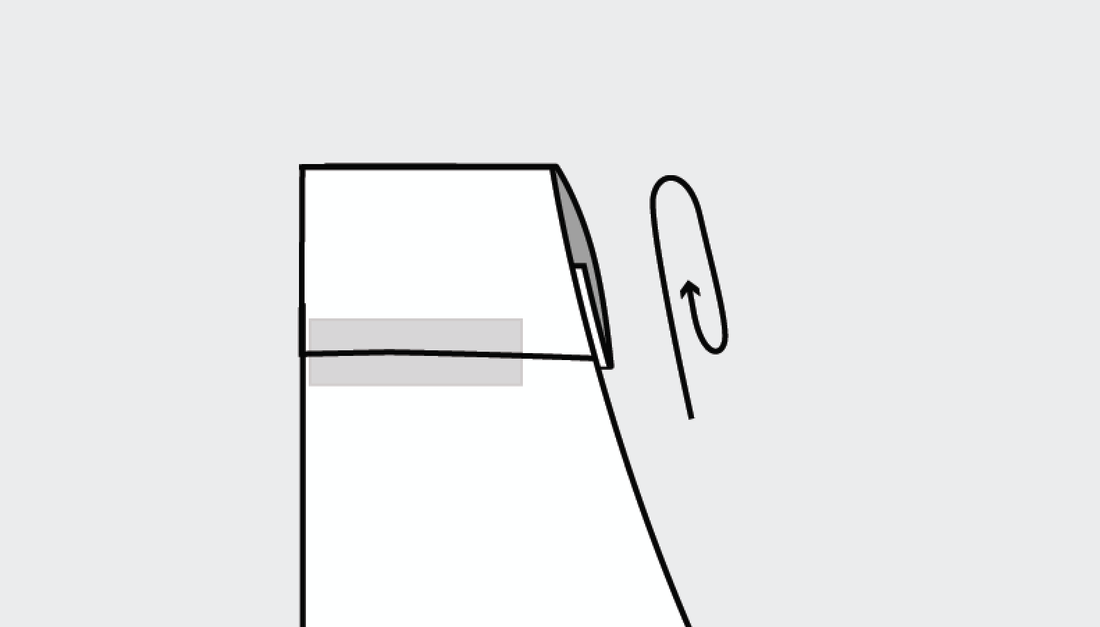
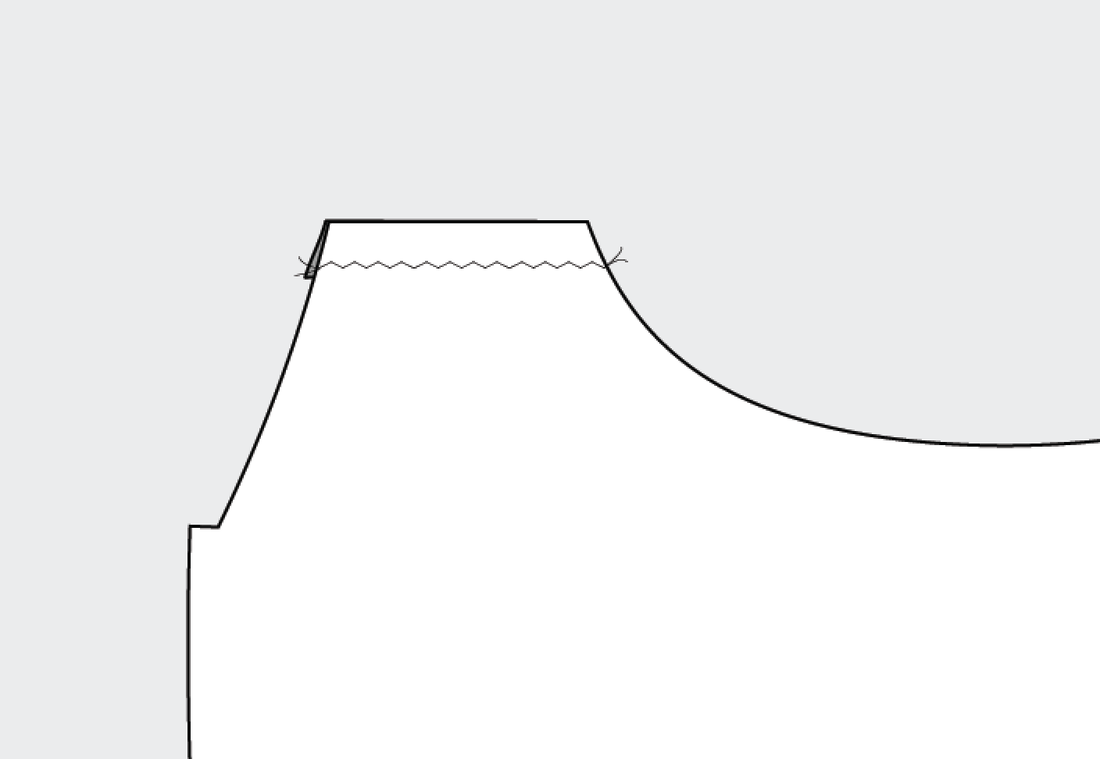
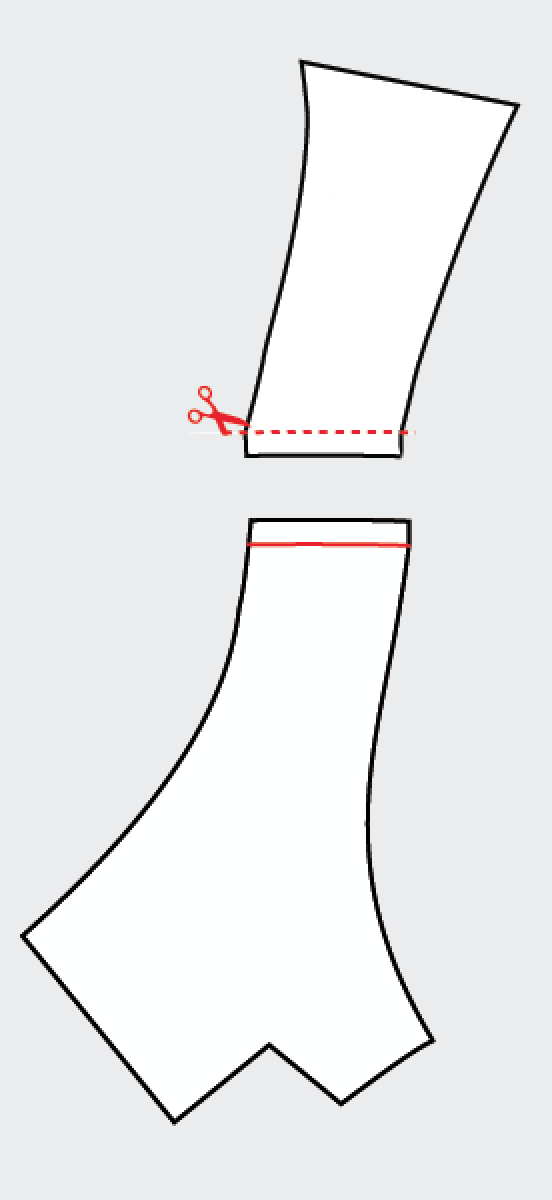
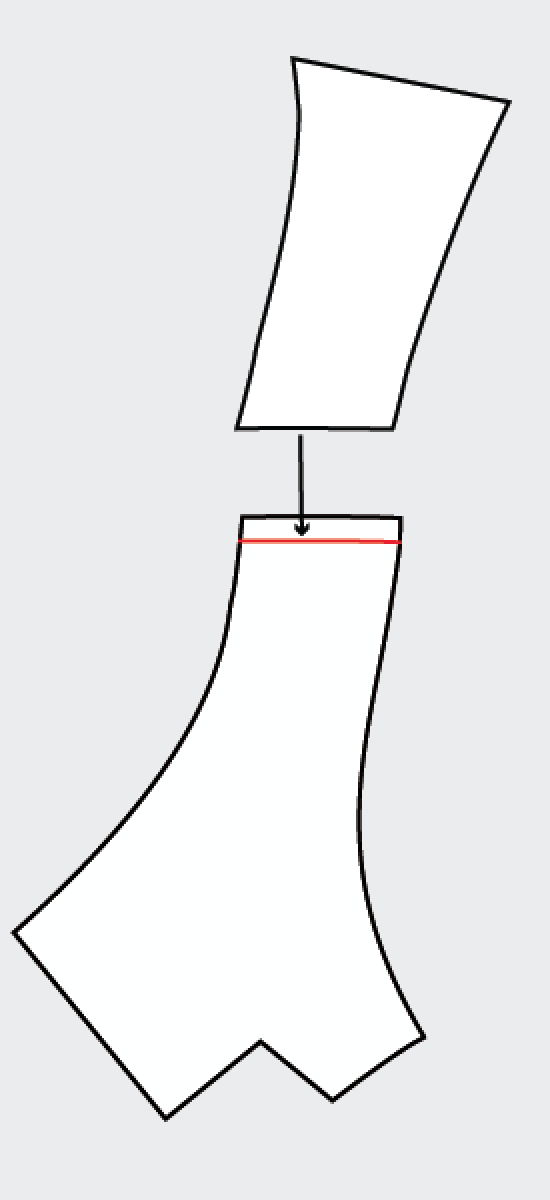
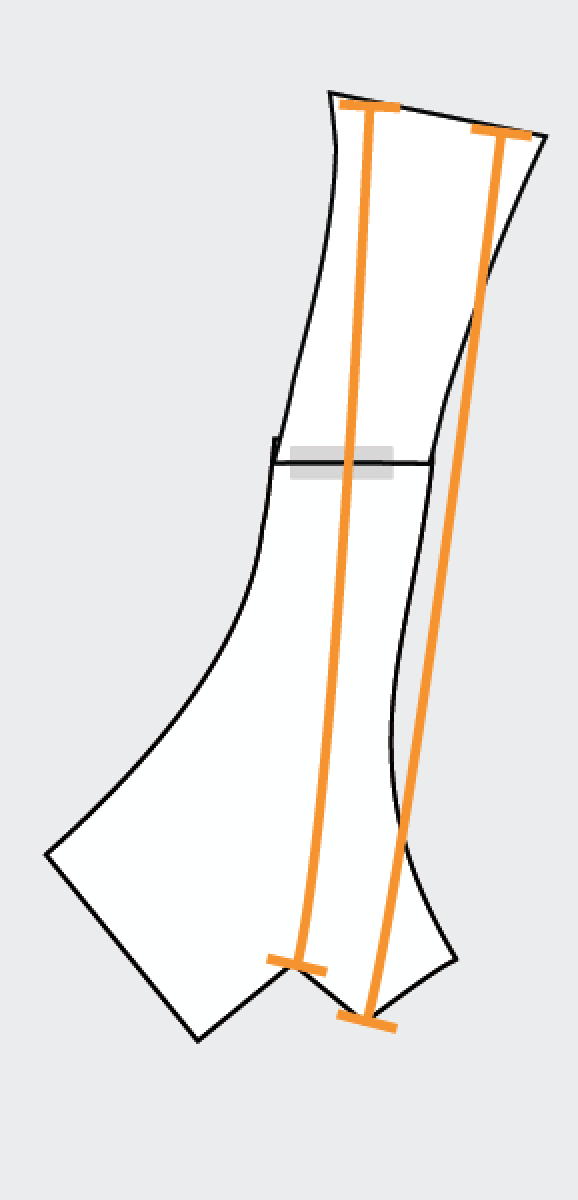
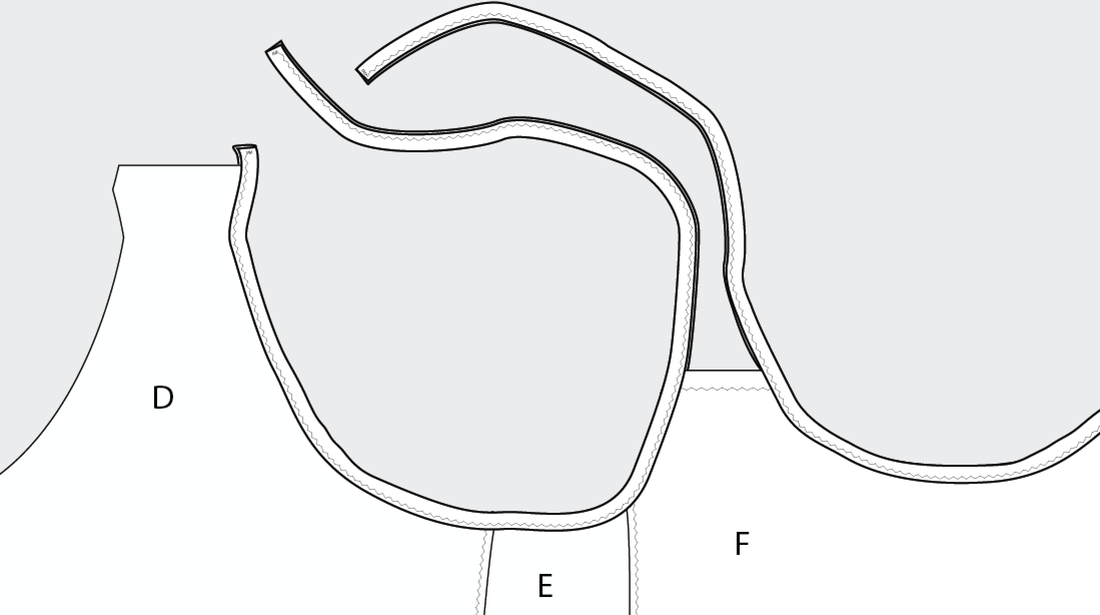
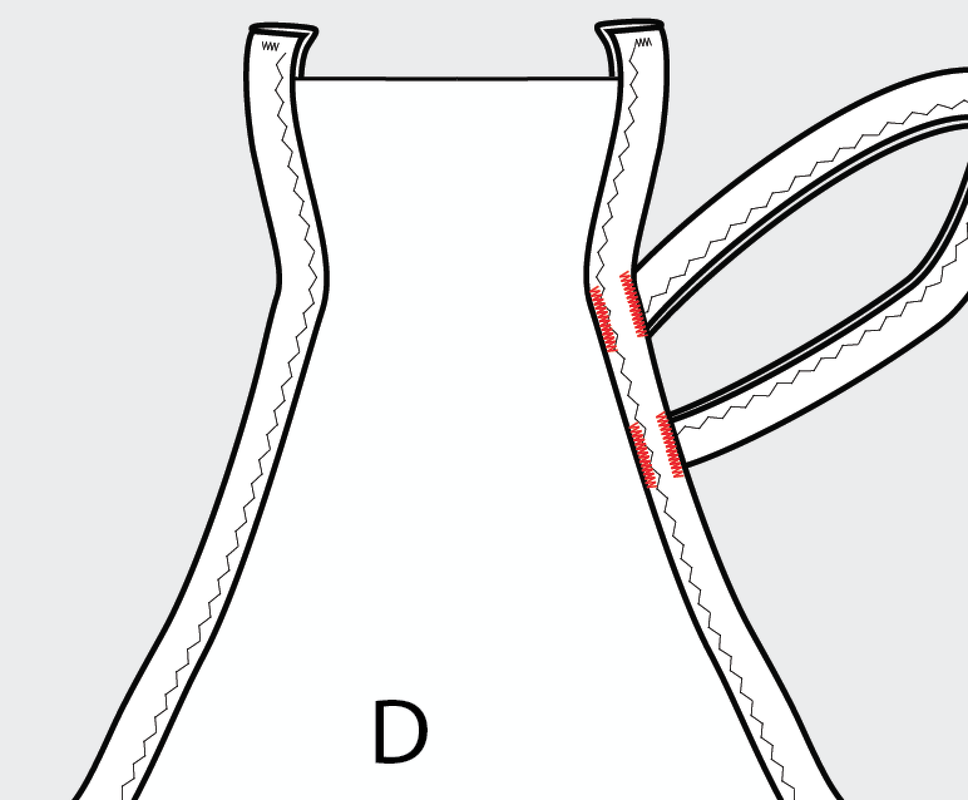
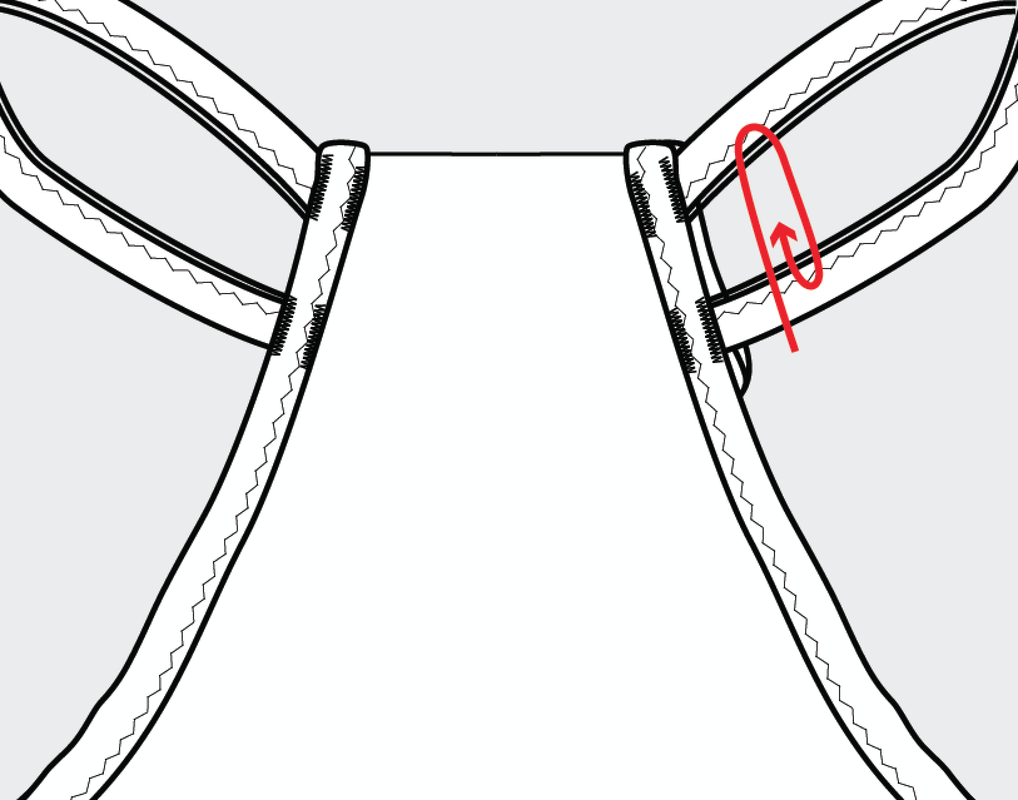
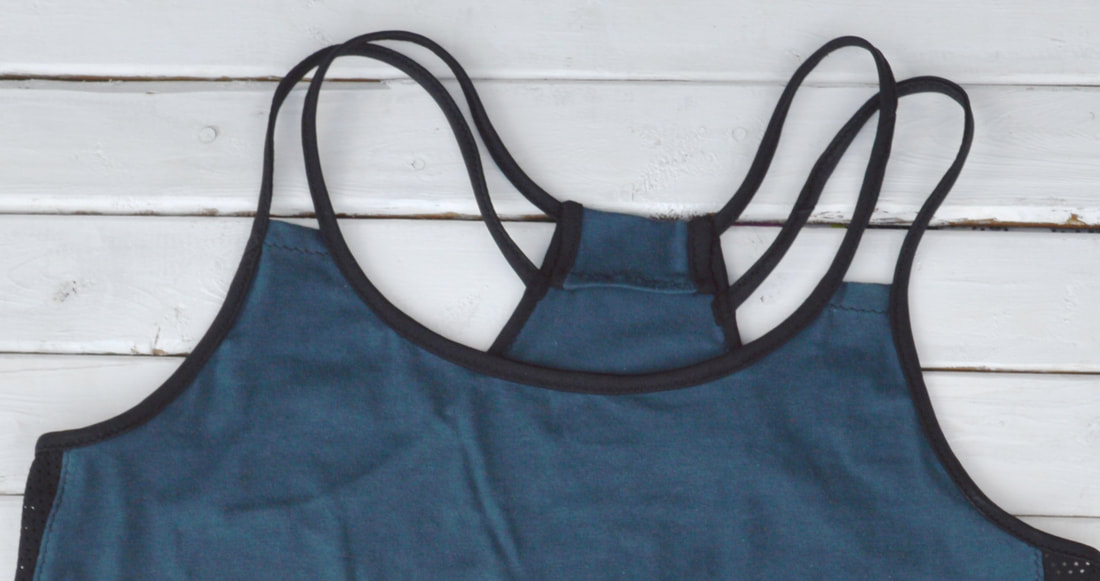
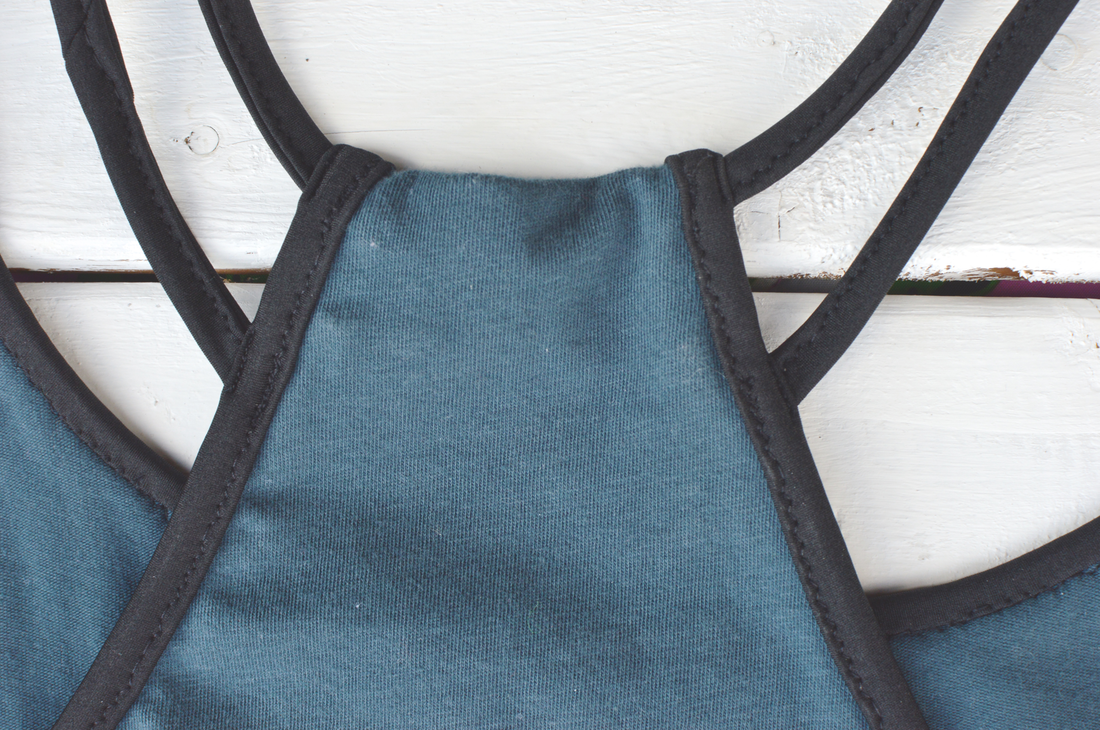
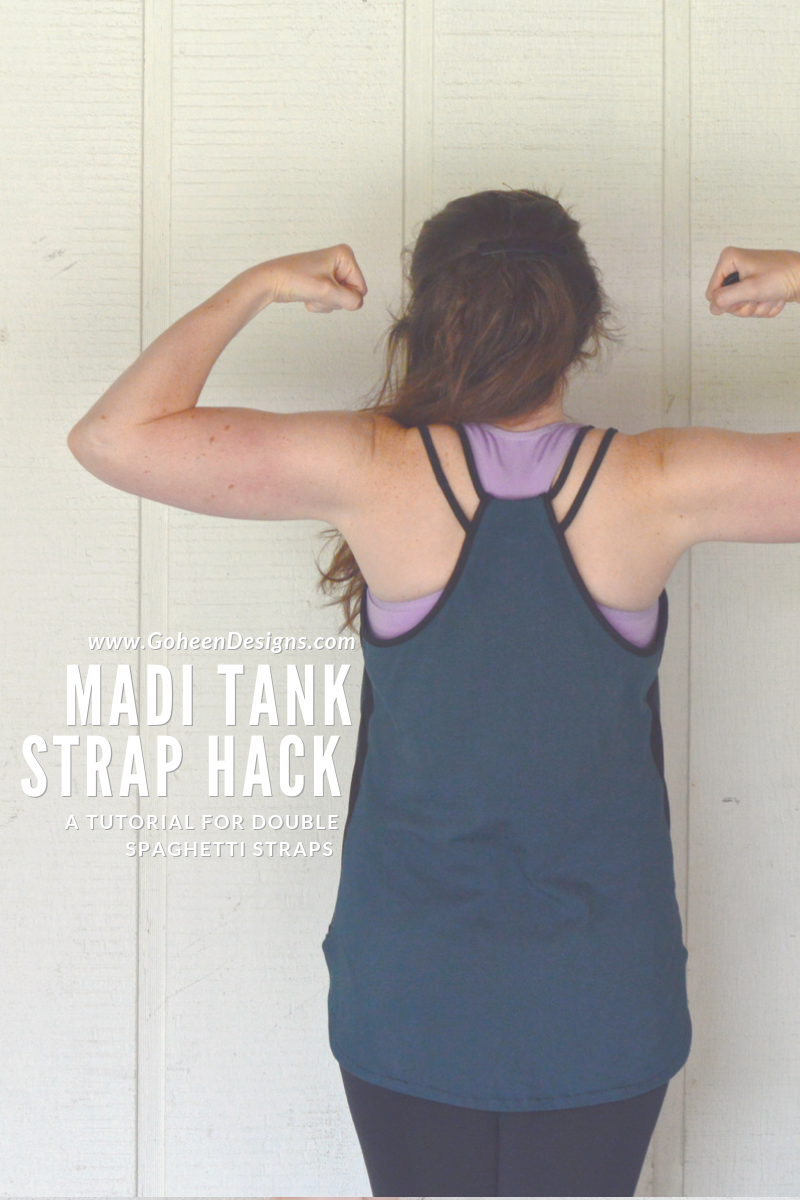
One of the things I love about sewing my own clothes is the ability to create meaningful garments for meaningful events in my life. There are the huge life events like my wedding (and yes I did make my own wedding dress) and then there are smaller but still meaningful events like running my first post baby road race. Running after giving birth has been a really difficult transition for me, and I felt like I needed to celebrate the hard work I'd put in to get ready for this half marathon. So of course, what better way to celebrate than by making myself a new Madi tank for race day?! Of course, in the end, life got in the way and I didn't end up finishing it in time to wear it for the race. But I still think of it as my Indy Mini Madi. I have a few "normal" madi tanks in my closet already (that follow the pattern) but I'm a big fan of hacking my patterns to create new variations. I created a pinterest board for inspiration, and then narrowed it down to a few different features that I thought would be fun. Even though I changed multiple things in this one Madi, I decided to break it up into multiple blog posts, so you can focus on one hack at a time. The first hack? I'm referring to it as the "Strappy Hack". This hack gives you double spaghetti straps on the shoulders of your tank top. Just as a note: Normally I wear a size H in the Madi, but I've discovered that I'm more self conscious about wearing tighter garments these days, and I wanted a looser fit, so I made a size J this time based on my new measurements and to give it more ease. Honestly, this turned out a little too loose for what I had in mind! It will work, but next time I'll go with size I instead. For the main pieces of my hack, I used a beautiful blue jersey fabric that I bought from Feira Dos Tecidos in Lisbon a few months back. For the accent pieces I used black scrap pieces from previous Madis. This is one of the things I love about this pattern. It is such a great scrap buster! Strappy HackThe hardest part about the strap change for me was the fact that I couldn't try on my tank until it was nearly finished, which means making any fitting alterations around the armholes or neckline would have been a huge chore (taking off the binding, then taking out the seam, then redoing the seam, then redoing the binding, then checking the fit again...). So unless you enjoy a close friendship with your seam ripper, I advise only making this hack after getting the fit you want in a standard Madi, then using that altered pattern as your base. Other than that, the hack is pretty straight forward! Front Piece (F) Pattern Alteration:Draw a line 2 inches up from the center front neckline and cut off the straps above this pattern. Save these strap pieces for later though. Narrow the strap width to 1.5", redraw the neck and armhole lines, then trim off the excess. Add 1/2 inch to the top of your straps for turning under the raw edge. Mirror the half inch below the strap edge. Back Pieces (C and D) Pattern Alteration:Draw the 1/4" seam allowance on the bottom of piece C and the top of piece D. Cut the seam allowance off of piece C, then line up the new cut edge with the seam allowance drawn on piece D. Tape in place. Draw a new back neck line 1" up from the taped join. Make it 1.25" across from the center back then draw a new armhole line connecting to the side seam. Cut off the excess, but put it aside for later. Add on a hem allowance to the top of the new back pattern. I added 1.5" to create a double fold with the first being 1", and the second being 1/2". Sewing the Strappy HackTurn under the hems for your front straps and topstitch in place using a zigzag stitch. Sew the side panels in your Madi following the normal instructions: sewing the seams and then topstitching. The next step will be the binding. Both the armhole binding and the neck binding will run off the fabric (extending from the front) and be sewn only to itself to create the straps. To get a good idea of how long this extra section of binding needs to be, use the strap pieces of your pattern that you've set aside. Trim the seam allowance off of the front shoulder seam, overlap that piece 1/4" on the back shoulder seam and tape in place. Then measure where your spaghetti straps will connect (the orange lines). For the armhole binding, start at the top of piece D and continue around to the front (F). When you get past the strap hem, keep sewing the binding to itself for at least the measurement that you got from measuring above. For the neck binding, make sure that the extra length hangs off of both sides of the neckline. Pin the ends of the binding straps to piece D and try on your tank top. Make sure that the length and positioning of your straps is exactly what you want. Then bartack the straps in place. I bartack the straps on both edges of the back binding. Once all four straps are sewn in place, fold the top of piece D down 1/2" and machine stitch. Then fold again at 1" and secure the hem with a few hand stitches.
0 Comments
Leave a Reply. |
madeline stage
creative business owner. designer. hoosier. crafter. runner. sewer. swing dancer. outdoor enthusiast. entrepreneur. wife. mom. material hoarder. Categories
All
Archives
June 2023
|
Contact Me
|
Weekly Mantra:Motivation doesn't last. That's why, just like bathing, we recommend it daily.
Click here for the Privacy Policy |
|

 RSS Feed