Goheen
  • Home
  • Pattern Shop
    • Shop Patterns
    • Shop Kits
    • Sizing Chart
    • Skill Levels Chart
    • Pattern Kit Instructions
    • Corrections
  • Green Graves
  • The Community
  • Blog
    • Blog
    • Blog Archives
  • About
  • My Makes
  • Stockists
  • Search

Guest Post: Sewing the Huxley Bag

9/19/2018

3 Comments

 
This is a guest post by Sonia Spence over at Fabric & Flowers. Go check out her awesome blog full of tips, tutorials, and patterns!


sonia from fabric and flowers
Hi! I live in the West of the UK and started sewing in 2011 with an old sewing machine I’d been given and haven't really stopped since! 
I am passionate about quilting and inspired by colours, shapes or random ideas that pop in to my head. I love coming up with a design and making it a reality, and as well as quilts I also like to design bags, pouches and accessories (you can find my patterns in my Etsy Shop here and where my patterns have been published here). I believe that nothing is impossible (especially if you don’t think about it too much…..I often question myself halfway through a project though!) and love to encourage others to try new things.
Sx
huxley rucksack convertible sewing pattern

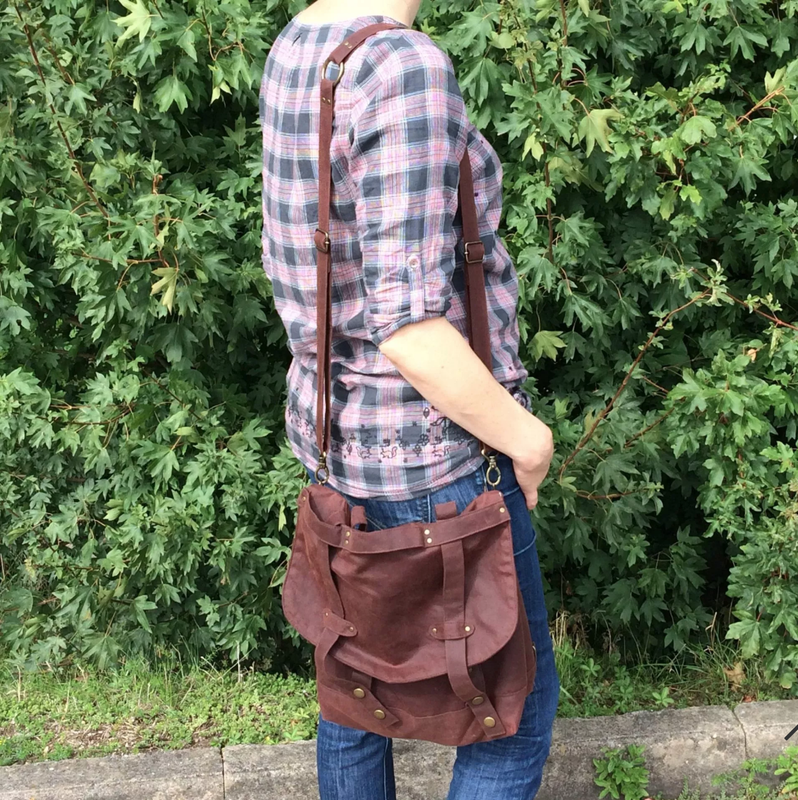
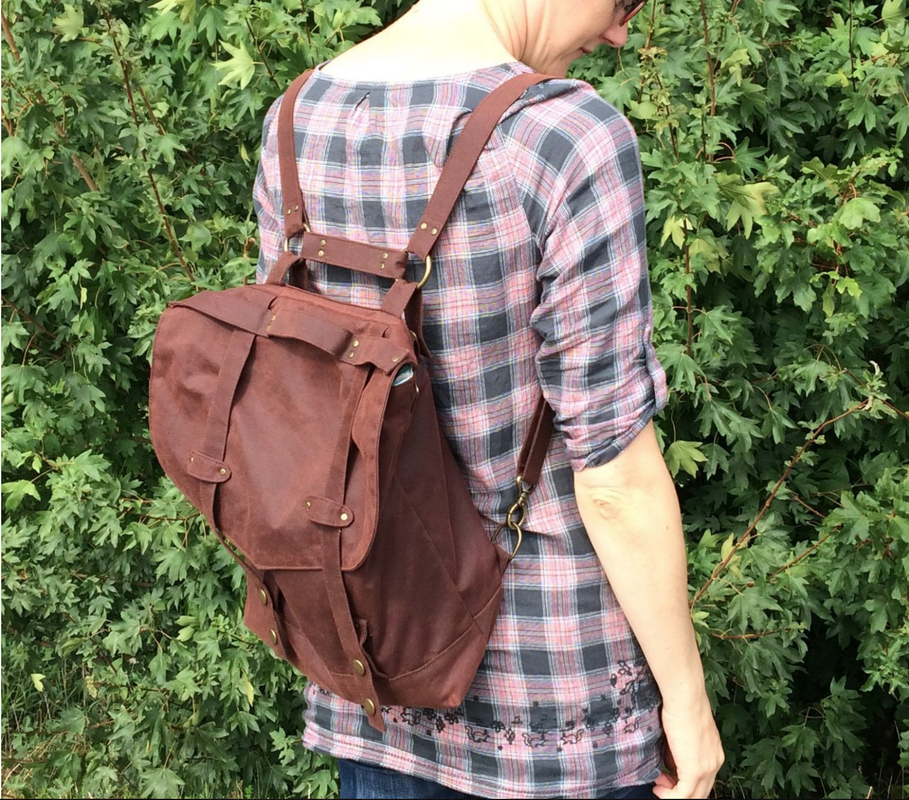
Sewing the Huxley Bag – a convertible rucksack

NOTE: this post may contain affiliate links. It will not cost you any money if you click on them and just means that I get a small commission for recommending it.
A little while ago, I was debating designing a new bag. My messenger bag was threadbare and I’d cut it apart to remove the hardware for my daughters’ bag! I wanted a bag that I could convert from a shoulder/ crossbody bag into a rucksack and although I had come across quite a few – I especially liked this one – they weren’t quite what I wanted. Then I saw the Huxley Bag by Goheen Designs and I was smitten. The idea of using rivets and other hardware seemed like good fun!
huxley sewing pattern convertible rucksack
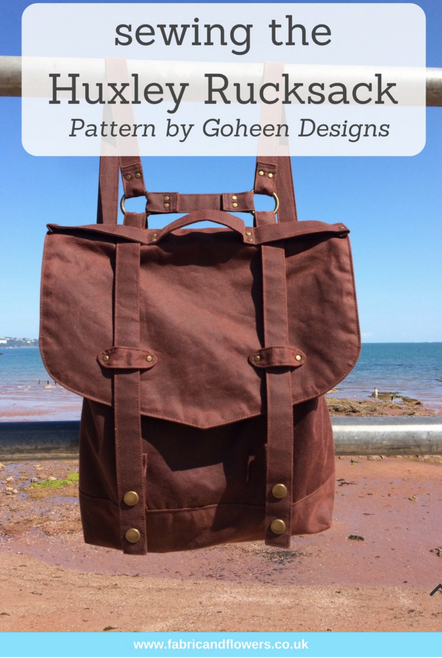
Originally, I’d hoped to have it finished in time for Festival of Quilts, but that didn’t quite happen……kids, holidays and the like mean everything’s taken a bit longer. I also decided to take my time to enjoy the making process: the pattern is rated as confident and there are a number of steps to follow – not in a scary way, mind! – and I’d made a few adjustments to it due to the fabric that I was using, which involved a bit more thinking!
I made a large View A and used a waxed cotton (from here) – it has a leather-like look, but is a bit thinner and provides an element of being waterproof which is handy! It meant that I could do without the webbing but had to adapt the pattern – both in terms of width and length (on some strap pieces, the pattern calls for leather to be top stitched to a longer piece of webbing) which required a little bit of planning.
adding in a back zipper pocket
I also decided to add a zip to the back pocket – I love having a secure place to keep valuables, especially when it’s being used as a messenger bag. I added the zip in between the outer and lining fabric of the back pocket and then secured the ‘free’ zip side straight on to the back piece of the bag with a few lines of stitching. However, I didn’t really read the pattern fully through – schoolgirl error! – and then realised I would have to alter the length of the bike straps in order to make it all look ok! Ah well, if you chose to do this, you can learn from my mistake!
Overall, the pattern is really well written. On first look at the download, it can seem slightly intimidating – there are over 40 pages! However, many of the early pages are used to share tips, and the rest of the pattern takes you through step-by-step in a clear and concise way.
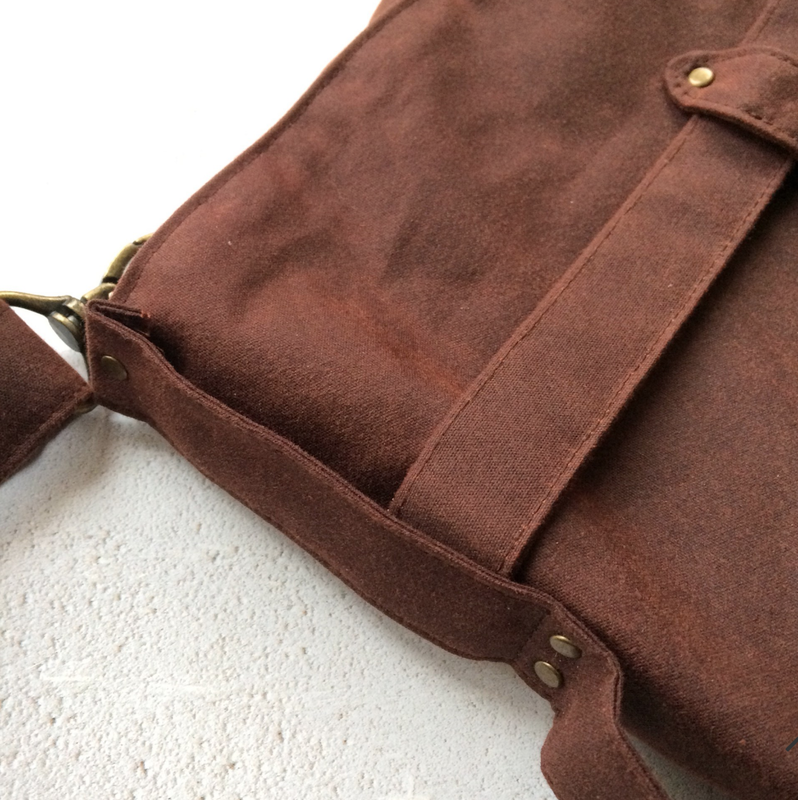
details of the huxley bag pattern
Sewing Tips
  • If you are using fabric instead of leather, make sure to add a seam allowance to the bag strap guide – I added 1/4″ – and cut two pieces for each strap. Place two pieces wrong side together and sew around, leaving a gap for turning. Turn through and topstitch before proceeding as per the pattern.
  • For fabric straps, cut all pieces at 4″ wide x the length of the pattern piece or webbing (whichever is longest): fold one or both ends over (dependant on if it’s a visible end), fold in half along the length and then fold the edges into the middle. Top stitch around the edges of the strap to secure
  • Check position and length of the bike straps before adding a zip pocket on the back of the bag! They need adding before the zip is sewn on and I altered mine to be a bit shorter so that the straps sit at the top of the pocket and only used one popper.
  • If you want to add a zip to the back pocket, make tabs to go at each end of the zip. There should be at least 1/2″ of fabric at each end for the seam allowance to allow for ease of sewing the bag together (see my tutorial here if you’re not sure how).
  • To mark sewing lines – especially where they are not going to be seen – I found that placing the paper pattern piece on top of the fabric and using a Hera marker would create a guideline (similar to what I would get from creasing) the fabric.
  • Using a zipper foot for sewing the sides (especially where I’d added the zip pocket) and sewing the outer and inner bags together around the top gave a better result, and meant the foot didn’t get pushed out of the way by all the straps. I also found it was less likely to give me skipped stitches where there were lots of layers.
putting in hardware in a bag pattern
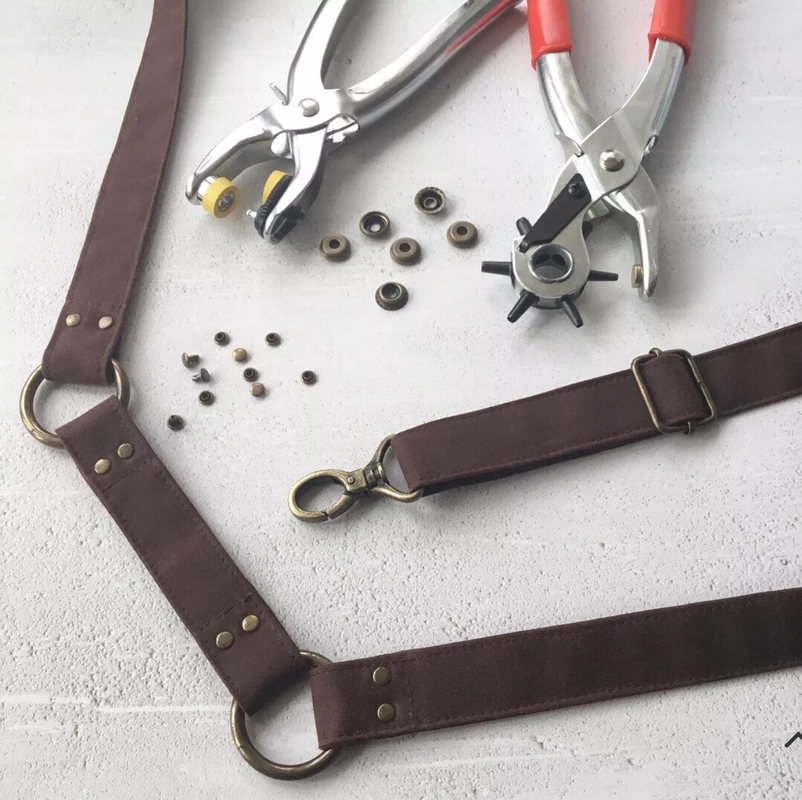
Tips for accurate placement of rivets & poppers
  • Laying the paper pieces over the fabric, I would push a pin through the guide mark – sometimes this would leave a visible mark that I could then punch, other times I would use a quilting pencil to make it more visible with a dot.
  • Where possible, I folded or layered pieces together so that I could punch holes in all of them at the same time and therefore increase my ‘accuracy’.
  • I used 6mm rivets for this bag, I figured the waxed cotton would be a bit thinner than leather. Largely, this was okay but there were a couple of spots – mostly on the handle at the edge of the bag flap – where slightly longer rivets would have been handy, so next time around I will definitely look at getting some bigger ones!
convertible bag sewing pattern
I think that covers everything?! Someone on IG asked me if the bag was heavy, which is a really good question and one I had to think about! It makes sense that it would be with all the hardware on it, however, its actually quite tricky to tell. The waxed cotton is a heavier fabric anyway (the bag I made for my daughter weighs probably double the one I’d made out of cotton and wadding!) but having never sewn with leather, I’m not sure how this would compare? So far, all I can really say is that it is a good weight and I’ve not been put off using it!
Overall, I am so happy with the bag! It’s not the biggest rucksack – it’s best to think of it as a shoulder bag that converts into a rucksack – but is perfect for my needs. Having never used hardware before, I feel that it really lifts the finished look to a much more professional level. Not all of my rivets are perfect – in fact, there are a number of things that I could pick on as ‘could be better’ – but I think that’s the makers’ curse, isn’t it?! I’m trying to let these little things go though and concentrate on all the skills I learnt! I can see myself making another in the future, maybe using different fabrics and having made this one, I can see (hope!) that others will go together a lot quicker and easier!
See you soon,
Sx
​
3 Comments
Sonia link
9/19/2018 03:37:05 am

Thanks for sharing this Madeline! It's a great pattern and I had so much fun making it x

Reply
MckinneyVia link
12/19/2021 09:21:42 pm

Excellent article! Your post is essential today. Thanks for sharing, by the way.
If you are looking for coupon codes and deals just visit coupon plus deals dot horizn studios sale dot com

Reply
Best Sewing link
3/15/2023 11:49:19 am

Hi,
I hope you are doing well, I am a constant reader of your blog. You are doing great work. I was checking your blog and saw you are offering a guest post opportunity. I have some great ideas for a guest post that will give you value for your visitors.

There are some ideas,

1. 5 things you should do to improve your sewing skills

2. Best hand-held sewing machine in 2023
3. If you have any other ideas, let me know I will get them done. Thanks

Regards

Muhammad Sufyan

Reply


Leave a Reply.

    madeline stage

    creative business owner. designer. hoosier. crafter. runner. sewer. swing dancer. outdoor enthusiast. entrepreneur. wife.  material hoarder.


    Categories

    All
    Eddie Pattern
    Goals
    Inara
    Inspiration
    Madi Pattern
    My Makes
    News
    Products
    Sewalong
    Sewing Patterns
    Sewing Tips
    Sponsored


    Archives

    December 2021
    October 2021
    May 2021
    April 2021
    February 2021
    January 2021
    December 2020
    October 2020
    July 2020
    April 2020
    March 2020
    February 2020
    January 2020
    December 2019
    November 2019
    October 2019
    September 2019
    June 2019
    May 2019
    April 2019
    March 2019
    February 2019
    December 2018
    October 2018
    September 2018
    August 2018
    June 2018
    May 2018
    April 2018
    March 2018
    February 2018
    October 2017
    September 2017
    August 2017
    July 2017
    May 2017
    March 2017
    February 2017
    January 2017
    December 2016
    November 2016
    October 2016
    September 2016
    August 2016
    July 2016
    June 2016
    May 2016
    April 2016
    March 2016
    February 2016
    January 2016
    December 2015
    November 2015


    RSS Feed

    follow us in feedly
    My Instagram Feed:
    @GoheenDesigns

    Subscribe to our mailing list

    * indicates required

Contact Me

Madeline Stage madeline.goheen@gmail.com
1-260-403-9348
Libertyville, IL

Weekly Mantra:

Right here. Right now.

Click here for the Privacy Policy

Quick Links

Blog
​About
Patterns
Sizing Chart
Kit Instructions
Sewing Level Chart
Handmade Products
© COPYRIGHT 2021. ALL RIGHTS RESERVED.
  • Home
  • Pattern Shop
    • Shop Patterns
    • Shop Kits
    • Sizing Chart
    • Skill Levels Chart
    • Pattern Kit Instructions
    • Corrections
  • Green Graves
  • The Community
  • Blog
    • Blog
    • Blog Archives
  • About
  • My Makes
  • Stockists
  • Search