Goheen
  • Home
  • Pattern Shop
    • Shop Patterns
    • Shop Kits
    • Sizing Chart
    • Skill Levels Chart
    • Pattern Kit Instructions
    • Corrections
  • Green Graves
  • The Community
  • Blog
    • Blog
    • Blog Archives
  • About
  • My Makes
  • Stockists
  • Search

Retro Top Knot Headband Tutorial

3/2/2016

0 Comments

 
rosie the riveter polka dot headband pattern

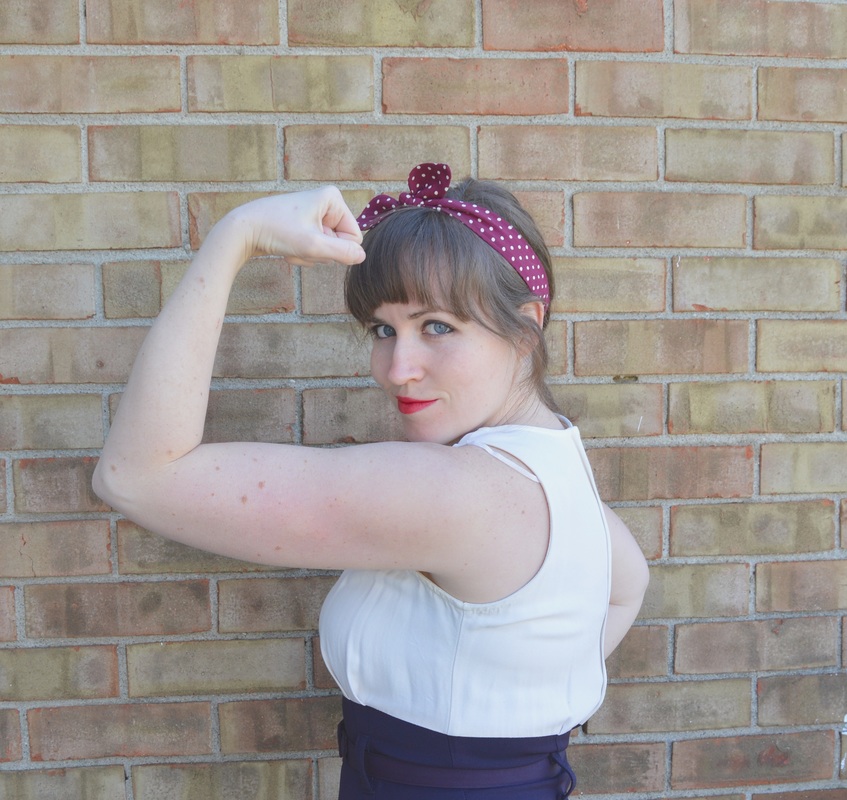
I have a new downloadable pattern for you! It is super simple, and super cute! You can find the Top Knot Headband in my shop store.

Here's a little visual help using the pattern:
topknot headband pattern free
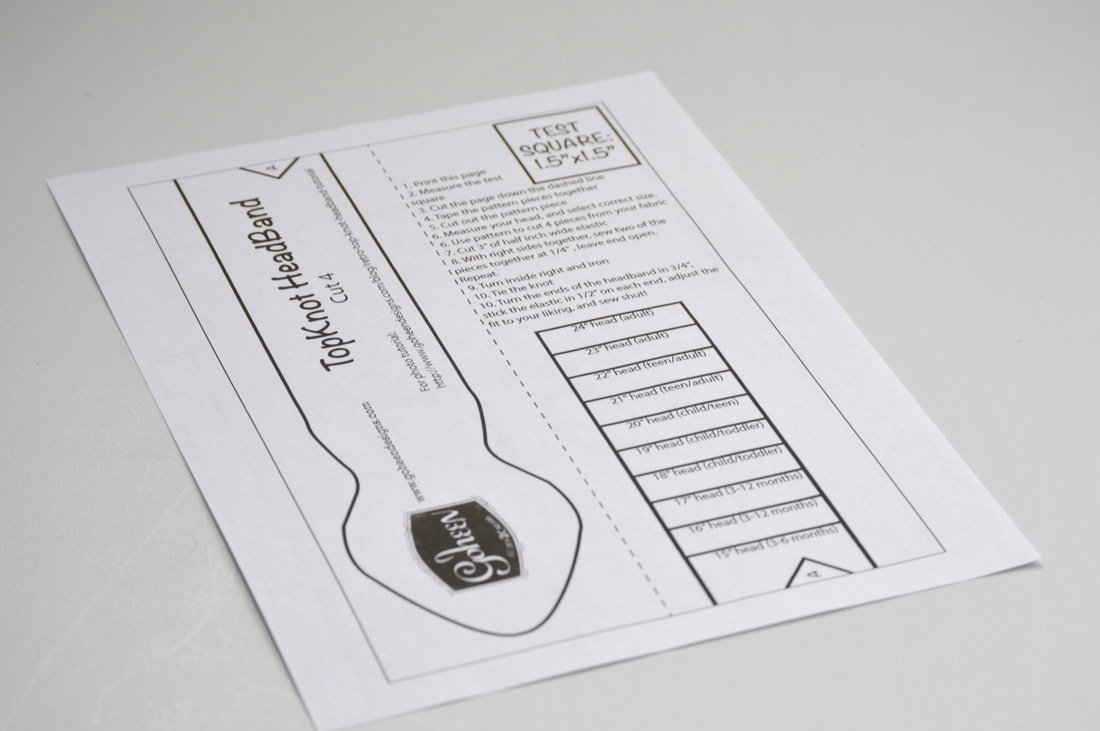
When you print your pattern, make sure that you click the option that says "Actual Size", so that it will print correctly:
how to print a digital downloadable headband pdf pattern
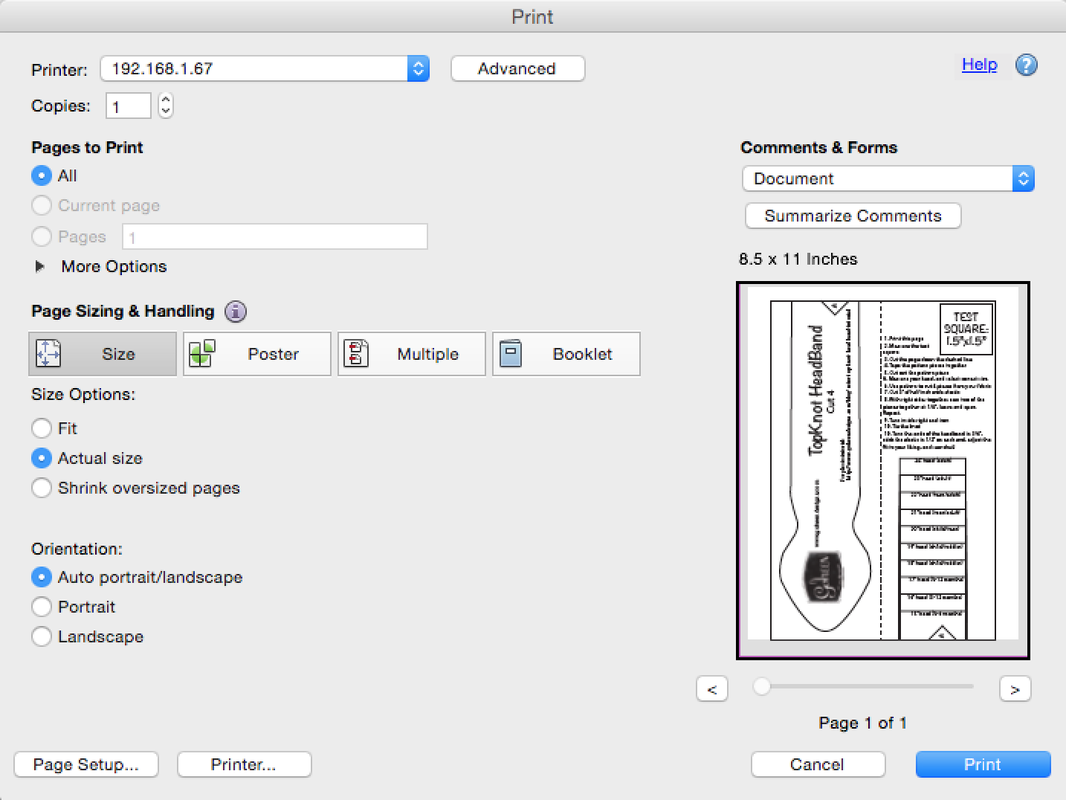
Use a ruler to make sure that the Test Square does indeed measure 2"x2"
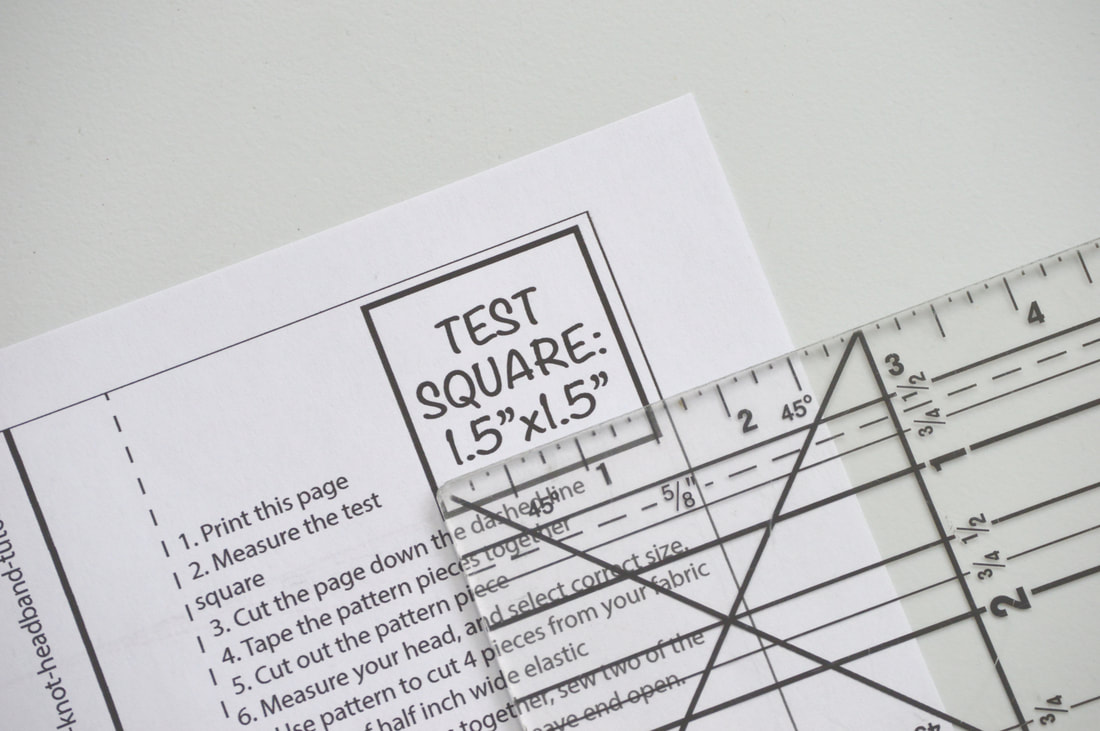
test square on a pdf indie pattern printout
Cut the page down the dashed line:
putting together a topknot pdf headband indie pattern for free
Cut off one of the "A" edges, and place it on top of the other "A", matching them and taping them in place. Then cut out the pattern piece, and you're ready to use it. 
top knot headband pattern tutorial
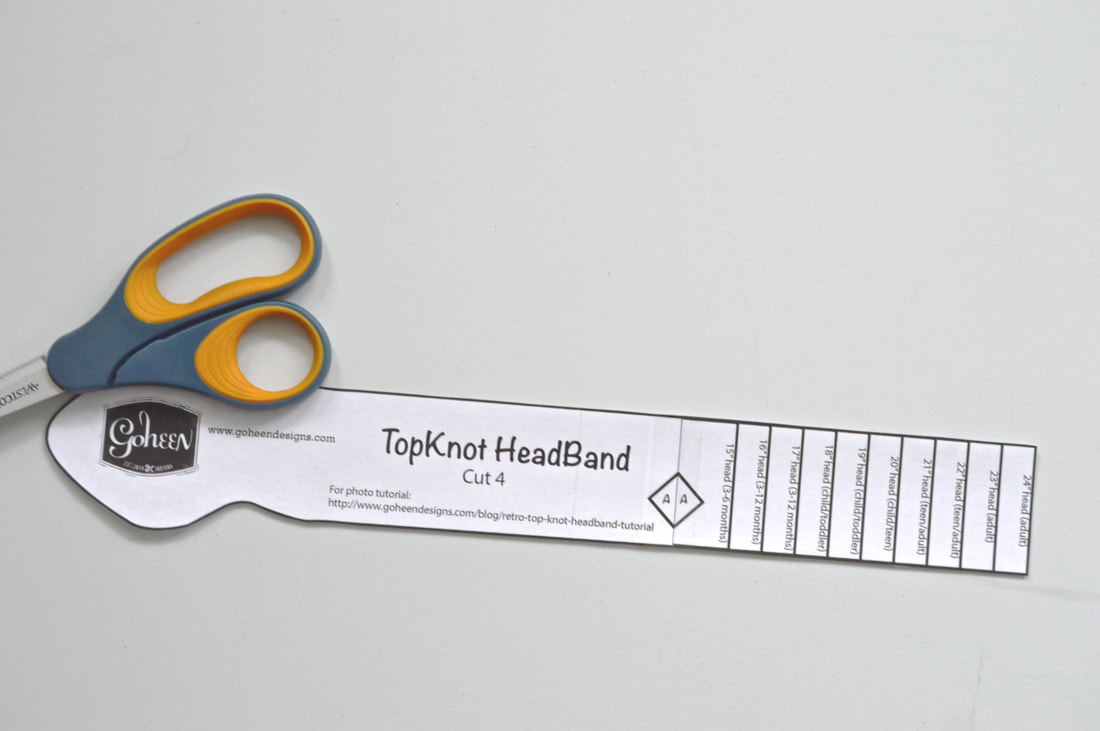
You'll see that the pattern has several different sizes for you to choose from. These sizes are based on the actual head circumference measurement. So measure your own head (or whoever is going to be wearing the headband) and pick which size would work best for you!
Use the pattern to cut out 4 fabric pieces:
red and white polka dot headband how to
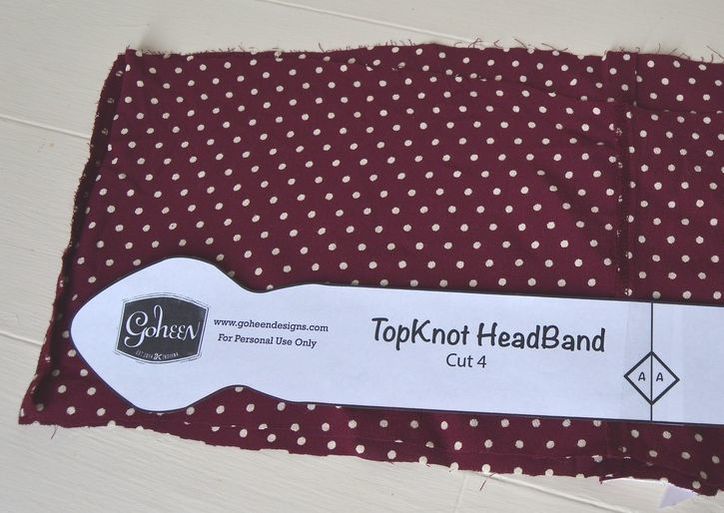
Pin your pattern pieces right sides together and sew with 1/4" seam allowance, leaving the small end open (the left ends in the picture below):
instructions for sewing a top knot headband for free
Clip the curves, turn the pieces inside right, and iron them:
sewing a diy headband
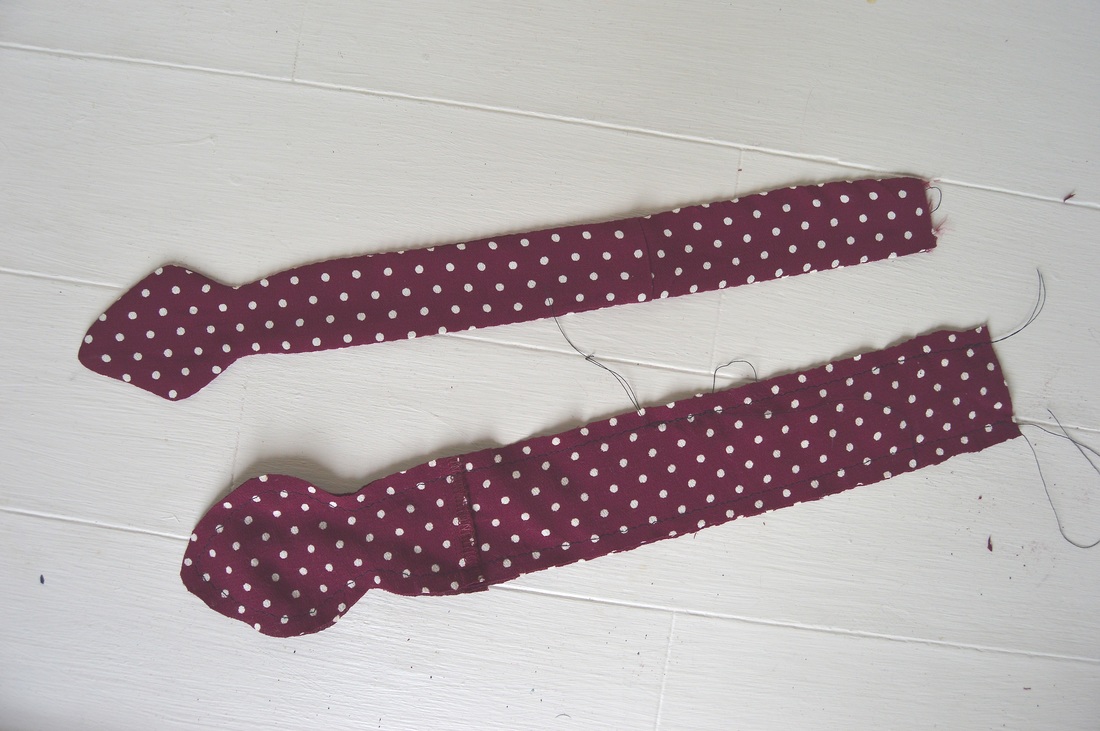
Tie the "Top Knot" in your headband.
diy retro topknot headband
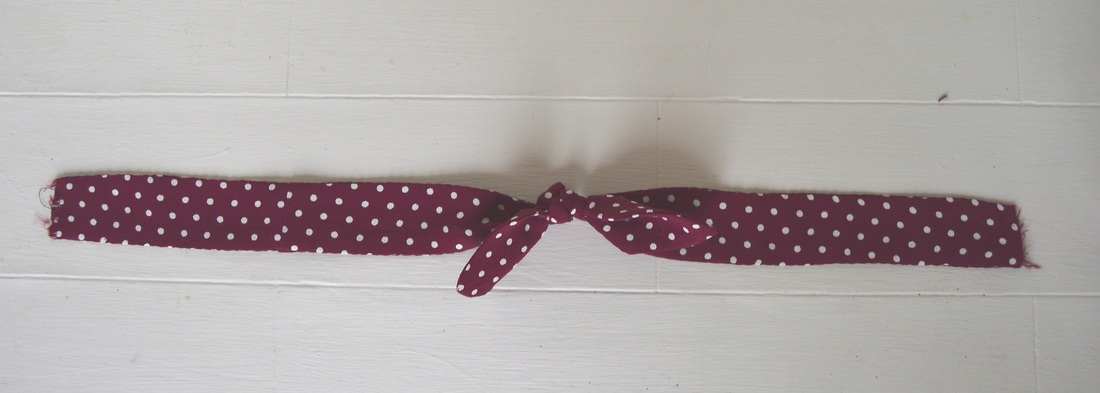
Turn in the ends of your headband 3/4". Then cut 3" of elastic for the back of your headband. Place 1/2" of each end of the elastic inside your headband ends and pin them in place. This is, theoretically, the finished size of your headband. But, as we all will tie the knot a little differently, and may prefer different levels of snugness, it is very important for you to test this size and make sure you like the fit! You can add or subtract from the headband or elastic to perfect it!
measuring your head for a diy headband
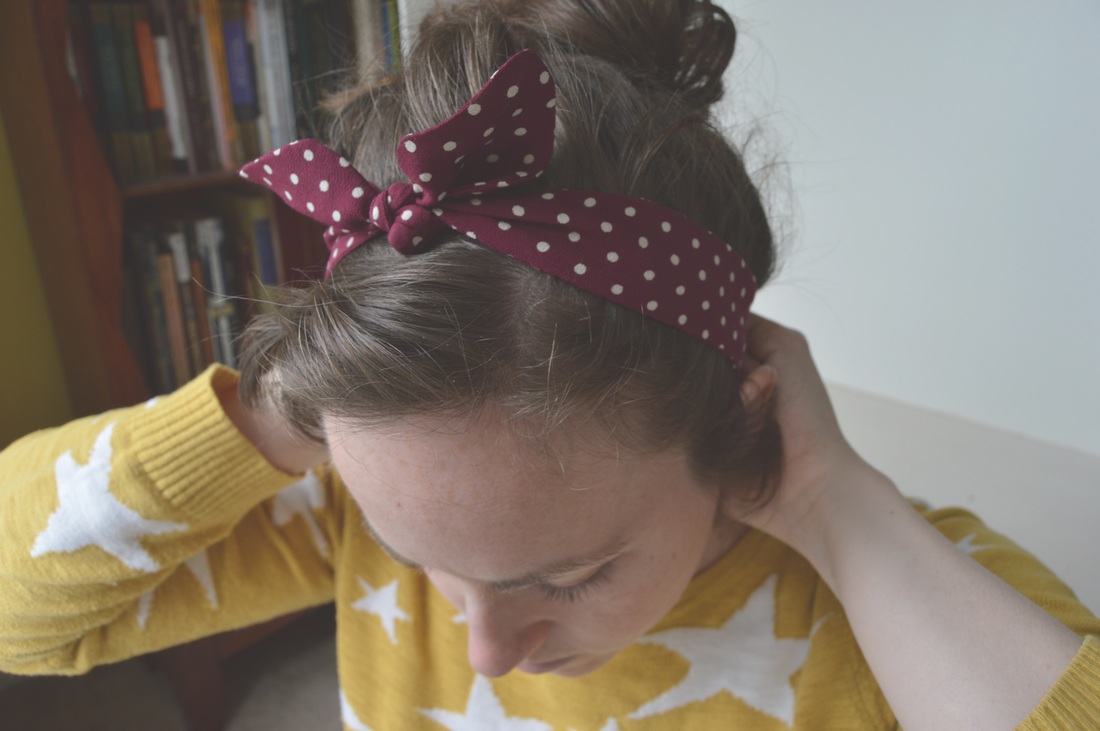
Topstitch the elastic into the ends of your headband.

For my headband (pictured below) I shortened the elastic to 2.5", still inserting .5" on either side. I like my headbands tight!
sewing elastic in a topknot headband
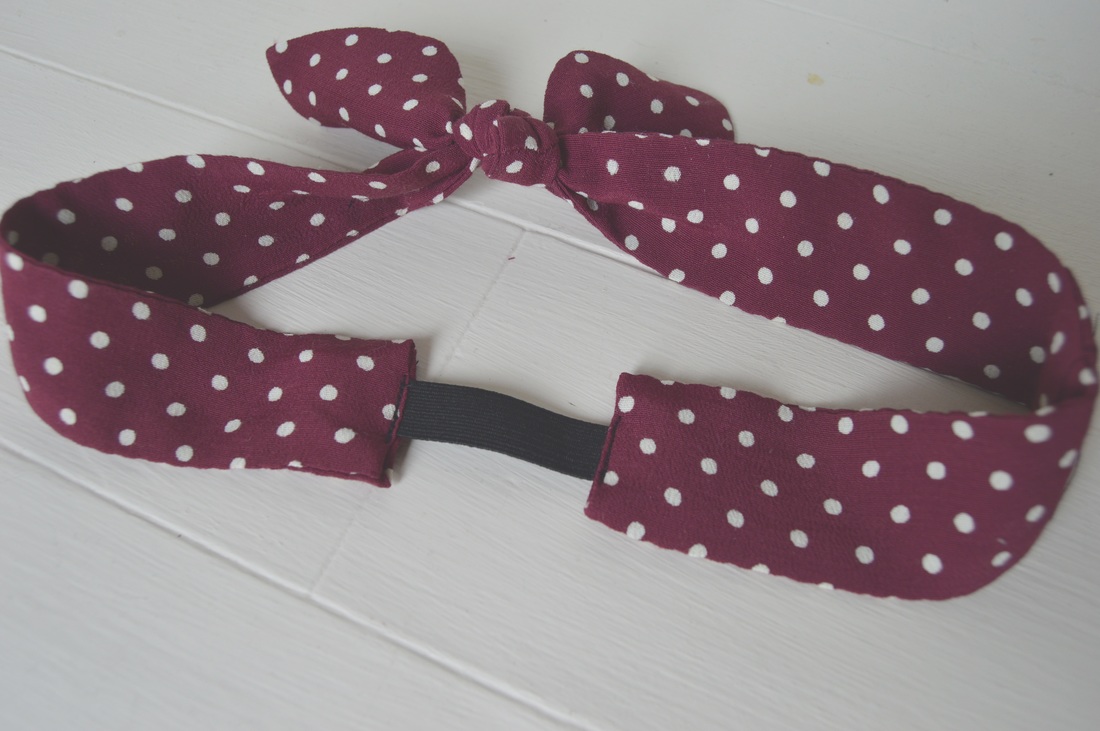
Closeup of the topstitching:
red and white polka dot elastic headband
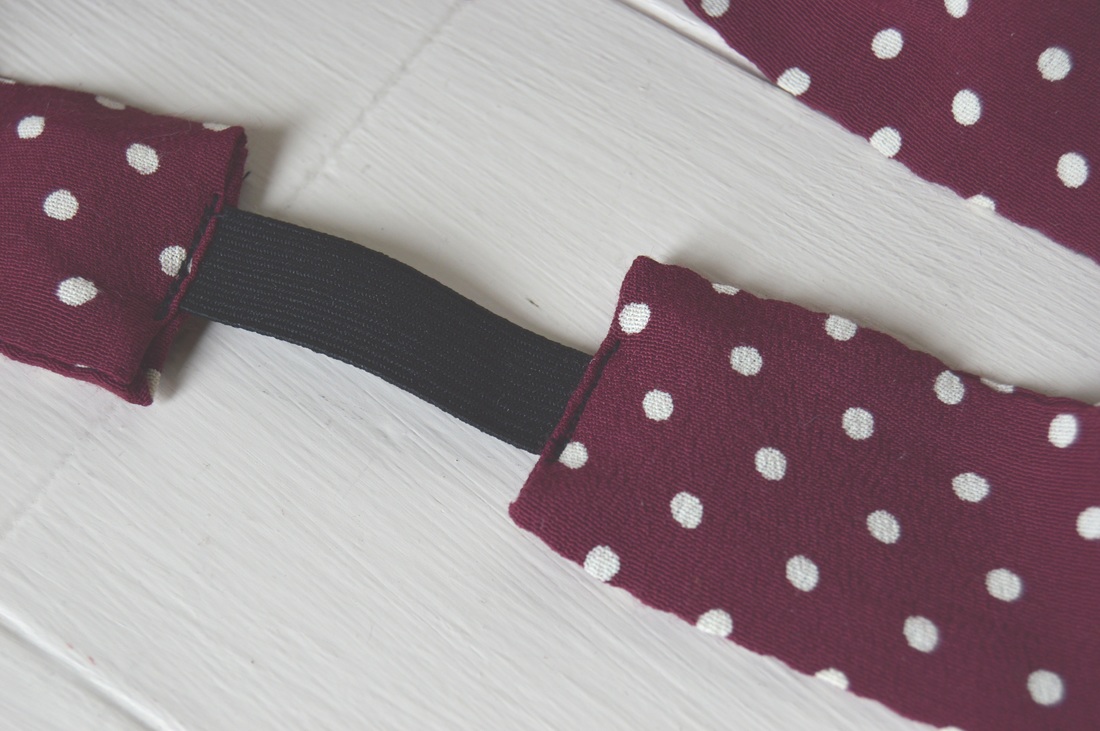
After the initial topstitching, fold the corners in on the underside and stitch across it again.
sewing a retro hair band
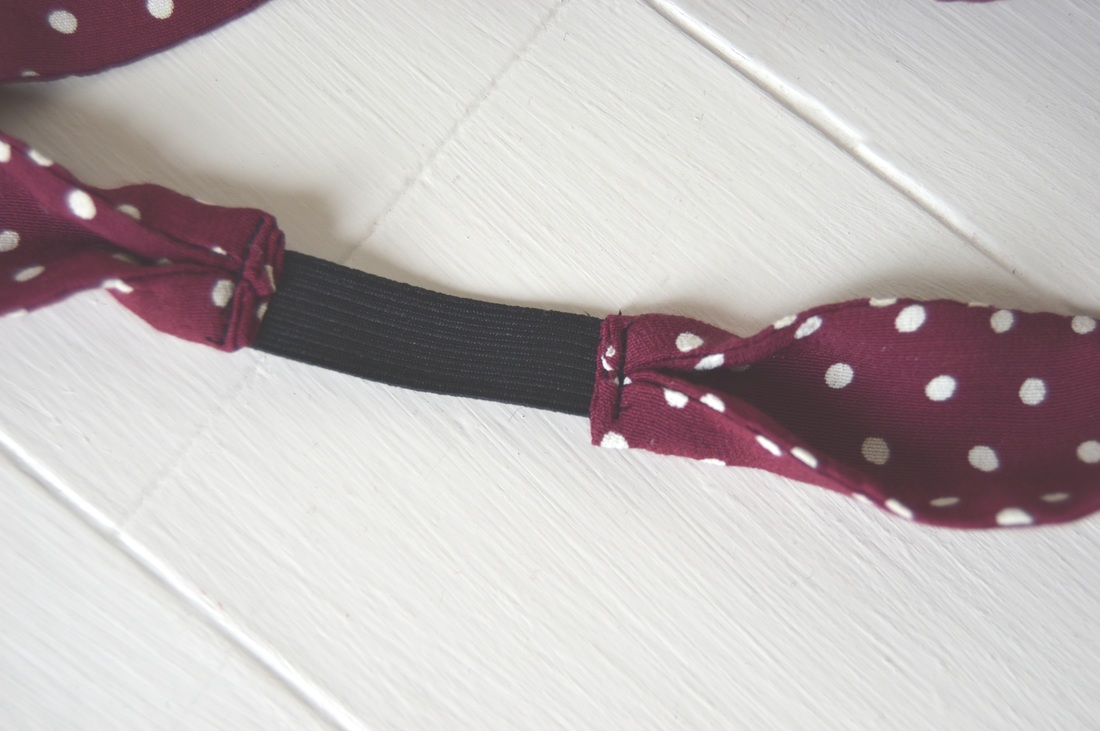
Now your headband is done! Enjoy!
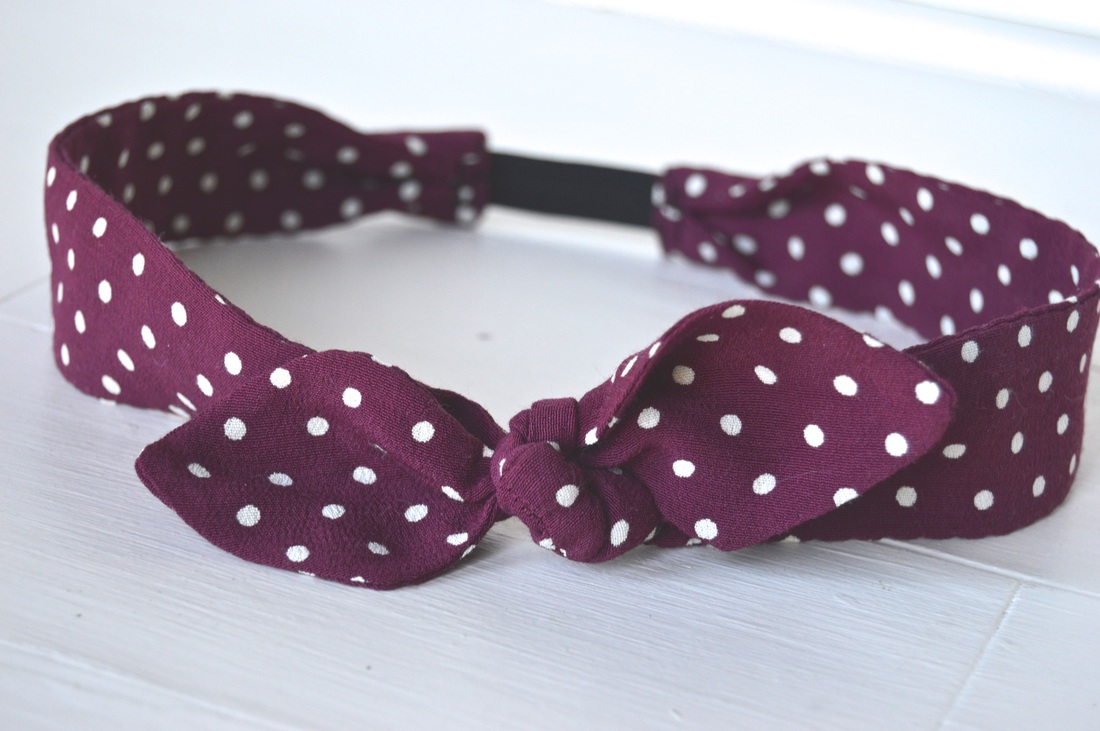
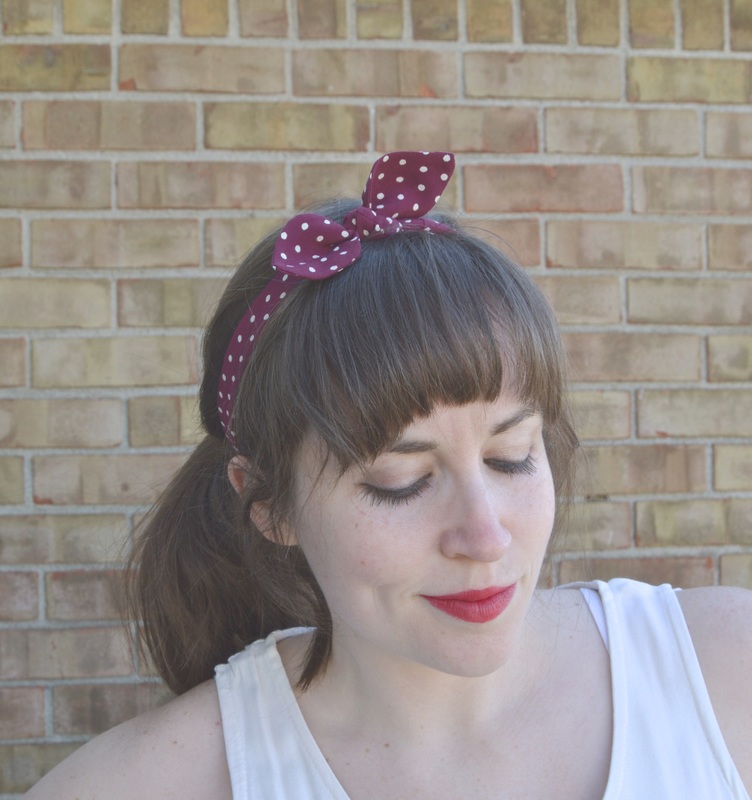
cute polka dot bow head band
make your own polka dot rosie the riveter headband
0 Comments


Leave a Reply.

    madeline stage

    creative business owner. designer. hoosier. crafter. runner. sewer. swing dancer. outdoor enthusiast. entrepreneur. wife.  material hoarder.


    Categories

    All
    Eddie Pattern
    Goals
    Inara
    Inspiration
    Madi Pattern
    My Makes
    News
    Products
    Sewalong
    Sewing Patterns
    Sewing Tips
    Sponsored


    Archives

    December 2021
    October 2021
    May 2021
    April 2021
    February 2021
    January 2021
    December 2020
    October 2020
    July 2020
    April 2020
    March 2020
    February 2020
    January 2020
    December 2019
    November 2019
    October 2019
    September 2019
    June 2019
    May 2019
    April 2019
    March 2019
    February 2019
    December 2018
    October 2018
    September 2018
    August 2018
    June 2018
    May 2018
    April 2018
    March 2018
    February 2018
    October 2017
    September 2017
    August 2017
    July 2017
    May 2017
    March 2017
    February 2017
    January 2017
    December 2016
    November 2016
    October 2016
    September 2016
    August 2016
    July 2016
    June 2016
    May 2016
    April 2016
    March 2016
    February 2016
    January 2016
    December 2015
    November 2015


    RSS Feed

    follow us in feedly
    My Instagram Feed:
    @GoheenDesigns

    Subscribe to our mailing list

    * indicates required

Contact Me

Madeline Stage madeline.goheen@gmail.com
1-260-403-9348
Libertyville, IL

Weekly Mantra:

Right here. Right now.

Click here for the Privacy Policy

Quick Links

Blog
​About
Patterns
Sizing Chart
Kit Instructions
Sewing Level Chart
Handmade Products
© COPYRIGHT 2021. ALL RIGHTS RESERVED.
  • Home
  • Pattern Shop
    • Shop Patterns
    • Shop Kits
    • Sizing Chart
    • Skill Levels Chart
    • Pattern Kit Instructions
    • Corrections
  • Green Graves
  • The Community
  • Blog
    • Blog
    • Blog Archives
  • About
  • My Makes
  • Stockists
  • Search