
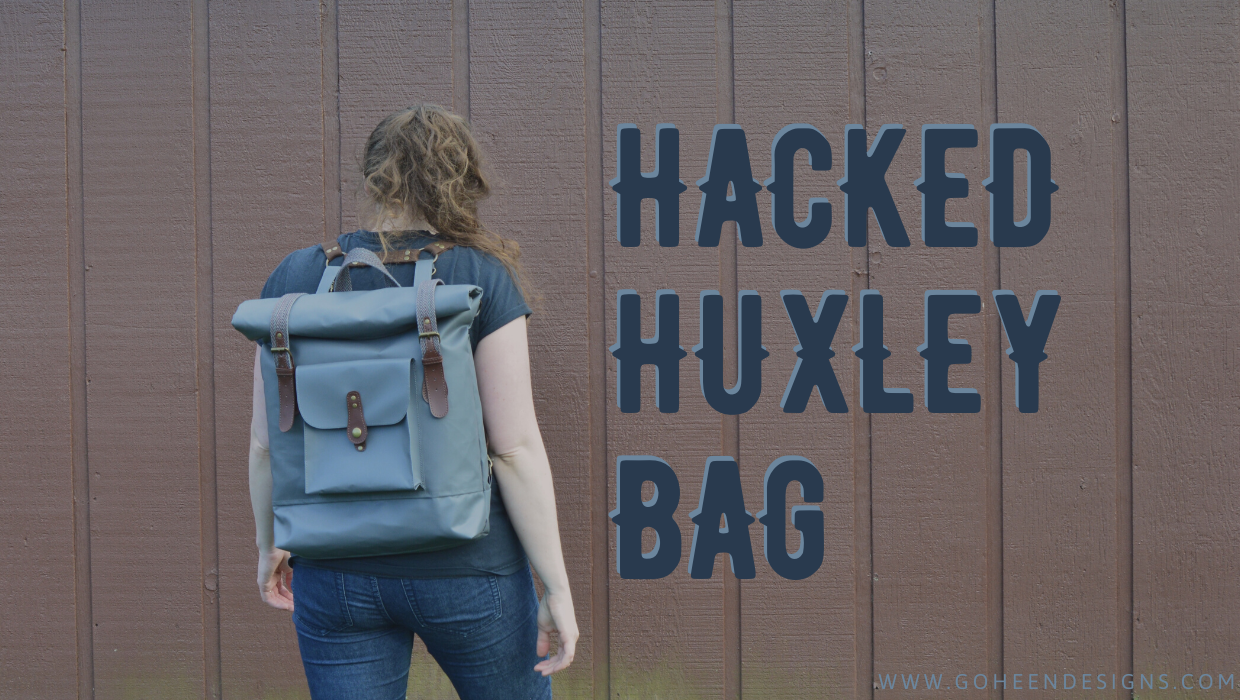
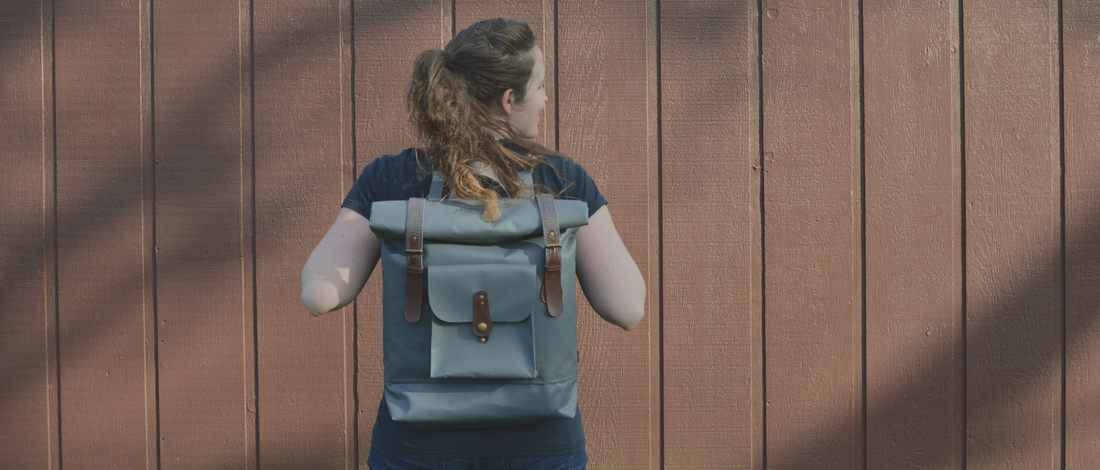
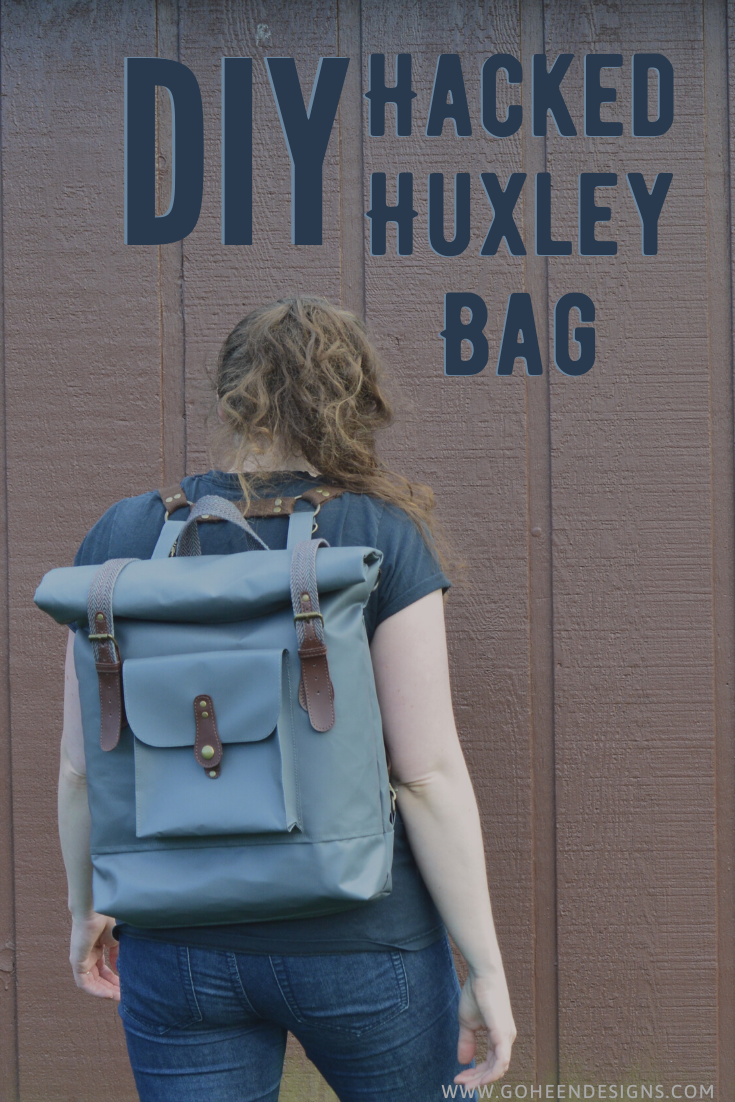
 I love my Huxley bag pattern as is, but I also love how versatile it can be. After lusting after a few roll top bags on instagram, I realized that my Huxley pattern could easily be converted to create one of my own! So, I decided one of my #MakeNine projects was going to be a hacked Huxley, with a roll top, using waterproof material. And because I can't go simple, I added in quite a few other hacks too. Here is a breakdown: 1. Size - So this isn't realllly a hack per say. But I want to make sure that people realize my new bag isn't one of the regular sizes included in the pattern. A few months ago a customer requested that I alter the pattern for them to make it able to fit a 15" laptop. I decided to fully test this new XL version for myself. So the bag is roughly 3" longer and 2" wider. I'm considering offering this as an expansion pack for the Huxley. Let me know what you think!
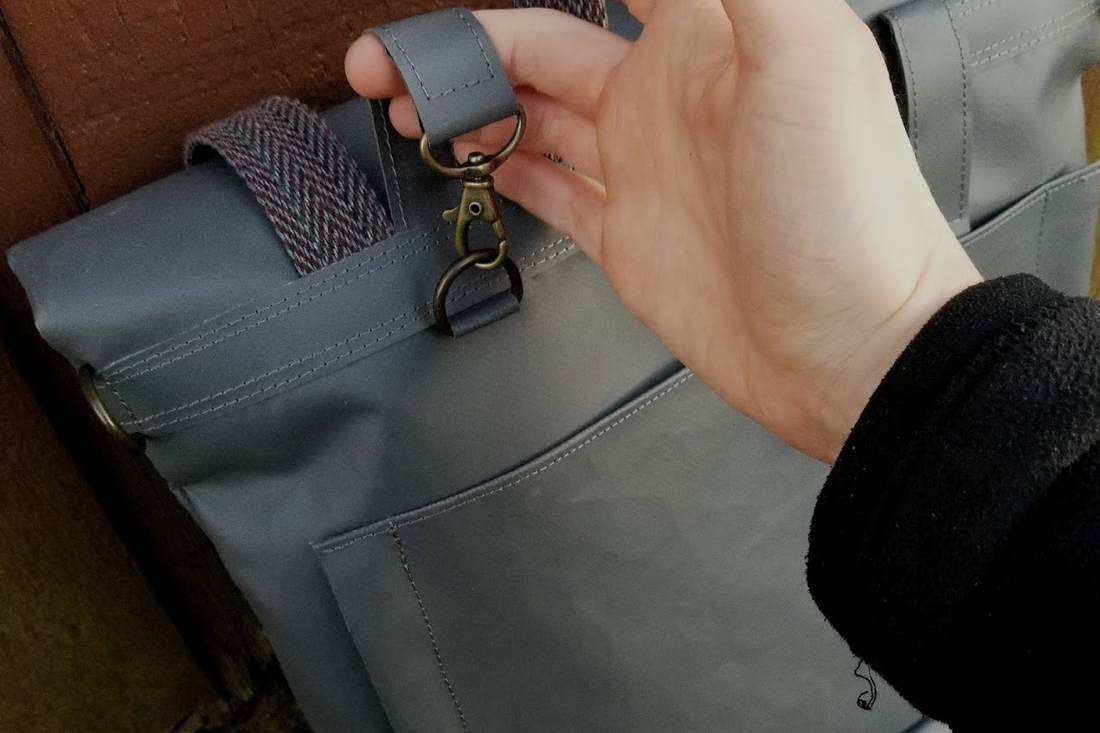
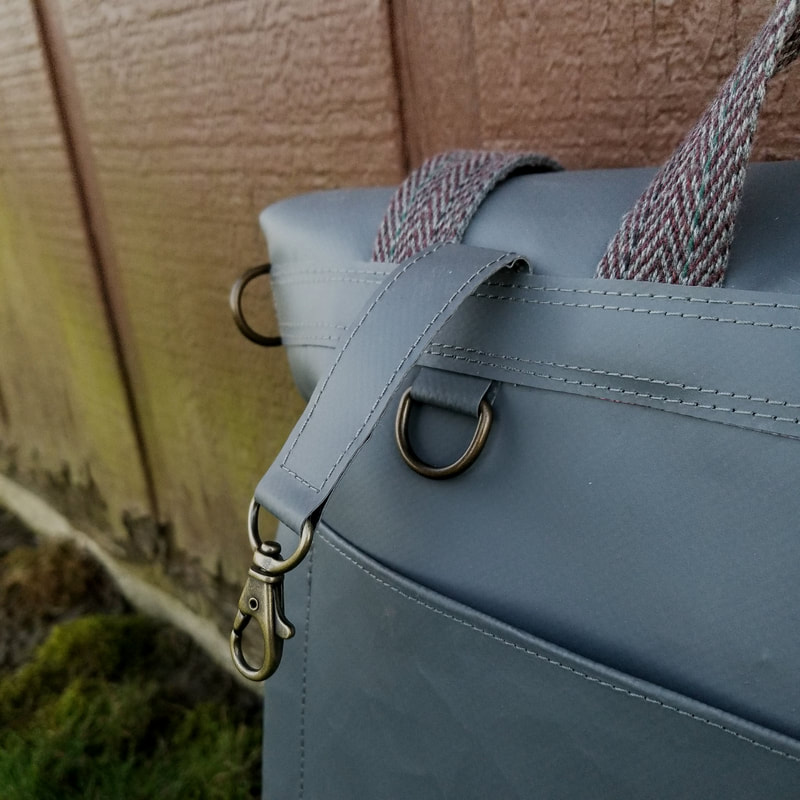
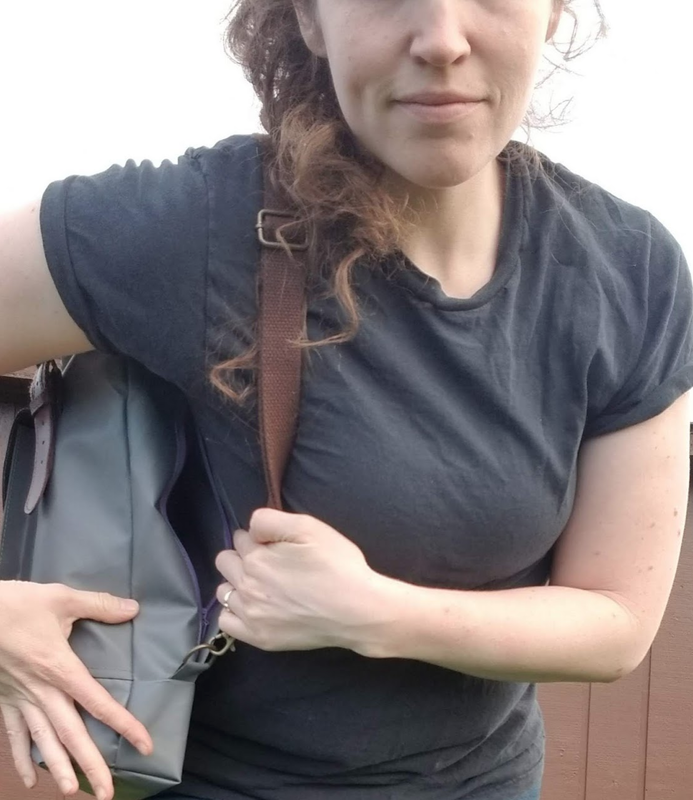
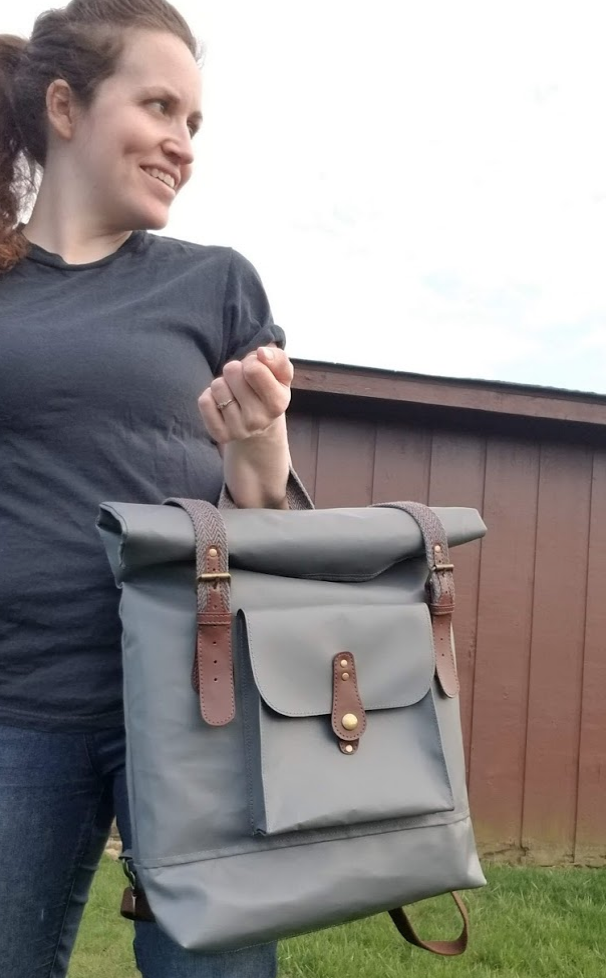
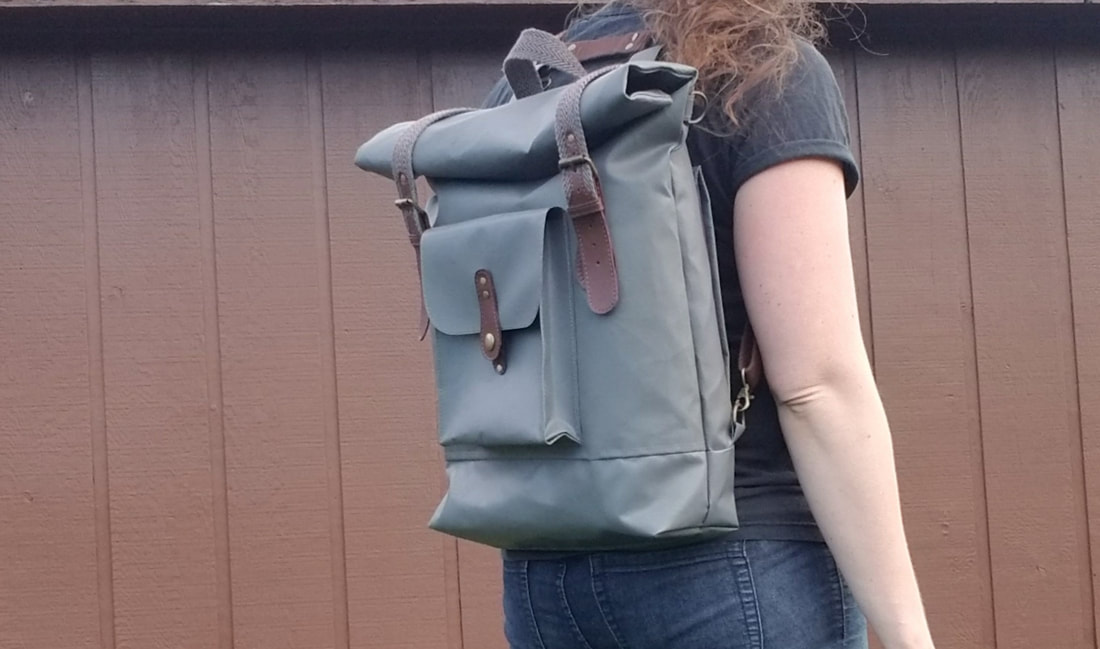
2. Lobster Claw Bike Straps - This goes along with the XL size in my opinion. These bike straps on the back need to be able to carry the weight of the entire bag and all its contents. Both on a bike, and also for the backpack conversion. This is why I use such heavy duty snaps for my Huxley bags. If they could easily be unsnapped, it would be dangerous for your stuff! So with the extra size and weight of the XL bag, I decided to go for lobster claws so that I didn't have to worry about the extra stress on the snaps. I made the bike straps long enough to slip into the back pocket when not in use. But realistically, I'm mostly going to use this bag as a backpack or bike bag.
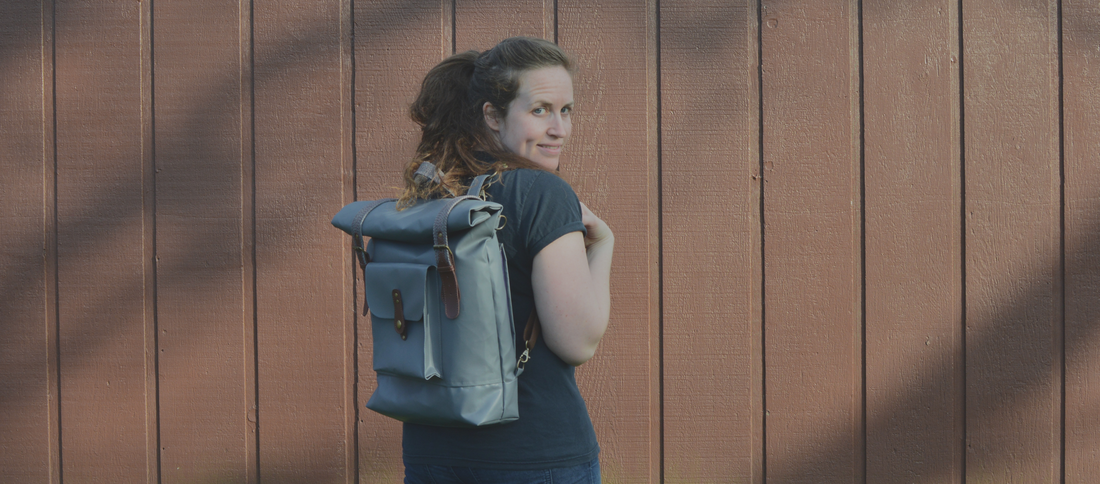
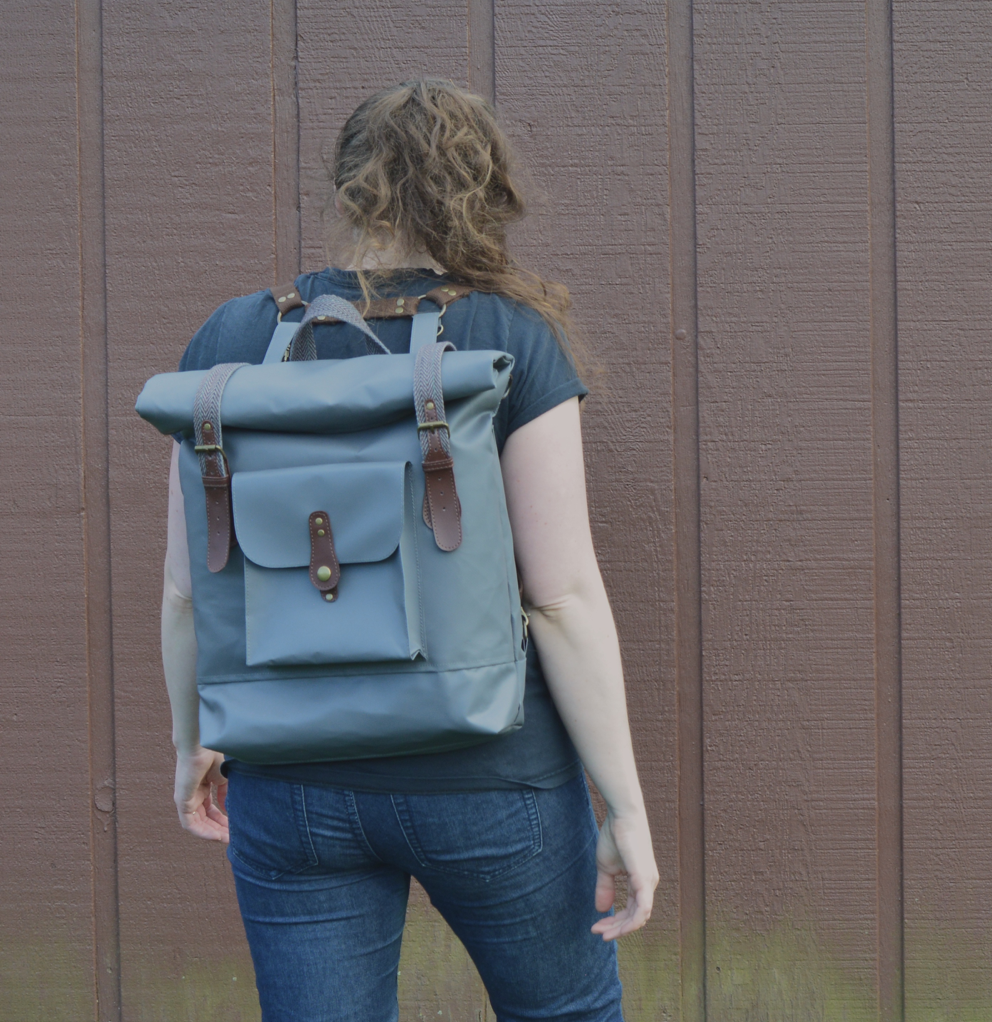
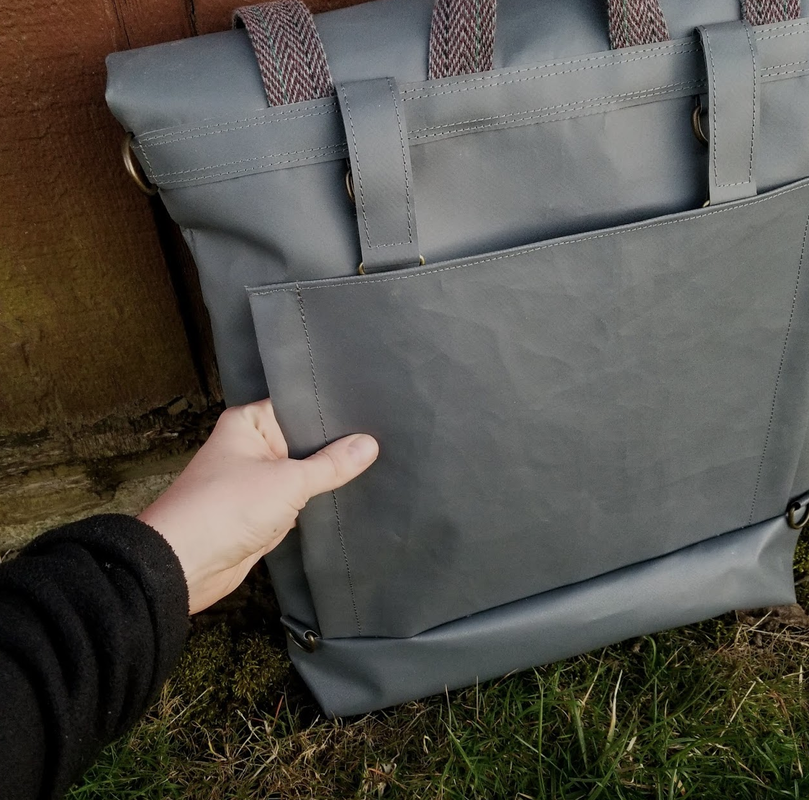
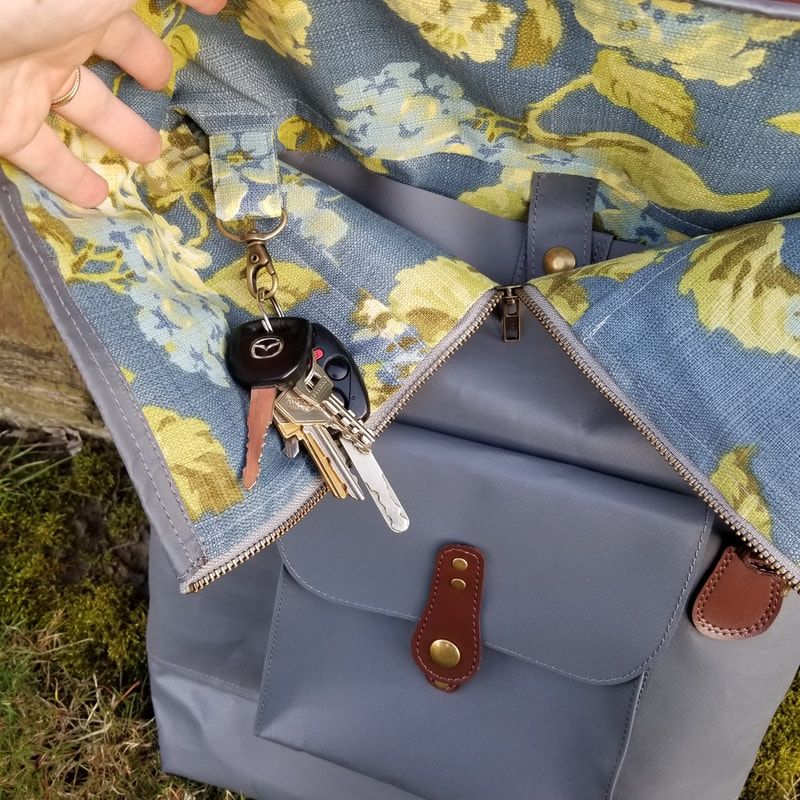
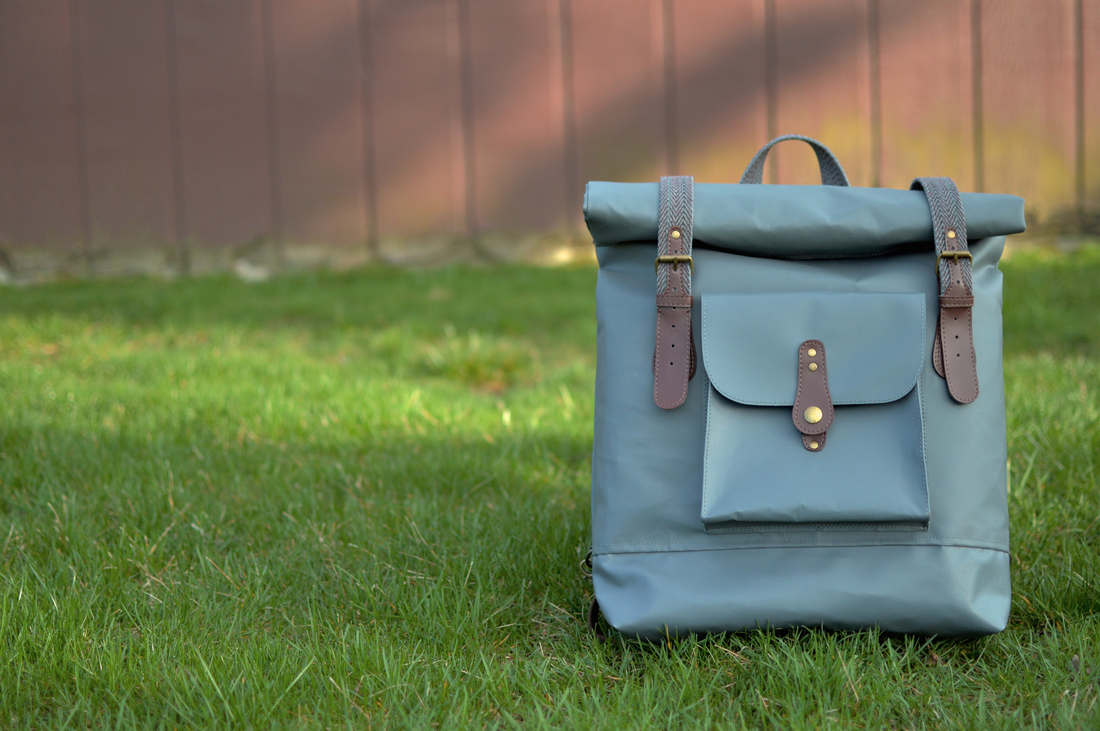
3. Front Closures - I've always loved the look of buckle closed bags. I tend to go for faux buckles, that can be snapped closed simply because they are easier to get in and out of. But I decided to go for real ones, and since I was going for it, I went all in to make them look as beautiful as I could. First, I found a belt at the thrift store that had webbing that beautifully matched my grey fabric. Then, using dark brown marine vinyl, I copied the style of the belt's closure. I even used some dark brown fabric paint to stain the edges of my faux leather straps, to make them more professional looking. I ended up attaching one part to the front of the bag, and another to two straps. The back ends of these straps I tucked into the reinforcement piece on the back of the bag, which also houses the bike straps. I was worried about being able to adjust the straps for different heights depending on how rolled my roll top would be, so I added several buckle holes. In the end, I could have made the straps a few inches shorter. I'm not entirely sure I want to be carrying around an overly full XL Huxley bag. I think it would weigh a ton. 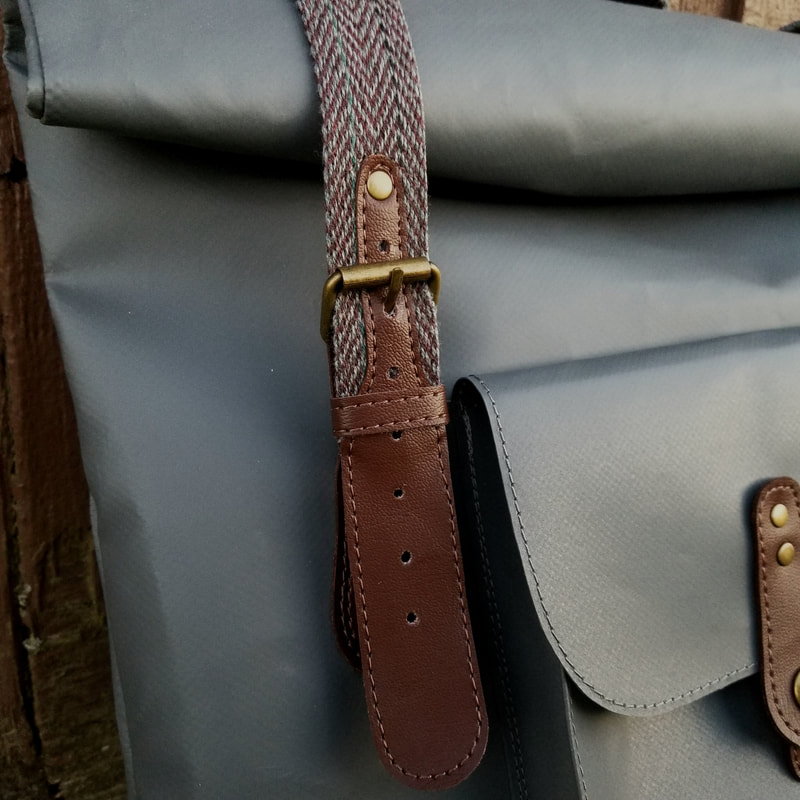 4. Front Pocket - Because I knew that buckle closures don't make it particularly easy to get in and out of the bag quickly, I decided to add some more pockets to the outside of the bag. The first is the big pocket on the front of the bag. It snaps for easy access, is lidded for at least some rain protection, and is also a decorative feature. I used more of the brown marine vinyl to give it a faux leather detail to match the buckle closures. 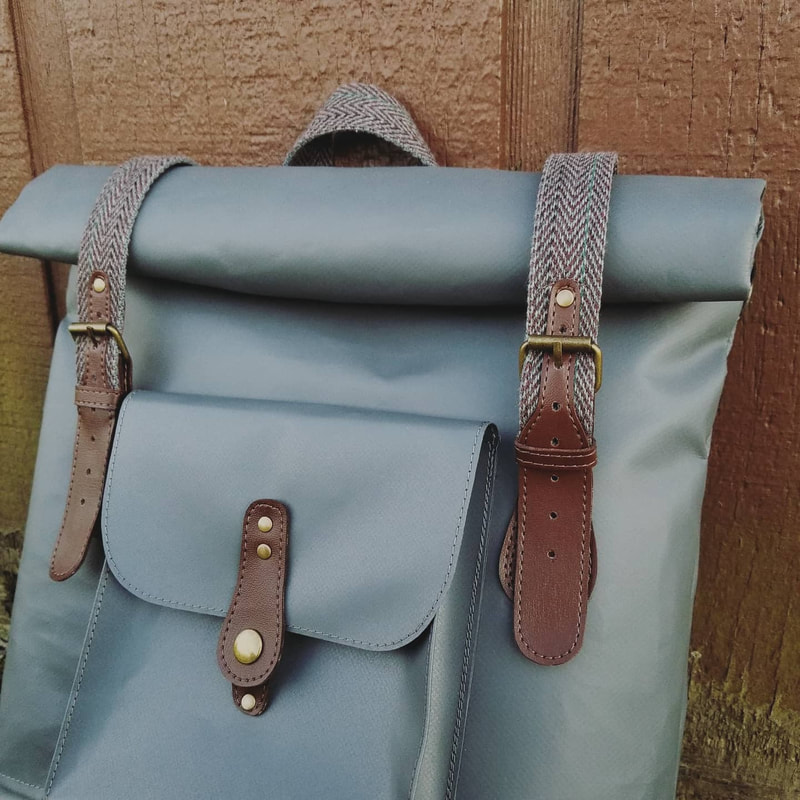 5. Back Pockets - To reduce bulk in the seams (this fabric is quite stiff!) I decided to make the back pocket narrower. While doing this, I realized that this made for a perfect secret pocket opportunity! I added in a zipper to the side of the pocket, scooched over so that the edge of the pocket creates a flap hiding the zipper and protecting it from rain. My favorite part about this hidden zipper is that it is very easily accessible while using the bag as a backpack. If I shrug off the left shoulder strap and let the bag swing around on my right side, I can easily slip something in or out of the hidden pocket and then shrug the bag back on. I have a feeling this is going to be my cell phone pocket.
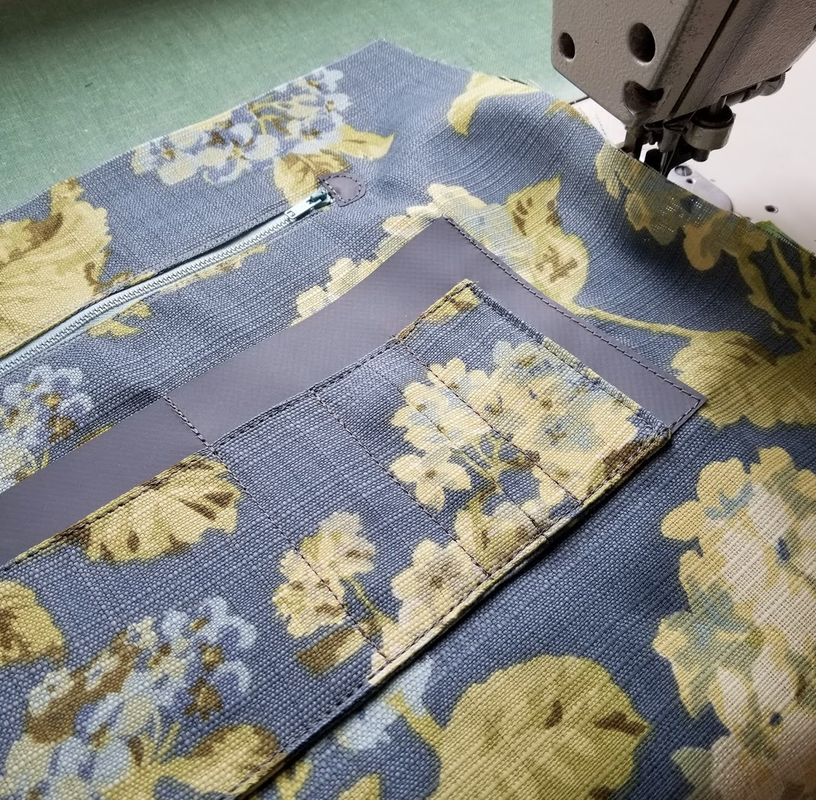
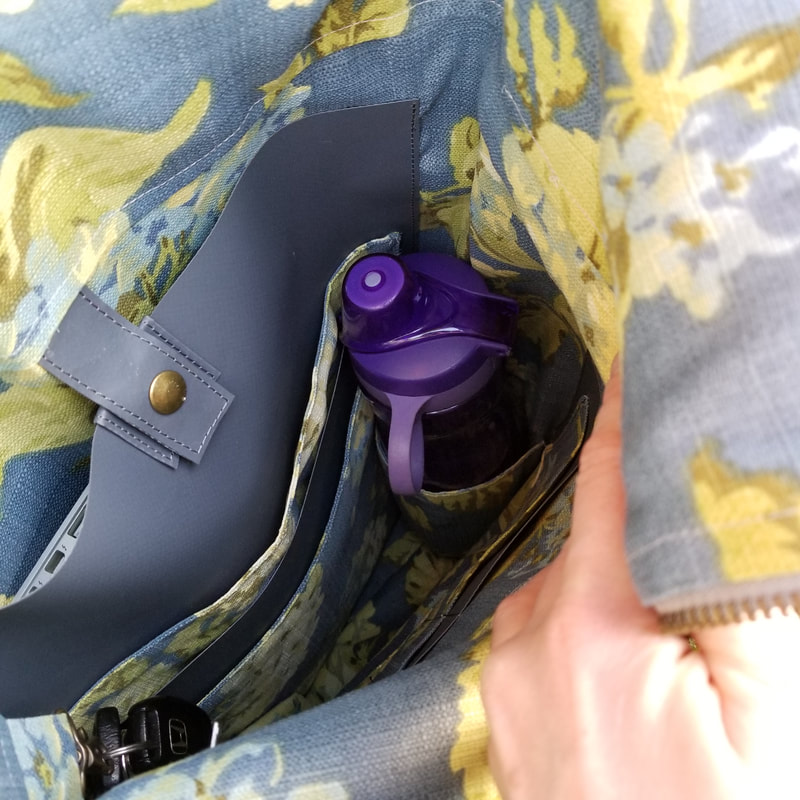
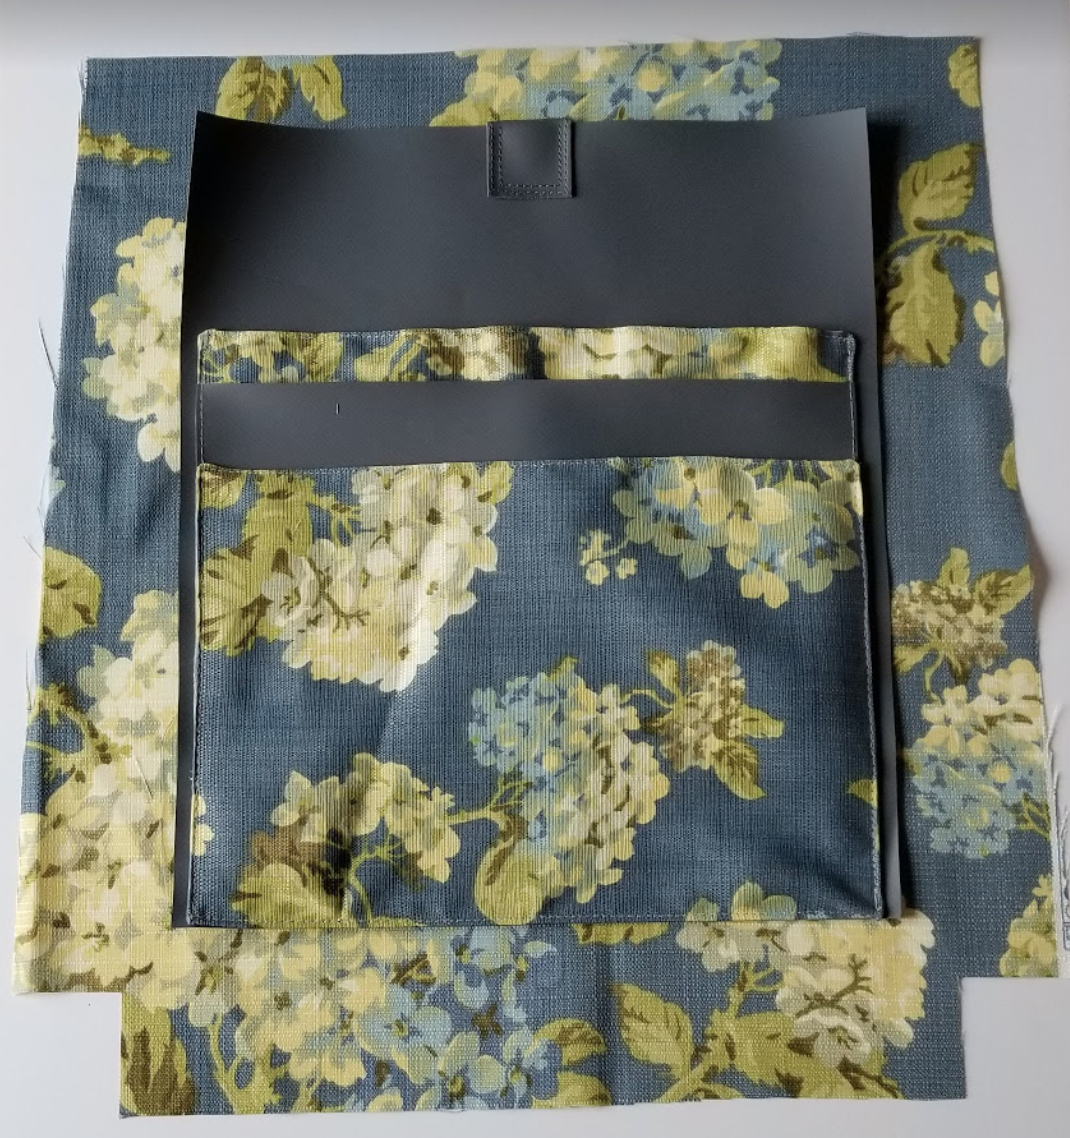
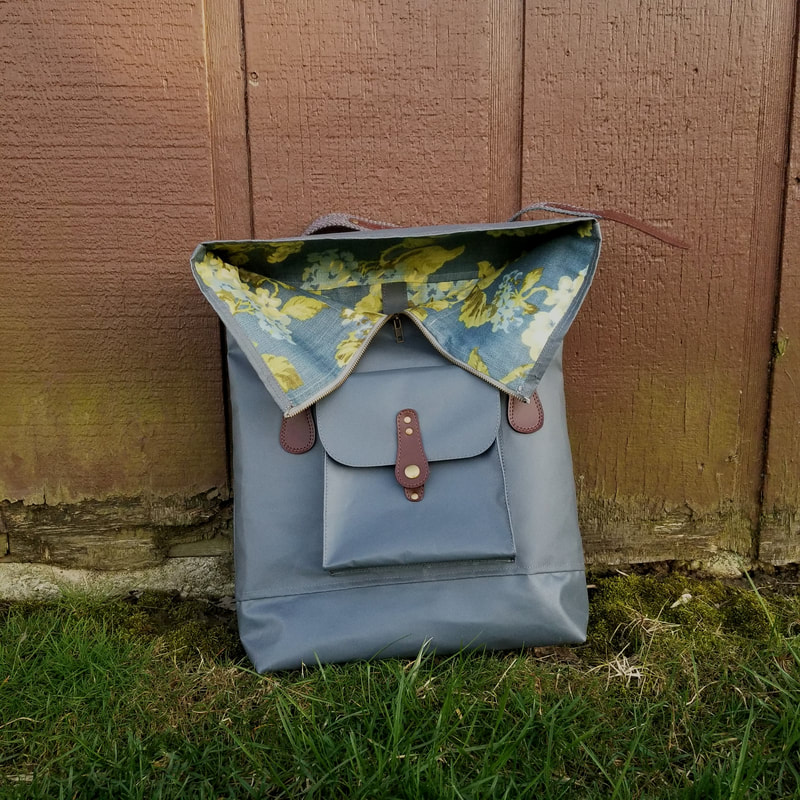
6. Inside Pockets - I kept the original pattern simple with only two pockets inside, one for either a laptop or a tablet, and one for smaller items like keys. In this much larger size of bag, and with the need to reach in further with the roll top, I decided to put in a lot more organization. I kept the laptop pocket, with closure, and added a 3 document pockets on top of it. By "document pocket", I mean they are large enough to put 8.5"x11" papers in them, something that I've actually run into more than I thought I would in my everyday life. On the front side of the lining, I changed the original pocket to be an interior zipped one, and then added on a few smaller ones on top to hold things like pens and chargers. I also added a key holder at the top back of the bag (no chance of losing my keys in the giant belly of the bag) and a water bottle holder in one of the corners, to make sure my water bottle can stand upright. In total, this bag has 15 pockets! That's a lot of pockets! Only time will tell if this ends up being helpful, or if I'll have to check every single pocket to find what I'm looking for.
7. Roll Top with Zipper - So I knew I wanted to make the bag a roll top from the start, but after doing some photo research, I saw some bags that had the zipper too, and realized that this was going to be necessary for my bag. The combination of very stiff fabric, very tall bag, and a rather narrow top opening means that reaching into the depths of the bag would mean sticking my arm in up to my shoulder without the zipper option. The roll top itself not only has a neat look, but also does a better job keeping water out than just a flap.
8. Handle - I opted to simplify the top handle of the bag by simply using webbing, and sewing it into the reinforcement area in the back with the bike straps. This would be a very simple hack to do on any Huxley, with or without the lid! I used more of my thrifted belt webbing for this handle. 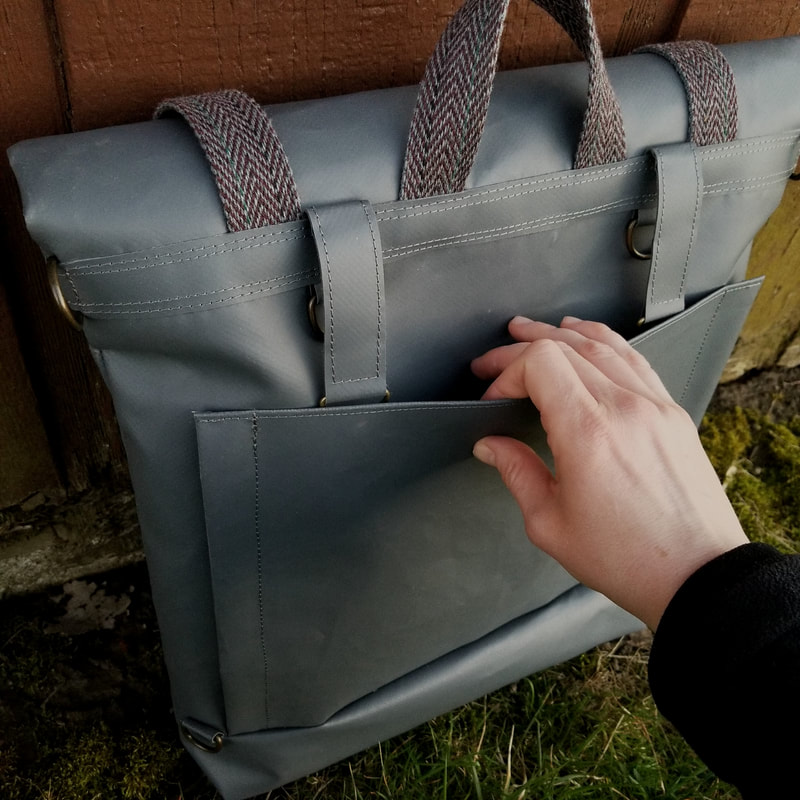 I hope this post has you inspired to try out some new versions of the Huxley Bag for yourself! There really is no limit to what you can do with it! I'm happy to answer any questions you may have about how I did any of this. And let me know if there is a hack in particular that you would like to see done step by step! Pattern: Huxley Bag Outer fabric: Donated remnants from pool covers Lining: Donated remnants from a drapery workroom Hardware: Huxley Hardware kits Webbing: Thrift store belt Faux Leather: Marine Vinyl
2 Comments
Leave a Reply. |
madeline stage
creative business owner. designer. hoosier. crafter. runner. sewer. swing dancer. outdoor enthusiast. entrepreneur. wife. mom. material hoarder. Categories
All
Archives
June 2023
My Instagram Feed:
@GoheenDesigns |


 RSS Feed