
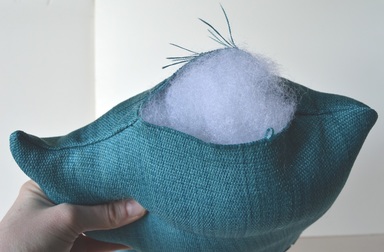
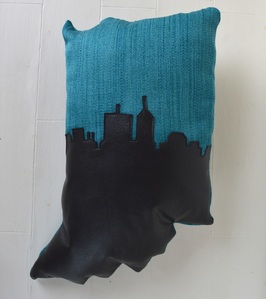
The Ladder Stitch is a great technique to have in your arsenal! It is perfect for sewing closed pillows (like this Indiana one) and stuffed animals with a nearly invisible seam. It is a very easy stitch once you get the rhythm! First, pin the opening shut, with the raw edges tucked to the inside: 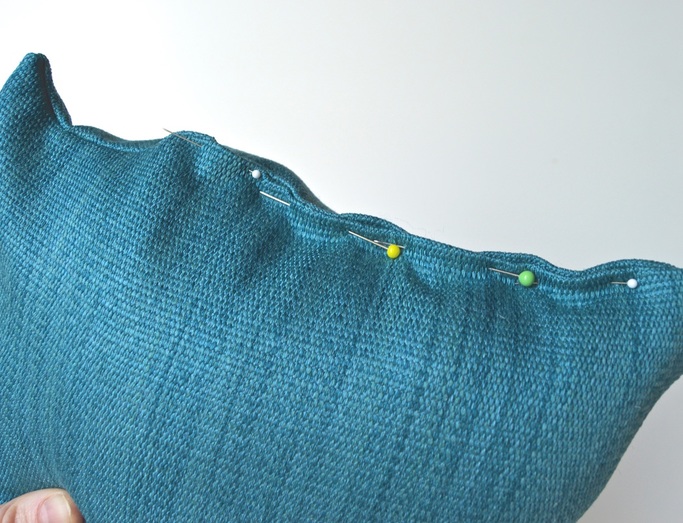 Then, thread your needle and tie off one end of the thread. Here is a quick tutorial on how to tie your thread using a French Knot This method of tying has changed my hand sewing forever. so easy. so quick. Also, apparently I was whispering into the camera, so you may have to turn it up.
Bury the knot inside your pillow by starting the needle on the inside of your seam and bringing it through to the outside right on the fold. Then, insert your needle into the opposite side of the opening, and run it along the fold for about 1/8 of an inch. 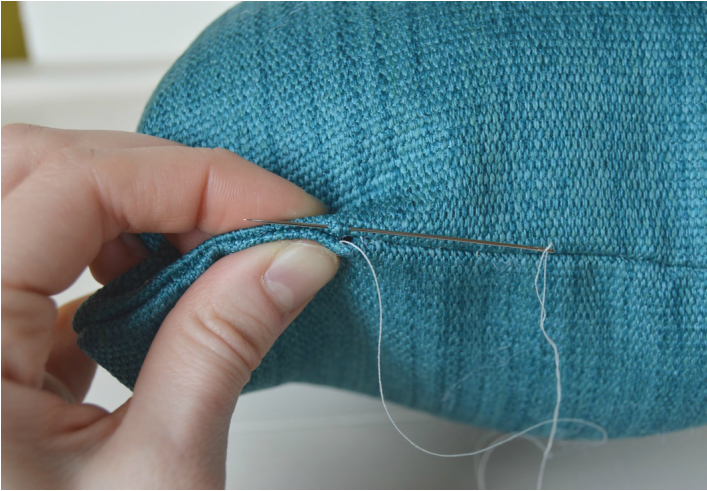 For the next stitch once again insert the needle into the opposite side of the opening, directly across from where the thread is coming out, and take another 1/8" bite along the fold. 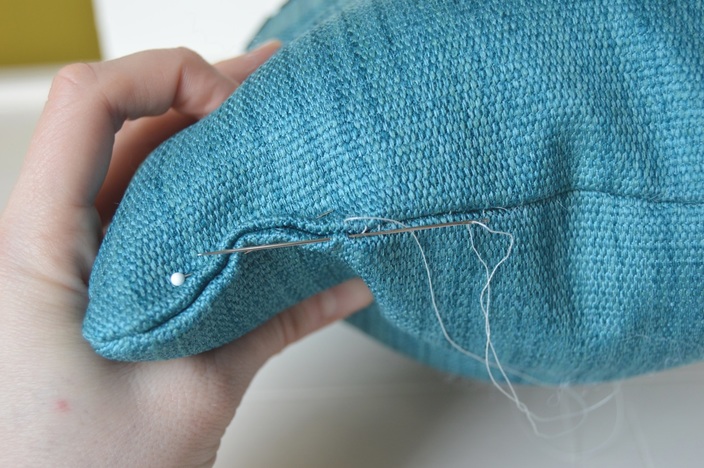 Keep repeating this process! After a few more stitches, your sewing will look like this: 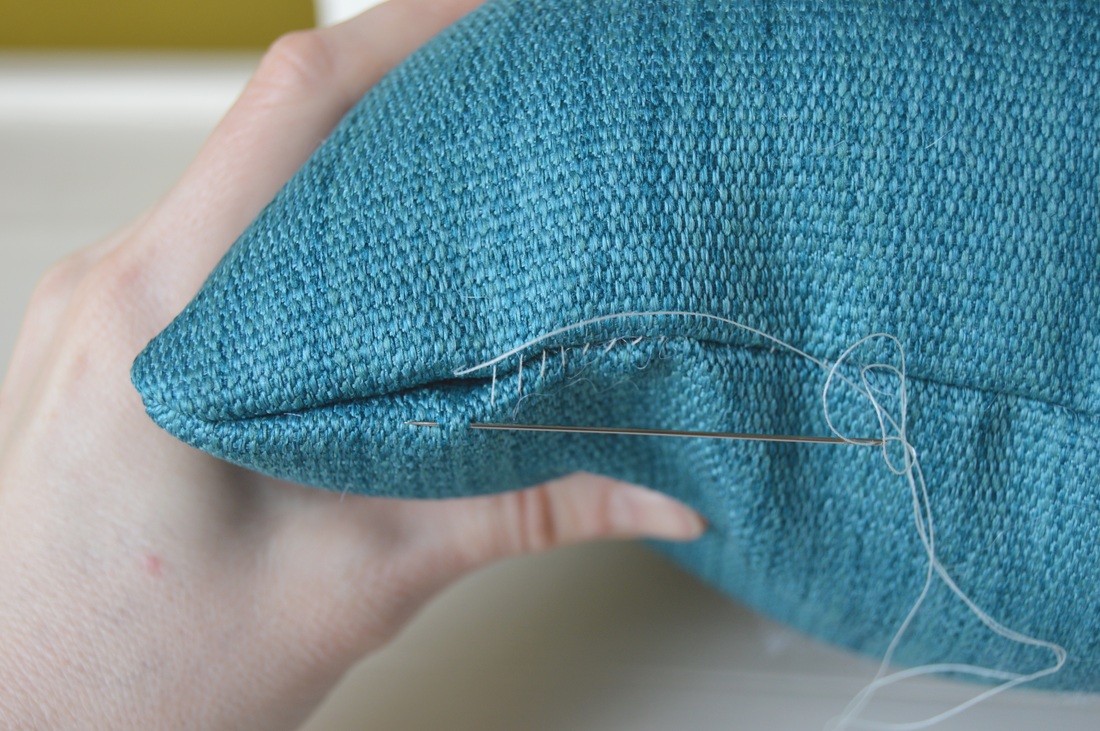 Every couple of stitches, pull your thread taut and your stitches will disappear!  Once you get to the end of your opening, tie off your thread, and cut off the extra! Ta-Done. Here's an oversimplified graphic of the Ladder Stitch: 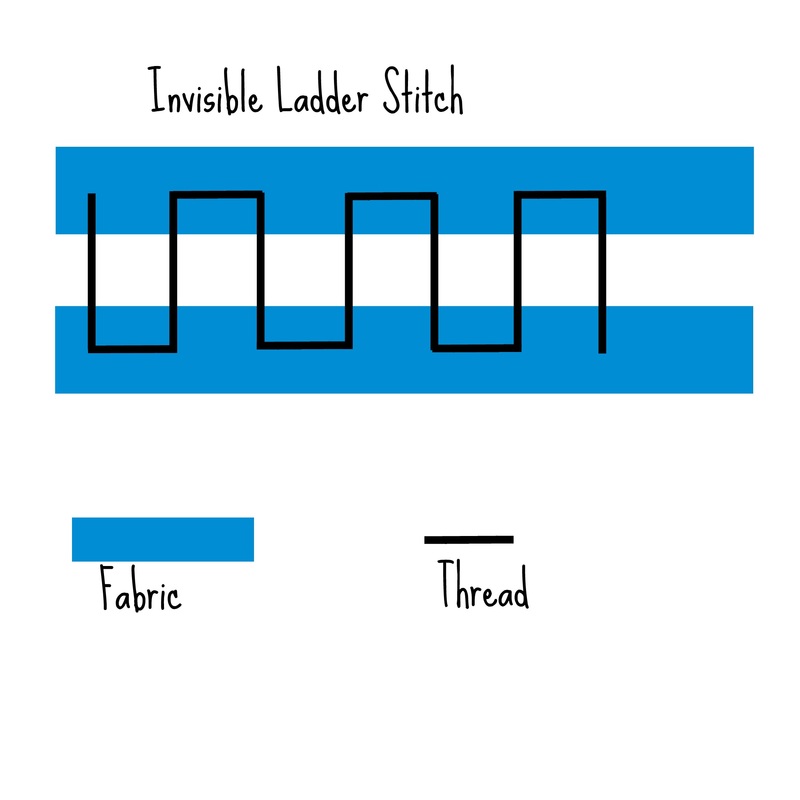
0 Comments
This method of tying my thread on a needle has changed my hand sewing forever. so easy. so quick. I will run through a quick set of written instructions, and then I've made a little video demonstration. The demonstration is much easier to understand than the written instructions, FYI. Although apparently I was whispering into the camera, so you may have to turn the sound up. 1. Thread your needle 2. Pull the thread through so that one side is much longer than the other 3. Hold the needle between your left thumb and forefinger 4. Place the end of the longer thread side in that thumb and forefinger along with the needle 5. Use your right hand to wrap the long thread around the needle a few times (the more you wrap it the larger the knot at the end) 6. Add the wrapped thread to the left thumb and forefinger (still holding the needle and the end of the thread as well) 7. Use your right hand to pull the needle carefully through the wrapped thread (that you are still holding onto the entire time) 8. Keep pulling until you get to the end of your thread, and you have a knot! 9. Cut off any extra thread tail you might have on the knot. 10. Start sewing!  Tape?? Really? Yes! More specifically, masking tape or painter's tape! Painter's tape is my personal choice, because it is sticky enough to stay put on most fabrics, but it doesn't leave any sticky residue on fabric or sewing machine, and it doesn't pill your fabric! Now I'm sure you are wondering why in the world you would be putting tape on your fabrics, right? Well here are 5 reasons to raid your painting supplies for your sewing! 1. Mark the bottom right side of your fabric: Sometimes, I pick out fabrics that are verrrry similar on the right and wrong sides, or it is hard to tell which way the grain is after I have cut out a square for a pillow cover. Close inspection can usually solve this dilemma, but sometimes I forget to closely inspect my piece, and I end up with two pieces of the same fabric, sewn together, that look like two different colors because one is upside down! Putting a piece of tape in the bottom right corner, on the right side of the fabric when you cut it makes it easy to see the proper orientation at a glance. 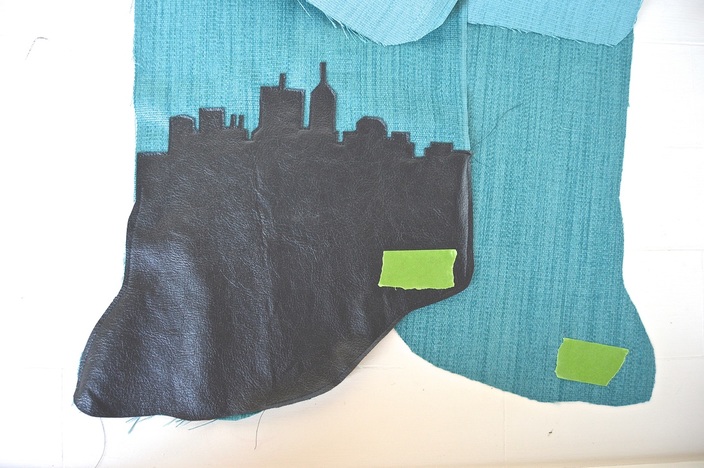 2. Create a custom seam gauge: Most sewing machines have handy little guides on the right side of the needle plate to help you keep a consistent seam allowance. But if your machine doesn't have these, or if you are sewing with a seam width that isn't marked (5/8" anyone?) you can lay a piece of tape along the width that you do need! This is also great for beginner sewers and kids who find it easier to follow a bright green line than an indent in the needle plate. 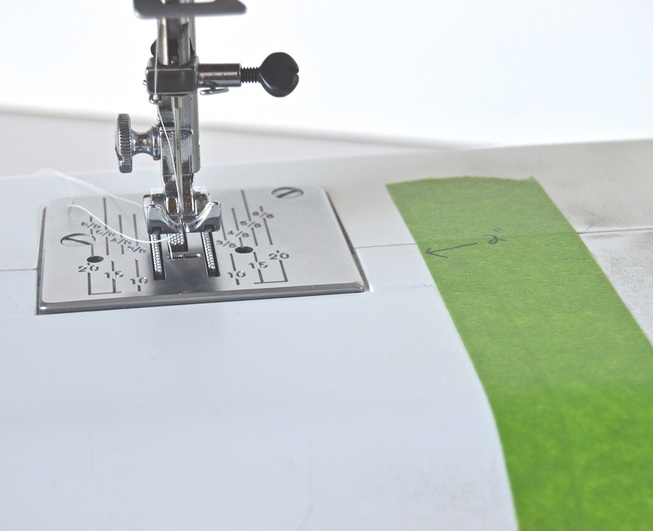 3. Sew in a straight line! How many times have a tried to sew a straight line only to have the fabric shift, or my attention shift? Too many. But using a long piece of tape is the perfect way to ensure that you are staying on the straight and narrow, even in the middle of your fabric. This is especially great for quilting straight lines! 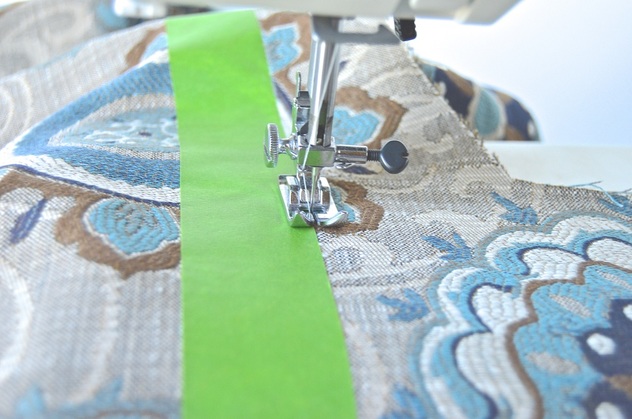 4. Sew darts: Get perfectly straight darts every time when you use a piece of tape to create a straight path to sew between the notch and the point. I used to draw a line in chalk, but tape is so much easier to remove! 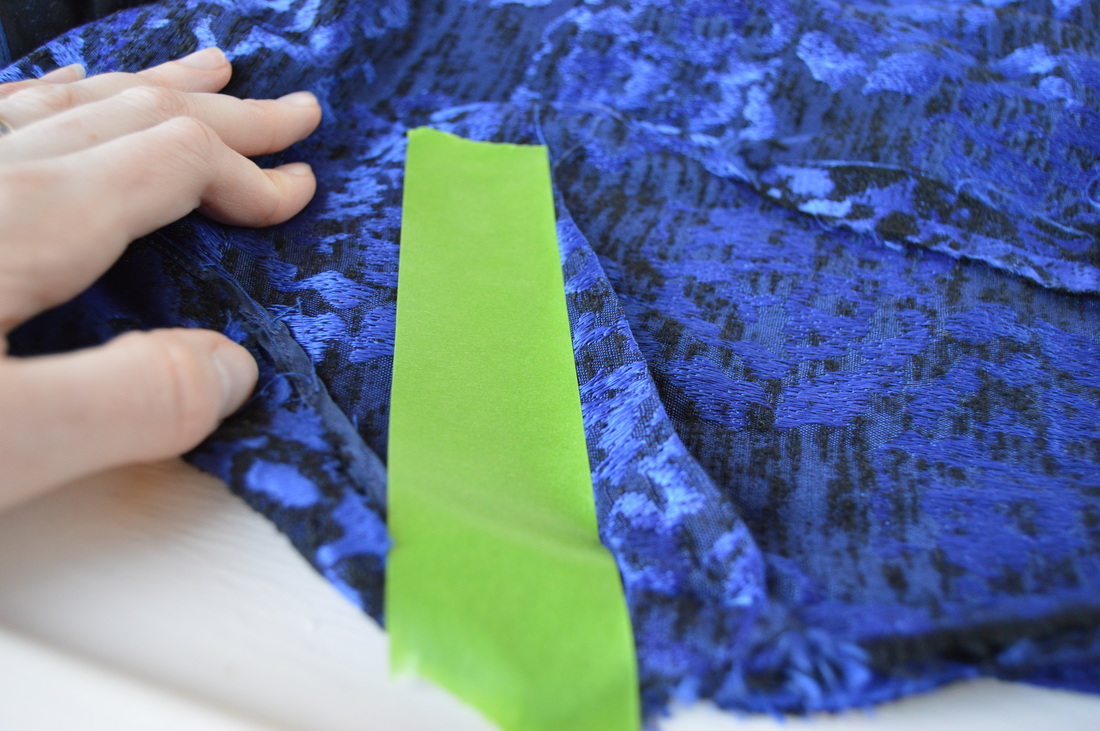 5. Make Bias Tape: Tape is a great way to cut out perfect bias strips even on slippery fabrics! The key is the have the same size tape width as the bias strips that you want to cut. Simply lay your tape in diagonal stripes, and then cut them apart and voila! you have perfectly straight strips on the bias, and you can keep the tape on until you are ready to use it, which has the added benefit of keeping the fabric from fraying! 
6. Label your pattern pieces: Is that the left sleeve or the right....? Question no more! I like to label those tricky pattern pieces that are hard to tell apart after cutting them out. A great way to label without risking your magic marker disappearing, or your chalk smearing. 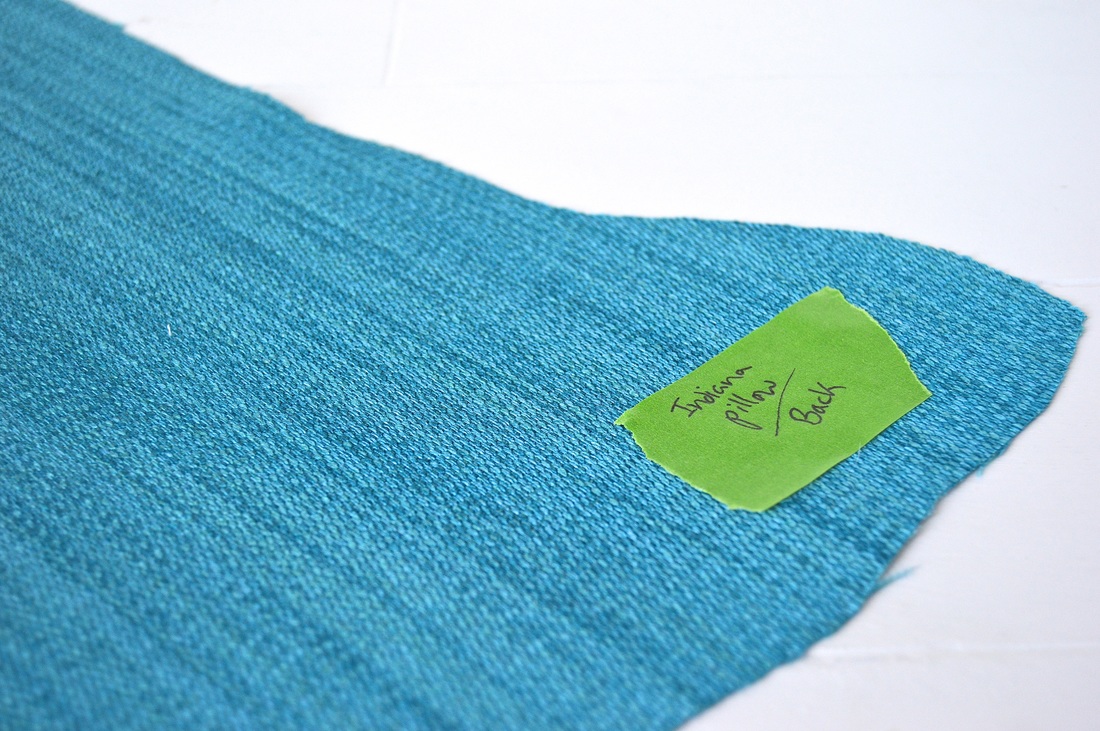 7. Mark your fabric: I like to have a variety of ways to creating the sewing pattern marks on my fabric. So along with disappearing ink, and tailors chalk, and thread basting, I also have tape in my arsenal. So if I need my markings to last a long time, or if the fabric doesn't respond well to chalk, I can use tape! 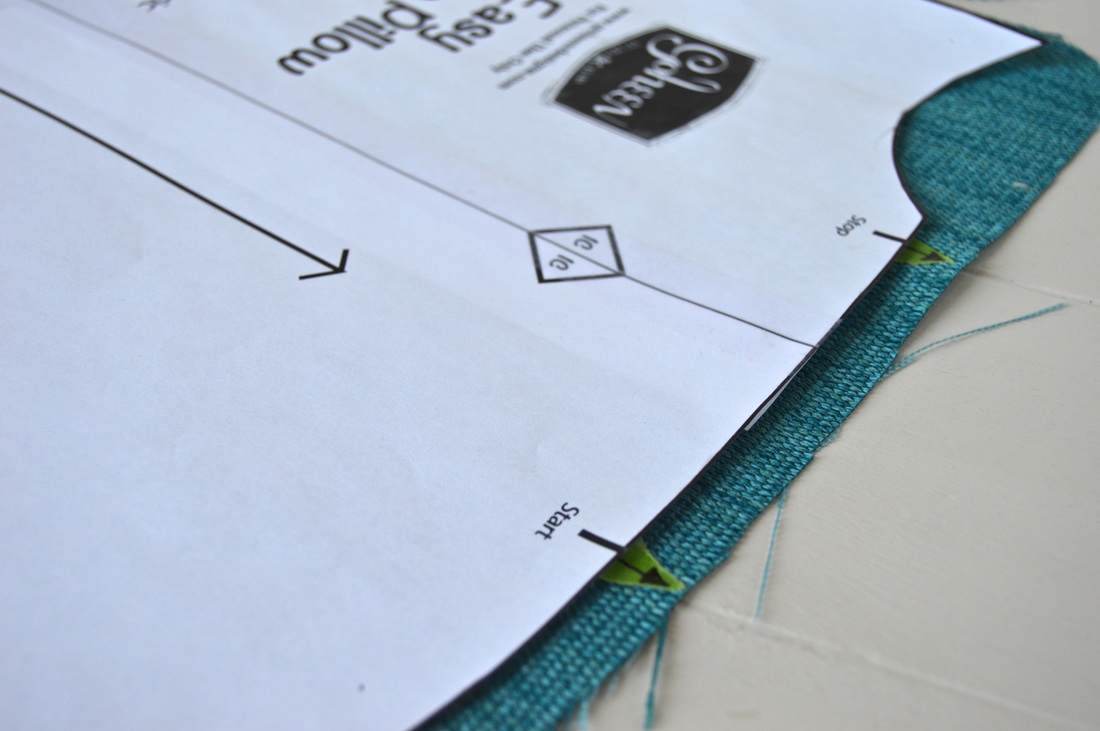 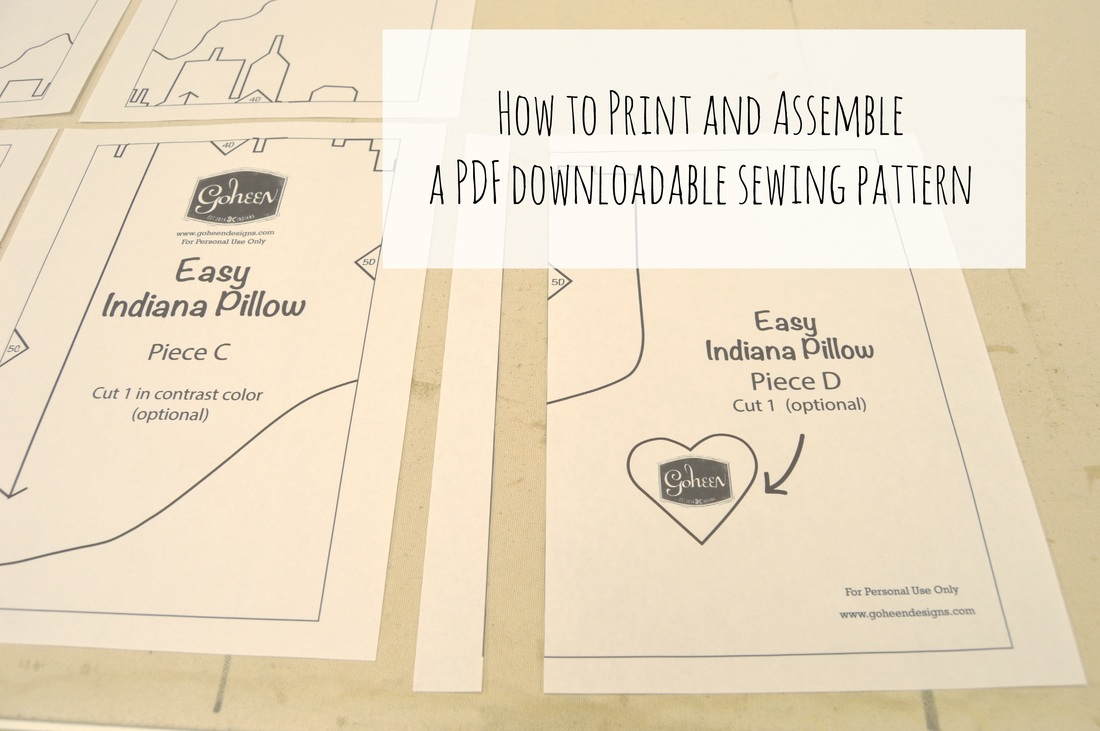 What is a PDF pattern? How do I use it? These are good questions! Downloadable PDF patterns can be intimidating to those of us who have never used them before. But once you know what to expect, they are a breeze! Nowadays, you don't have to go to the craft store and pick from a narrow selection of patterns to suit your needs. There is a wide world of patterns from indie pattern makers available online. They can be downloaded immediately, printed at home, and pieced together by you! PDF stands for Portable Document Format, and simply means that it should open on anyone's computer without changing format. When you buy a pattern (or use a free one) you will have to download the file to your computer, and open it in your PDF reader. Then you are ready to print. 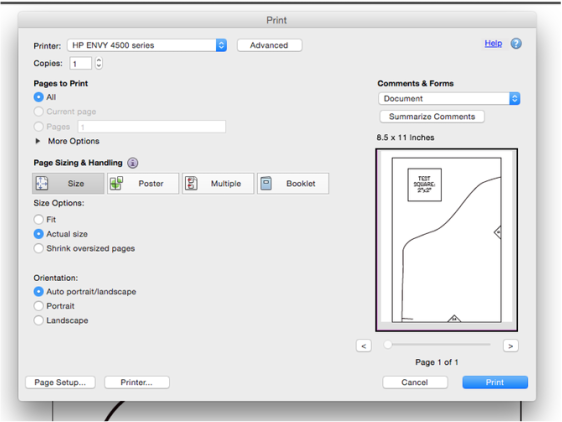 When you print your PDF pattern, make sure that you set your printer guidelines to “actual size” so that your computer doesn’t change the size of the image. Also, make sure that you are printing on the correct size of paper. Most patterns will be compatible with both US Letter and A4 but be sure to check.
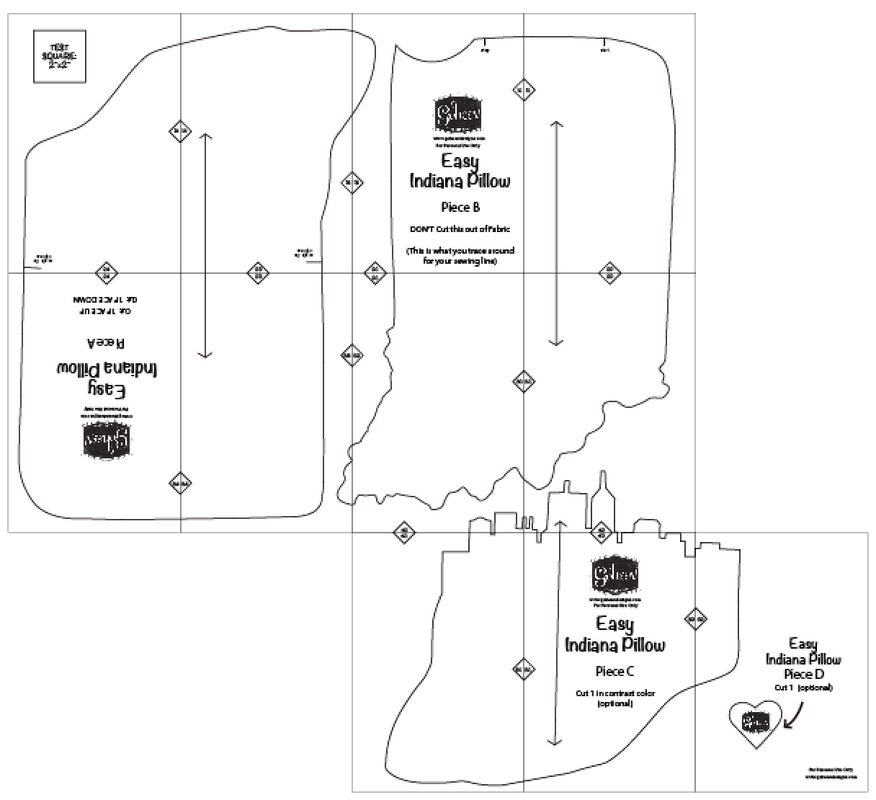 My patterns will include a picture like this in the instructions. It is an overview of where all the pages go. This is what we are aiming for when your pattern is all put together. Refer back to this picture if you aren’t sure you got it right. Use this picture and the numbered and lettered diamonds on the edges to make sure that your pages are laid out correctly. A1 will match with A1 and so on. 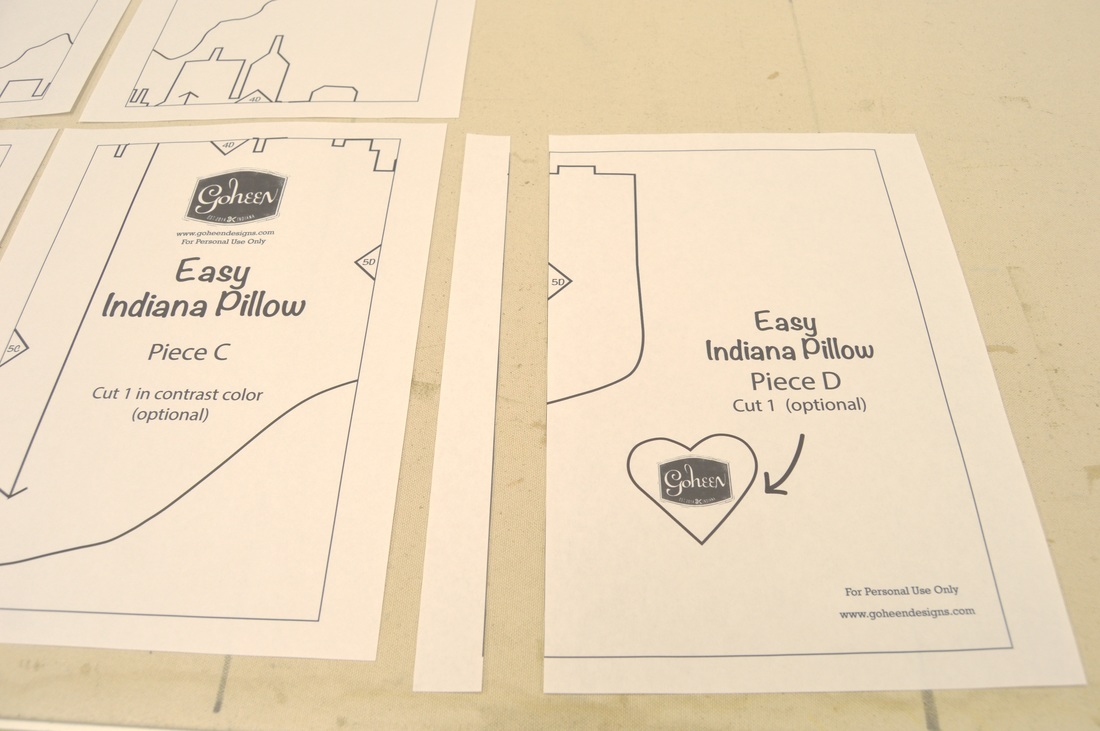 Now, we will start putting the pages together. Take both the pages with A1’s on them, cut the extra side of the first paper off, and then tape it on top of the second page so that the diamond, and all the pattern lines match. Now do the same for the rest of the pages! 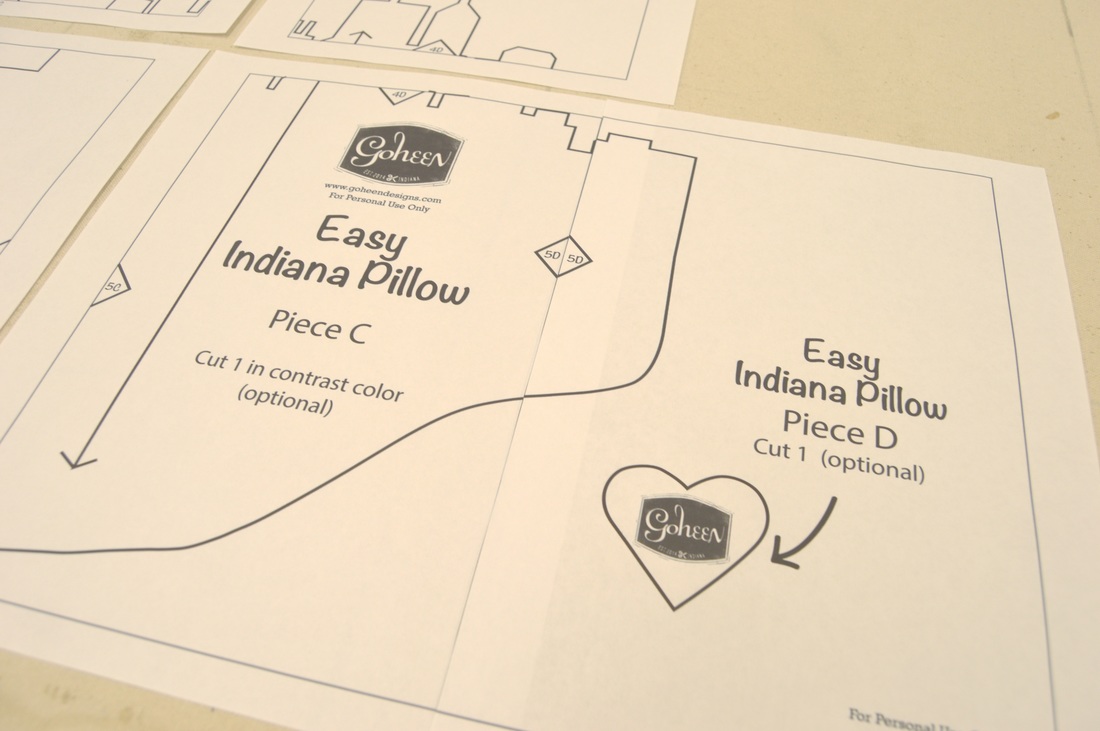 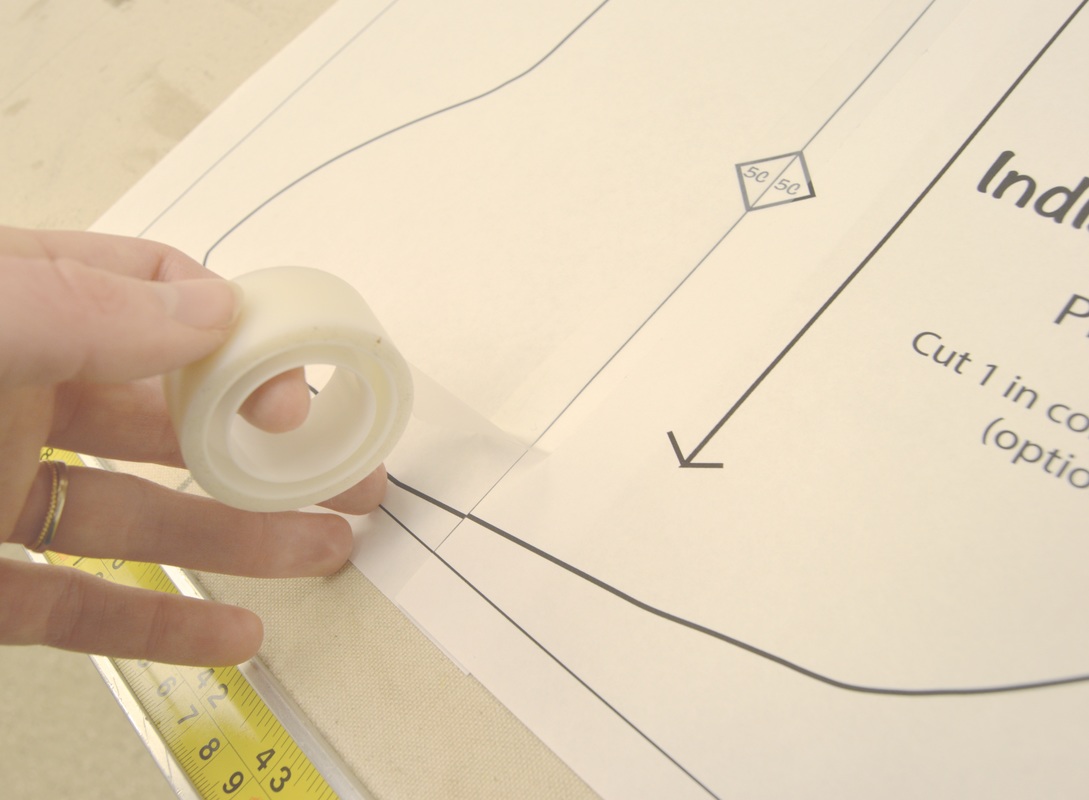 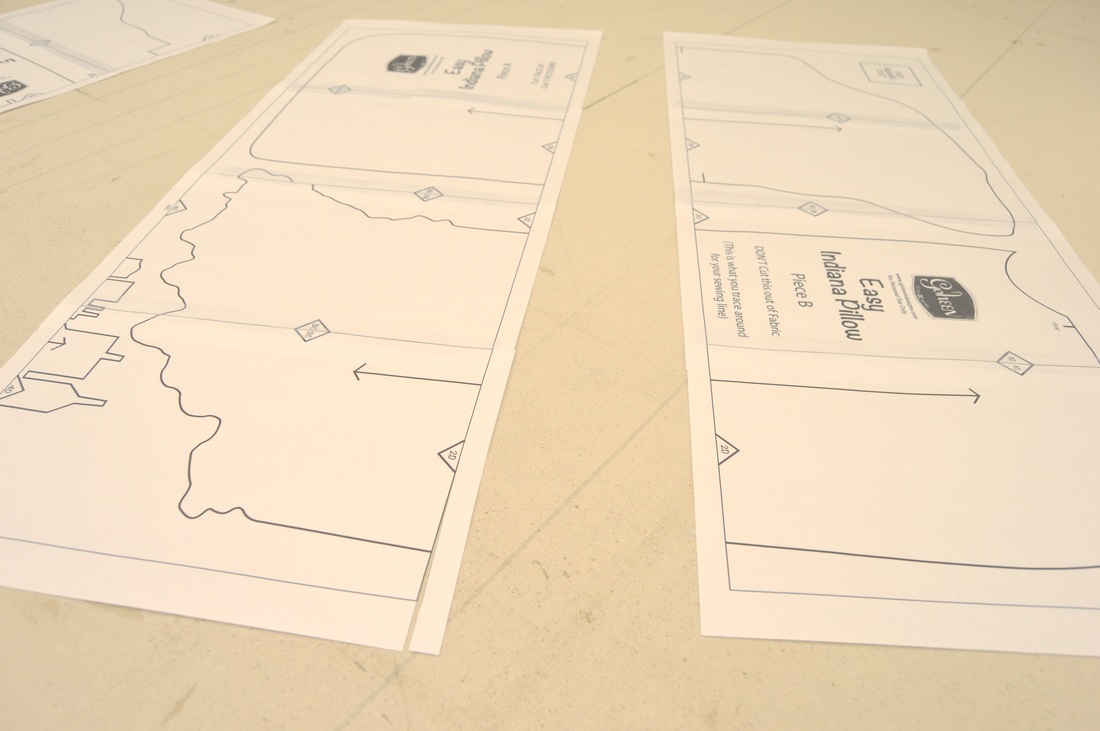 After you have everything taped together, you can cut out your individual pattern pieces. 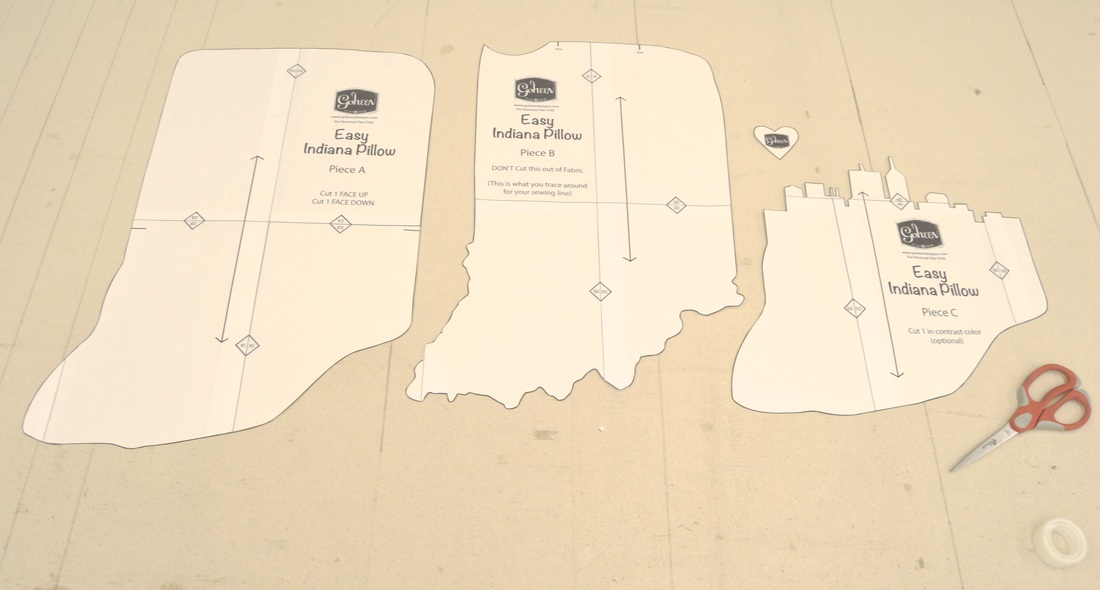 Happy Sewing!
|
madeline stage
creative business owner. designer. hoosier. crafter. runner. sewer. swing dancer. outdoor enthusiast. entrepreneur. wife. mom. material hoarder. Categories
All
Archives
June 2023
My Instagram Feed:
@GoheenDesigns |

 RSS Feed